Can You Use Black Screen For A Projector?
-
 Written by:
Kristy Roger
Written by:
Kristy Roger
- Last Updated:
Struggling to enjoy your projector’s image with too much ambient light washing out the details?
I’ve been there, squinting at a faded display until I discovered the game-changing potential of black screens.
In this article, I’ll share the insider scoop on how a black screen could be your home cinema’s unsung hero, even when daylight invades your space.
Join me as we explore this unconventional yet effective solution—your optimal viewing experience awaits!

I recommend using the Table of Contents to quickly access the information you need.
My article is designed to cater to home cinema users of all levels, from Beginners to Advanced enthusiasts.
Table of Contents
Can You Use a Black Screen For a Projector?
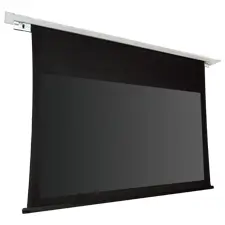
Yes, you can use a black screen for a projector, and doing so might bring some surprising benefits. Black projector screens, also known as ambient light rejecting (ALR) screens, are a bit of a niche product but they have specific use cases where they excel.
Here’s how a black screen can be advantageous and what to consider:
Improve Contrast in Bright Rooms
In environments where it’s difficult to control ambient light—think living rooms with lots of windows or spaces where you can’t achieve total darkness—a black screen can significantly improve contrast.
From personal experience, the difference is quite noticeable, the blacks are deeper and the colors stand out more vibrantly against the dark background.
Match Screen with High-Lumen Projector
It’s important to pair a black screen with an appropriate projector. Projectors with higher lumens (brightness) tend to work better with black screens.
From my experience, using a projector with at least 3,000 lumens ensures that the image remains bright and clear against the darker surface.
Consider Viewing Angles
One thing to note is that black screens often have a narrower optimal viewing angle. This means you’ll want to set up your seating directly in front of the screen.
In a home cinema setup where I installed a black screen, we had to carefully position the furniture to ensure everyone had a good view.
Optimize Room Colors
The effectiveness of a black screen is also influenced by the color of your walls and ceiling. Darker-colored surroundings help in enhancing the perceived quality of the image.
In one case, painting the walls a darker shade improved the overall viewing experience dramatically.
Choose the Right Screen Material
Black screens are typically made with special materials that enhance their reflective properties. This does not just mean that the screen is ‘black’—it’s about the material’s ability to reflect the projector’s light back to the audience effectively.
For instance, Screen Innovations’ Black Diamond screen is a great example, designed to reject ambient light from the sides and above.
Budget for Higher Costs
Be prepared for a potentially higher price tag. Black screens are often more expensive than traditional white screens, and the cost can be a deciding factor.
In my consulting work, I’ve had to balance budget constraints with performance benefits when recommending screen types to clients.
Invest in Professional Calibration
Finally, calibration is key. A black screen will likely require you to adjust your projector settings for optimal brightness and color balance.
Investing in a professional calibration can make all the difference—I’ve seen cases where calibration turned a mediocre setup into a stunning home cinema experience.
Disadvantages of Using a Black Projector Screen
Using a black projector screen can indeed offer several advantages in the right conditions, but it also comes with its own set of challenges and potential drawbacks.
Let’s discuss these disadvantages in detail:
Be Aware of Limited Viewing Zones
Black screens typically have a much narrower optimal viewing angle compared to white screens.
This can be a significant drawback in a home cinema setting where viewers are spread out, as those seated off to the sides may experience a less vibrant picture.
Prepare for Higher Expenses
Generally, ALR black screens are more expensive than their white counterparts. This higher cost can make them less accessible for those on a tighter budget.
Check Projector Compatibility
Not all projectors are suitable for use with black screens. Compatibility with the projector’s brightness, throw distance, and throw ratio is essential.
If a projector isn’t compatible with an ALR screen, the image can suffer, negating the benefits the screen might provide.
Precision Required in Screen Setup
The angle and distance of the projector in relation to the screen need to be more precise with black screens.
Incorrect installation can lead to a suboptimal viewing experience, requiring a more meticulous setup.
Stay On Top of Maintenance
Depending on the material of the black screen, they may attract more visible dust and may be more delicate to clean, necessitating careful maintenance.
Understand Reflectivity Drawbacks
If a black screen is not of high quality, it can suffer from hot spotting, where certain areas of the screen look brighter due to the angle of reflected light. This can be particularly distracting during viewing.
Recognize Ambient Light Challenges
While black screens are designed to reject ambient light, they are not perfect. They can still suffer from glare and reflections if light is coming from a direction that the screen does not reject.
Alternatives to Black Projector Screen
When considering alternatives to black projector screens, which are tailored for environments with ambient light, there are several options you might explore depending on your setup and preferences:
Gray Screens
Gray screens are a middle ground between white and black screens. They are better at maintaining contrast in low ambient light conditions compared to white screens but do not require as bright a projector as black screens.
They can improve black levels in your image without as severe a restriction on viewing angles or brightness.
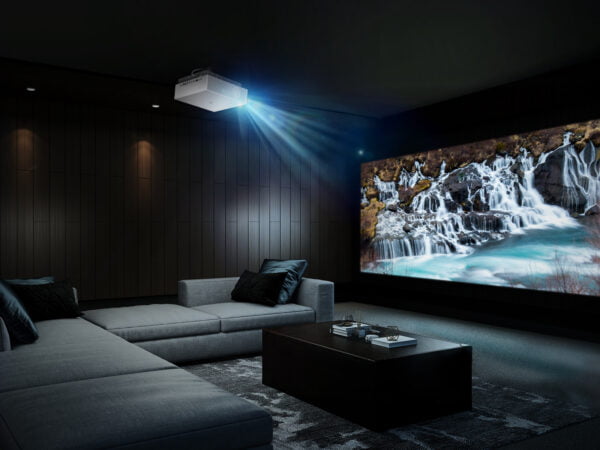
Ultra Short Throw (UST) Projector with ALR Screen
Combining an ultra-short throw projector with an ALR UST screen can be a great alternative. UST projectors can be placed very close to the screen, reducing the impact of ambient light significantly, and the ALR screen designed for UST projection will enhance the contrast further.
Painted Wall
Some home cinema enthusiasts opt to paint a wall with special projection screen paint. This can be an economical alternative, and there are various types of screen paints available that cater to different levels of ambient light and projector brightness.
High-Gain White Screens
A white screen with a higher gain can reflect more light directly back to the audience, improving brightness and contrast in environments with some ambient light.
However, be aware that higher gain can also narrow the viewing angle and may introduce hotspots where the center of the image appears much brighter than the edges.
How To Make Black Projector Screen?
Making a black projector screen at home can significantly enhance your home cinema experience. Here’s a step-by-step guide with specific details:
Materials you’ll need
- Wooden Frame: Get four pieces of wood (such as 1×3 inch boards) cut to your desired screen size.
- Blackout Cloth: Purchase a piece of blackout cloth that matches the dimensions of your frame. You can find this at fabric stores or online.
- Staple Gun and Staples: Ensure you have a staple gun with enough staples for the project.
- Spray Adhesive: This will help to secure the cloth to the frame.
- Heavy-duty Velcro Strips: These will be used to hang the screen on your wall.
Steps:
Step 1: Prepare the Frame
Assemble the wooden frame by attaching the four pieces together using wood screws or nails. Make sure it’s sturdy and square.
Sand the edges to smooth out any rough spots.
Step 2: Attach the Blackout Cloth
Lay the blackout cloth flat on a clean surface. Place the frame on top.
Starting at one edge, use the staple gun to attach the cloth to the back of the frame. Begin in the middle and work your way out towards the corners.
Pull the cloth taut as you staple, ensuring there are no wrinkles or sagging.
Step 3: Trim Excess Cloth
Once the cloth is secured, use a sharp utility knife to trim away any excess material, leaving a clean edge.
Step 4: Secure Corners
Pay special attention to the corners. Fold the cloth neatly and staple it down to ensure it’s secure and doesn’t bunch up.
Step 5: Apply Spray Adhesive
Flip the frame over so that the front (blackout cloth side) is facing up.
Apply a thin, even layer of spray adhesive to the cloth.
This will help to ensure the surface is smooth and free of imperfections.
Step 6: Hang the Screen
Attach heavy-duty Velcro strips to the back of the frame.
Place corresponding strips on your wall where you want to mount the screen. This allows for easy removal and adjustment.
Step 7: Calibrate Your Projector
Once the screen is mounted, it’s important to calibrate your projector settings (brightness, contrast, etc.) to get the best image quality on the new screen.
This DIY black projector screen can provide a fantastic viewing experience, and with care, it can rival commercial screens.
FAQs (Frequently Asked Questions)
Do Projectors Work On Black Screens?
Yes, projectors can work on black screens. A black screen enhances contrast and can improve image quality by minimizing reflections and ambient light interference.
Is a Black Background Better for a Projector?
Yes, a black background is generally better for a projector. It improves contrast and color accuracy, providing a more vibrant and immersive viewing experience.
What is the Best Screen Material for Back Projectors?
The best screen material for rear projectors is a specialized rear projection screen fabric.
This material is designed to allow the projector’s light to pass through from behind, providing optimal brightness and clarity for rear projection setups.
What is the Best Paint for Black Projector Screens?
The best paint for black projector screens is a high-quality acrylic paint specifically designed for projection surfaces.
Look for a paint labeled as “projection screen paint” or “high-gain screen paint” for the best results. Brands like Behr, Sherwin-Williams, and Screen Goo offer suitable options.
Final Thoughts
In conclusion, while a black projector screen may seem unorthodox, it’s a formidable ally against ambient light, promising to elevate your viewing experience with richer contrasts and deeper blacks.
However, it’s not a one-size-fits-all solution and should be weighed against factors like projector brightness, room conditions, and budget. As you journey towards cinematic excellence, consider all angles to find the perfect match for your home theater dreams.
Author of this Post:

Kristy Roger
Home Cinema Consultant & Tech Enthusiast
Holding a background in Industrial and Electrical Technology from the University of Alberta, Kristy has spent 5+ years consulting on home theater products at a top electronics firm. As a certified Technical Professional with Lean Six Sigma credentials, Kristy expertise ranges from projector nuances to hands-on experience with leading models. Kristy have been sharing her knowledge online for two years, blending professional insights with personal experiences from her own home cinema setup. Off the screen, She is a dedicated mom to Jerry, Ryan, and our two pups, Cuddle and Paw.