How To Connect Projector With Gaming Consoles [Step-by-Step Guide]
-
 Written by:
Kristy Roger
- Last Updated:
Are you curious about connecting your gaming console to a projector?
If you’re like me, you’ve wondered how to make your gaming nights more epic. You’re in the right place to learn how!
Why is this important? A projector can turn your gaming into a big-screen adventure. Plus, it’s perfect for sharing the fun when friends come over.
But let’s be honest, the setup can be confusing. You might not know which cables to use or how to make sure everything’s compatible.
So, stay with me as we go through the steps to hook up your console and projector. Trust me, your gaming world is about to get a whole lot more exciting!
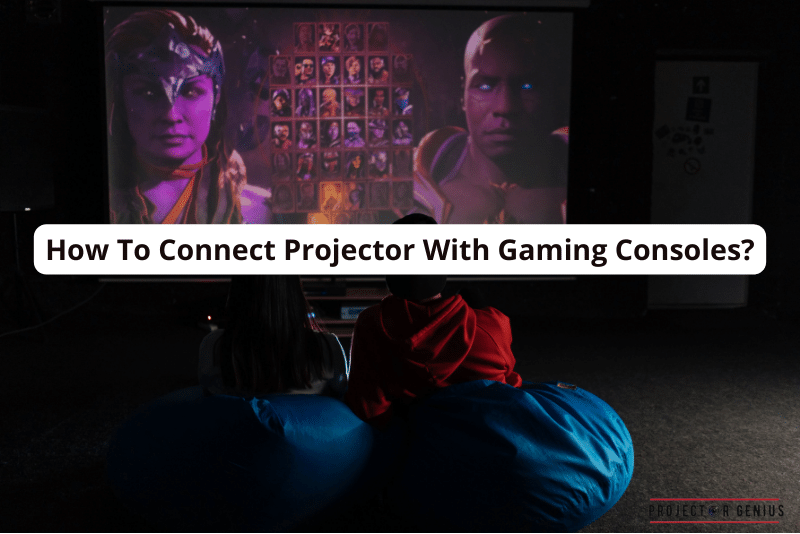
I recommend using the Table of Contents to quickly access the information you need.
My article is designed to cater to home cinema users of all levels, from Beginners to Advanced enthusiasts.
Table of Contents
How to Connect Gaming PC with Projector
Step 1: Gather the Necessary Equipment
To begin, make sure you have all the required items on hand. You’ll need an HDMI cable for this setup.
Step 2: Locate the HDMI Ports
Find the HDMI port on your gaming PC. It looks like a small trapezoid with metal pins inside. This is where you’ll be connecting the cable.
Step 3: Connect the HDMI Cable
Take one end of the HDMI cable and insert it firmly into the HDMI port on your gaming PC.
Step 4: Locate the Projector’s HDMI Port
Next, find the HDMI port on your projector. It’s usually located at the back or on the side. This is where you’ll connect the other end of the HDMI cable.
Step 5: Plug in the HDMI Cable to the Projector
Carefully insert the other end of the HDMI cable into the HDMI port on your projector. Make sure it’s snug and secure.
Step 6: Power On the Devices
Turn on your gaming PC and the projector. Wait for a moment to allow both devices to boot up.
Step 7: Adjust Projector Settings
On your gaming PC, right-click on the desktop and select “Display Settings”. This will open a window where you can configure the display properties.
Step 8: Extend Displays
In the Display Settings window, you’ll see two screens labeled “1” and “2”. Click on screen “2” and check the box that says “Extend these displays”. This will allow you to use both your PC monitor and the projector simultaneously.
Step 9: Set Main Display (Optional)
If you prefer one display over the other, click on that screen and check the box that says “Make this my main display”. This will be your primary screen.
Step 10: Apply Changes
Click “Apply” and then “Keep Changes” to confirm the settings.
Your gaming PC is now connected to the projector! You should see your desktop extended onto the projector screen. If you want to play games, launch them and enjoy the big-screen experience. Remember, when you’re done, you can simply unplug the HDMI cable to disconnect the projector.
How to Connect Gaming Console with Projector
Step 1: Gather the Necessary Equipment
Before we start, ensure you have all the required items. You’ll need an HDMI cable for this setup.
Step 2: Locate the Console’s HDMI Port
First, find the HDMI port on your gaming console. It’s a small, trapezoid-shaped slot with metal pins inside. This is where the cable will connect.
Step 3: Connect the HDMI Cable
Take one end of the HDMI cable and firmly insert it into the HDMI port on your gaming console.
Step 4: Find the Projector’s HDMI Port
Next, locate the HDMI port on your projector. It’s usually at the back or on the side. This is where you’ll connect the other end of the HDMI cable.
Step 5: Plug in the HDMI Cable to the Projector
Carefully insert the other end of the HDMI cable into the HDMI port on your projector. Make sure it fits snugly.
Step 6: Power On the Devices
Turn on both your gaming console and the projector. Wait for a moment to allow both devices to boot up.
Step 7: Select the Correct Input Source
On your projector, find the button labeled “Input” or “Source” on the remote control. Press it until you reach the HDMI input corresponding to the port you connected to.
Step 8: Check the Display
You should now see your gaming console’s screen on the projector. If not, double-check the connections and ensure both devices are powered on.
Step 9: Adjust the Projector Settings
If needed, adjust the focus and zoom on the projector to ensure a clear image. You may also need to tweak the display settings on your console to fit the projector’s screen size.
Step 10: Start Gaming
With everything set up, grab your controller and start gaming on the big screen! When you’re finished, power off the console and projector.
Step 11: Disconnect the Devices
To disconnect, remove the HDMI cable from both the console and projector. Store the cable and power off both devices. You’re now all set to enjoy gaming on the projector anytime.
How to Connect Gaming Handheld with Projector
Connecting a handheld gaming console to a projector is a bit different, but it’s totally doable.
Step 1: Prepare the Necessary Equipment
Before we start, make sure you have all the required items ready. You’ll need an HDMI cable and a special adapter for this setup.
Step 2: Locate the Handheld Console’s Port
Begin by finding the port on your handheld gaming console. It’s a small slot, usually on the bottom or side, where you plug in your charger. This is where the adapter will connect.
Step 3: Connect the Adapter
Attach the special adapter to your handheld console, ensuring it fits securely into the port.
Step 4: Plug in the HDMI Cable
Take one end of the HDMI cable and insert it into the HDMI port on the adapter.
Step 5: Locate the Projector’s HDMI Port
Next, find the HDMI port on your projector. It’s typically located at the back or on the side. This is where you’ll connect the other end of the HDMI cable.
Step 6: Plug in the HDMI Cable to the Projector
Carefully insert the other end of the HDMI cable into the HDMI port on your projector. Ensure it’s snug and secure.
Step 7: Power On the Devices
Turn on your handheld gaming console and the projector. Allow a moment for both devices to power up.
Step 8: Select the Correct Input Source
Using the projector’s remote control, find and press the “Input” or “Source” button until you reach the HDMI input corresponding to the port you connected to.
Step 9: Verify the Display
You should now see your handheld console’s screen on the projector. If not, recheck the connections and make sure both devices are powered on.
Step 10: Adjust Projector Settings (if necessary)
Fine-tune the focus and zoom on the projector for a clear image. You might also need to adjust the display settings on your handheld console to match the projector’s screen size.
Step 11: Start Playing
With everything set up, grab your handheld console and start gaming on the big screen! When you’re finished, power off the console and projector.
Step 12: Disconnect the Devices
To disconnect, remove the HDMI cable from both the console and projector, and unplug the adapter. That’s it! Now you can enjoy gaming on your handheld console through the projector whenever you like.
How to Connect Multi-Player System with Projector
Connecting a multi-player gaming system to a projector for a big-screen experience is a fun idea. Here’s how you can do it:
Step 1: Get Everything Ready
Before we begin, ensure you have all the necessary items at hand. You’ll need an HDMI cable and potentially an adapter, depending on your gaming system.
Step 2: Locate the Console’s HDMI Port
Find the HDMI port on your multi-player gaming system. It’s typically a small, trapezoid-shaped slot with metal pins inside.
Step 3: Connect the HDMI Cable
Insert one end of the HDMI cable firmly into the HDMI port on your gaming system.
Step 4: Use an Adapter (if needed)
If your gaming system requires an adapter, connect it to the console. Make sure it fits snugly. Then, plug the HDMI cable into the adapter.
Step 5: Find the Projector’s HDMI Port
Locate the HDMI port on your projector. It will look similar to the one on your adapter or cable. This is where you’ll connect the other end of the HDMI cable.
Step 6: Plug in the HDMI Cable to the Projector
Gently insert the other end of the HDMI cable into the HDMI port on your projector. Ensure it’s securely connected.
Step 7: Power Up the Devices
Switch on your multi-player gaming system and the projector. Allow a moment for them to power up.
Step 8: Choose the Right Input Source
Using the projector’s remote control, select the appropriate input source. This could be labeled as “HDMI” or “Input” on the projector.
Step 9: Check the Display
You should now see your gaming system’s screen on the projector. If not, recheck the connections and ensure both devices are powered on.
Step 10: Adjust Projector Settings (if necessary)
Fine-tune the focus and zoom on the projector for a clear image. You might also need to adjust the display settings on your gaming system to fit the projector’s screen size.
Step 11: Start Playing
With everything set up, grab your controllers and start gaming with your friends on the big screen! When you’re finished, power off the gaming system and projector.
Step 12: Disconnect the Devices
To disconnect, remove the HDMI cable from both the system and projector, and unplug any adapters if used. Now you’re all set to enjoy multi-player gaming on the projector anytime.
How to Connect Retro Gaming with Projector
Let’s dive into connecting retro gaming with a projector. Connecting a retro gaming console to a projector is a bit different, but it’s doable. Here’s how you do it:
Step 1: Get Everything Ready
Before we start, make sure you have all the necessary equipment nearby. You’ll need an RCA to HDMI converter and an HDMI cable for this setup.
Step 2: Locate the RCA Ports on the Retro Console
Find the yellow, white, and red ports on your retro gaming console. These are the RCA ports where you normally plug in your cables.
Step 3: Connect the RCA Cables
Plug the yellow cable into the yellow port, the white cable into the white port, and the red cable into the red port on your retro gaming console.
Step 4: Connect the RCA Cables to the Converter
Attach the other ends of the RCA cables to the corresponding ports on the RCA to HDMI converter. Make sure they fit securely.
Step 5: Plug in the HDMI Cable
Take one end of the HDMI cable and insert it into the HDMI port on the converter.
Step 6: Locate the Projector’s HDMI Port
Find the HDMI port on your projector. It’s usually at the back or on the side. This is where you’ll connect the other end of the HDMI cable.
Step 7: Insert the HDMI Cable into the Projector
Carefully insert the other end of the HDMI cable into the HDMI port on your projector. Make sure it’s snug and secure.
Step 8: Power Up the Devices
Turn on your retro gaming console and the projector. Allow a moment for both devices to power up.
Step 9: Choose the Correct Input Source
Using the projector’s remote control, select the right input source. This might be labeled as “HDMI” or “Input” on the projector.
Step 10: Check the Display
You should now see your retro gaming console’s screen on the projector. If not, double-check the connections and ensure both devices are powered on.
Step 11: Adjust Projector Settings (if necessary)
Fine-tune the focus and zoom on the projector for a clear image. You might also need to adjust the display settings on your retro gaming console to fit the projector’s screen size.
Step 12: Start Playing
With everything set up, grab your controllers and start enjoying those classic games on the big screen! When you’re done, power off the console and projector.
Step 13: Disconnect the Devices
To disconnect, remove the RCA cables and HDMI cable from both the console and projector, and unplug the converter. That’s it! Now you can relive the retro gaming experience on the projector anytime.
Author of this Post:
Kristy Roger
Home Cinema Consultant & Tech Enthusiast
Holding a background in Industrial and Electrical Technology from the University of Alberta, Kristy has spent 5+ years consulting on home theater products at a top electronics firm. As a certified Technical Professional with Lean Six Sigma credentials, Kristy expertise ranges from projector nuances to hands-on experience with leading models. Kristy have been sharing her knowledge online for two years, blending professional insights with personal experiences from her own home cinema setup. Off the screen, She is a dedicated mom to Jerry, Ryan, and our two pups, Cuddle and Paw.

