
9 Steps to Make Slideshow Of Pictures On Projector With Music?
-
 Written by:
Kristy Roger
Written by:
Kristy Roger
- Last Updated:
Setting up a slideshow with music on a projector might seem like a daunting task, but trust me, it’s easier than you think!
I’ve done this many times, and each time, the joy of sharing memories on a big screen with a heartwarming tune in the background is simply unmatched.
Let me guide you to make slideshow of pictures on projector with music in simple steps, so you too can enjoy this wonderful experience without any hiccups.
Ready? Let’s dive in!

I recommend using the Table of Contents to quickly access the information you need.
My article is designed to cater to home cinema users of all levels, from Beginners to Advanced enthusiasts.
Table of Contents
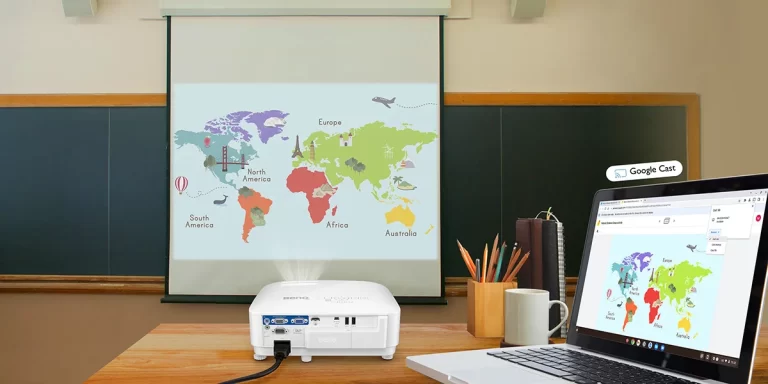
How to Make Slideshow of Pictures on Projector With Music?
Creating a slideshow for projection brings back memories. I recall a consultation I had with a client who wanted to showcase a slideshow during their 50th wedding anniversary. They wanted it to be seamless, and the stakes were high.

Here’s a step-by-step guide based on that experience, along with some tips I’ve picked up from various projector setups:
Step 1. Choose Your Software
Windows: Microsoft PowerPoint is a classic choice. It allows for easy integration of music.
Mac: Apple’s Keynote is seamless and offers a great user experience.
Free Alternatives: Make a Slideshow for a Projector Free using Google Slides which is cloud-based and accessible, though adding music requires a workaround.
Step 2. Organize Your Photos and Music
Have all your photos in one folder and decide on the music track(s) you want to use. This preparation step saves a lot of time.
Step 3. Create a New Presentation
Open your software and start with a blank presentation.
Step 4. Import Your Photos
For PowerPoint: Go to Insert > Photo Album > New Photo Album.
For Keynote: Drag and drop photos onto the slide sorter.
For Google Slides: Click on Slide > New Slide > Image Slide.
Step 5. Add Transitions
Choose transitions that match the mood of your music. A gentle fade works well for calm tracks, while a quicker transition might suit upbeat music.
Step 6. Add Music
For PowerPoint:
Go to Insert > Audio > Audio on My PC, then select your music file.
Right-click the audio icon on the slide > Play Across Slides. This ensures the music plays throughout the entire slideshow.
For Keynote:
Drag and drop the audio file onto the navigator (slide sorter view).
In the Format panel on the right, under Audio, choose Play across slides.
For Google Slides:
Since Google Slides doesn’t natively support background music, a workaround is to insert a YouTube video with your desired track, set it to autoplay, and hide the video off-slide.
Step 7. Adjust Music Settings
Ensure the music starts automatically and plays across all slides. You can also adjust the volume, fade in/out, and trim the audio if needed.
Step 8. Test Your Slideshow
Always preview your slideshow with the music to ensure everything flows well. Remember the time I tested a slideshow, and the music was deafeningly loud? Always check the audio balance!
Step 9. Connect to the Projector and Play
Using an HDMI cable or the appropriate adapter, connect your device to the projector. Ensure the projector and your device’s resolution settings match. Play the slideshow and adjust the projector settings as needed.
Pro Tips
Duration Matching: Ensure your slideshow duration and music track length are compatible. You want the music to continue smoothly and continue playing long after the slideshow is over.
Backup: Always have a backup of your slideshow and music. Technical hiccups can happen!
Ambient Sound: If you’re in a noisy environment, consider using external speakers for better audio quality.
Creating a musical slideshow for projection can be a rewarding experience. It’s a blend of technical know-how and artistic expression. Every time I set one up, I’m reminded of the magic of sharing memories on a big screen. Enjoy your presentation!
How do you Present Video on a Projector?
Presenting a video on a projector is one of those tasks that sounds straightforward, but there are nuances to ensure a smooth playback experience.
I remember setting up a projector for a film screening event. The anticipation in the room was palpable, and ensuring the video played without a hitch was crucial.
Here’s a guide based on that experience, along with some tips from my various projector setups:
Step 1. Check Your Video Format
Ensure the video format is compatible with the device you’re using to play it. Common formats include MP4, AVI, MOV, and WMV. I once had a client who had a rare video format that wouldn’t play on their laptop. Always double-check!
Step 2. Organize Your Files
Place the video file in an easily accessible location on your device. If you’re using subtitles, keep the subtitle file in the same folder.
Step 3. Connect Your Device to the Projector
- Use an HDMI cable for the best quality. Most modern laptops and projectors support HDMI.
- If your device lacks an HDMI port, consider using a VGA cable or an adapter suitable for your device.
- Turn on the projector and select the correct input source (usually labelled as HDMI, VGA, etc).
Step 4. Adjust the Projector Settings
- Focus the lens for a sharp image.
- Adjust the keystone correction if the image appears distorted.
- Ensure the aspect ratio matches the video (common ones are 16:9 and 4:3).
Step 5. Play the Video
- Open the video using a media player on your device. VLC Media Player, Windows Media Player, and QuickTime are popular choices.
- Set the player to fullscreen mode for an immersive experience.
- Ensure the audio is playing. If the projector has built-in speakers, adjust the volume accordingly. For better sound quality, consider connecting external speakers.
Step 6. Adjust Audio Settings (if necessary)
If the audio is too low or there’s a delay, adjust the settings in your media player. External speakers can also provide better sound clarity and volume.
Pro Tips
- Test Before the Main Event: Always play a few minutes of the video beforehand to ensure everything works seamlessly.
- Backup Plan: Have a backup device and copy of the video. I’ve seen situations where a device suddenly refused to cooperate, and having a backup was a lifesaver.
- Ambient Light: Darken the room as much as possible. Even the most powerful projectors can struggle with video quality in a brightly lit room.
- Wi-Fi Streaming: If you’re streaming the video online, ensure you have a stable internet connection. Buffering during a crucial scene can be a mood killer!
Presenting a video on a projector can be a delightful experience when done right. It’s like bringing the magic of the cinema to your own space. Enjoy your screening!
How to Project a Slideshow From a Laptop?
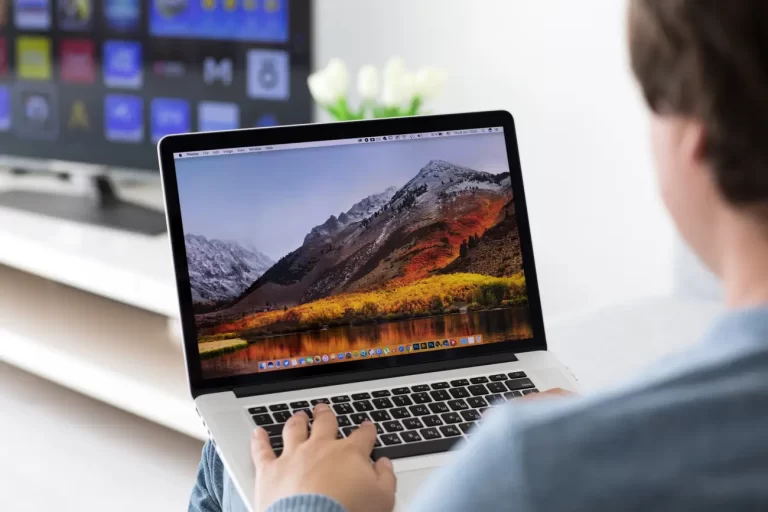
Projecting a slideshow from a laptop! I’ve done this countless times, from business presentations to intimate gatherings showcasing travel photos.
I remember a particular setup where the client was a photographer, and the vibrancy and detail of each slide were paramount. Based on that and other experiences, here’s a step-by-step guide to help you project a slideshow from your laptop:
Step 1. Prepare Your Slideshow
Before anything else, ensure your slideshow is ready. Whether you’re using Microsoft PowerPoint, Apple’s Keynote, Google Slides, or another program, have the file saved and easily accessible on your laptop.
Step 2. Check Your Laptop’s Ports
Identify which output ports your laptop has. The most common ones are HDMI, USB-C, Mini DisplayPort, and VGA. This will determine the type of cable or adapter you’ll need.
Step 3. Connect Your Laptop to the Projector
- Use an HDMI cable if both your laptop and projector have HDMI ports. It provides both video and audio transmission.
- If your laptop doesn’t have an HDMI port but the projector does, you might need an adapter (e.g., USB-C to HDMI or Mini DisplayPort to HDMI).
- Older projectors might only have a VGA port. If so, use a VGA cable and ensure you have a separate solution for audio if needed.
Step 4. Turn on the Projector
Power up the projector and select the correct input source (e.g., HDMI, VGA). You should see your laptop’s screen projected.
Step 5. Adjust Display Settings on Your Laptop
- Windows: Right-click on the desktop > Display settings. Under the “Multiple displays” dropdown, select “Duplicate” to show the same screen on both your laptop and the projector.
- Mac: Go to System Preferences > Displays > Arrangement tab. Drag the display icons to match the setup. Usually, you’ll want to mirror the displays.
Step 6. Play the Slideshow
Open your slideshow software and start the presentation mode:
For PowerPoint: Click on the “Slide Show” tab > “From Beginning”.
For Keynote: Click on the “Play” button.
For Google Slides: Click on the “Present” button.
Step 7. Adjust the Projector Settings
Focus the lens for a clear image.
Adjust the keystone if the image appears tilted or distorted.
Set the correct aspect ratio (usually 16:9 or 4:3).
Step 8. Control the Slideshow
Use your laptop or a remote clicker to navigate through the slides. Most slideshow software also supports keyboard shortcuts.
Pro Tips
- Practice: Familiarize yourself with the slideshow’s content and flow. It makes for a smoother presentation.
- Backup: Always have a backup of your slideshow on a USB drive or cloud storage. You never know when tech might act up!
- Darken the Room: For the best visual experience, reduce ambient light. The slides will appear clearer and more vibrant.
Projecting a slideshow from a laptop might seem daunting at first, but with a little preparation, it becomes second nature. And there’s something truly special about sharing visuals on a big screen, whether it’s a professional presentation or personal memories. Enjoy your projection!
How to Show a Slideshow Without a Projector?
There are times when a projector isn’t available or practical, but you still want to share a slideshow. Drawing from my experiences, here are some alternative ways to show a slideshow without a projector:
Method 1. TV Screen
Modern TVs, especially smart TVs, offer various connectivity options. Here’s how you can utilize them:
- HDMI Connection: Connect your laptop or device directly to the TV using an HDMI cable.
- Wireless Casting: Devices like Google Chromecast, Apple TV, or built-in casting features in smart TVs allow you to cast or mirror your screen wirelessly.
- USB Drive: Some TVs allow you to play slideshows directly from a USB drive. Export your slideshow as images or a video and plug the drive into the TV.
Method 2. Computer or Laptop Screen
If you’re presenting to a small group, simply using your computer or laptop screen might suffice. Gather around the screen and play the slideshow.
Method 3. Digital Picture Frames
These are frames designed to display digital photos. Many allow you to load photos and play them as a slideshow. They’re great for continuous display at events or in homes.
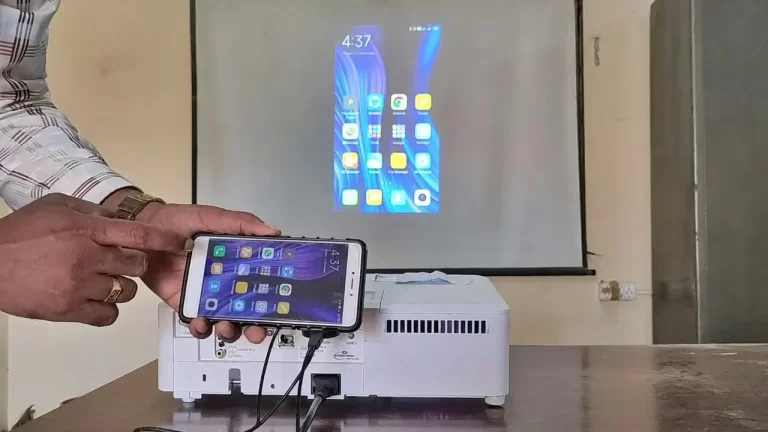
Method 4. Tablets and Smartphones
For more intimate settings or on-the-go presentations, tablets and smartphones can be quite effective:
- Use apps like PowerPoint, Keynote, or Google Slides.
- Hold the device or use a stand to prop it up.
Method 5. Online Platforms
Share your slideshow online using platforms like:
Google Slides: Share the link, and viewers can watch in real-time.
Zoom or Skype: Share your screen during a video call.
YouTube: Convert your slideshow into a video and upload it. Share the link with your audience.
Method 6. Interactive Whiteboards
Used often in educational settings, interactive whiteboards like SMART Boards can display and interact with computer screens.
Method 7. Large Monitors or Display Screens
In places like offices or event venues, large display screens can be used in lieu of projectors. Connect your device using appropriate cables or wirelessly.
Pro Tips
- Optimize for Screen Size: Ensure your slideshow’s visuals and text are clear and legible for the screen size you’re using.
- Interactive Elements: If using tablets or interactive whiteboards, consider adding touch-based interactive elements to your slideshow.
- Sound: If your slideshow has audio, ensure the device you’re using has adequate sound output or connect it to external speakers.
In one memorable consultation, a client wanted to showcase their travel photos during a family dinner. We ended up using their large smart TV, casting the slideshow from their phone. The family loved the experience, and it became a highlight of the evening.
Remember, the medium isn’t always the message; it’s about sharing moments and stories. Choose the method that best fits your setting and audience!
How do you Connect Presentation to a Projector?

Connecting a presentation to a projector is a task I’ve undertaken numerous times. Whether it was for a business seminar or a friend’s wedding slideshow, the process, while straightforward, requires attention to detail. Based on my hands-on experiences, here’s a step-by-step guide:
Step 1. Prepare Your Presentation
Ensure your presentation is ready on your laptop or device. Whether you’re using Microsoft PowerPoint, Apple’s Keynote, Google Slides, or another software, have the file saved and easily accessible.
Step 2. Check Your Device’s Ports
Identify which output ports your device has. Common ones include HDMI, USB-C, Mini DisplayPort, and VGA. This will determine the type of cable or adapter you’ll need.
Step 3. Connect Your Device to the Projector
- HDMI: This is the most common and provides both video and audio transmission. If both your device and projector have HDMI ports, use an HDMI cable.
- VGA: Older projectors might use VGA. Connect using a VGA cable. Remember, VGA only transmits video, so you might need a separate audio solution.
- Adapters: If your device doesn’t have the same port as the projector, you’ll need an adapter (e.g., USB-C to HDMI or Mini DisplayPort to HDMI).
Step 4. Power Up
Turn on the projector first, then your device. This sequence often helps the projector recognize the device more easily.
Step 5. Select the Correct Input Source on the Projector
Using the projector’s remote or buttons, select the input source corresponding to your connection (e.g., HDMI, VGA). You should see your device’s screen projected.
Step 6. Adjust Display Settings on Your Device
Windows: Right-click on the desktop > Display settings. Under the “Multiple displays” dropdown, select “Duplicate” to show the same screen on both your device and the projector.
Mac: Go to System Preferences > Displays > Arrangement tab. Check the “Mirror Displays” box.
Step 7. Play the Presentation
Open your presentation software and start the presentation mode:
For PowerPoint: Click on the “Slide Show” tab > “From Beginning”.
For Keynote: Click on the “Play” button.
For Google Slides: Click on the “Present” button.
Step 8. Adjust the Projector Settings
Focus: Ensure the image is sharp.
Keystone: Adjust if the image appears tilted or distorted.
Aspect Ratio: Set it to match your presentation, usually 16:9 or 4:3.
Pro Tips
- Test Beforehand: If possible, do a test run before the actual presentation to iron out any technical glitches.
- Backup: Have a backup of your presentation on a USB drive or cloud storage.
- Cable Management: Use cable ties or clips to keep cables organized, especially if you’re moving around during the presentation.
- Remote Clicker: Consider using a remote clicker to navigate through slides. It allows for mobility and can make your presentation smoother.
One of my most memorable setups was for a start-up pitch. The stakes were high, and the presenter was understandably nervous. We did multiple test runs, ensuring the visuals and audio were perfect.
When the presentation went off without a hitch, the relief and gratitude from the presenter were palpable. Always remember, preparation is key! Enjoy your presentation!
How do I Mirror Presentation to a Projector?
Mirroring a presentation to a projector means displaying the exact same content on both your device’s screen and the projector. This is especially useful when you want to see the same slides or content you’re presenting to your audience.
Drawing from my experiences in setting up countless presentations, here’s how you can mirror your presentation to a projector:
Step 1. Connect Your Device to the Projector
Depending on your device and the projector, use the appropriate cable (HDMI, VGA, USB-C, etc.). If the ports don’t match, you might need an adapter.
Step 2. Turn on the Projector
Power up the projector and then your device. This sequence often helps the projector recognize the device more easily.
Step 3. Select the Correct Input Source on the Projector
Using the projector’s remote or buttons, select the input source corresponding to your connection (e.g., HDMI, VGA).
Step 4. Adjust Display Settings on Your Device
For Windows
- Right-click on the desktop and select Display settings.
- Scroll down to the “Multiple displays” section.
- From the dropdown menu, select “Duplicate these displays.”
- Click “Apply.”
For Mac
- Go to System Preferences > Displays.
- Click on the Arrangement tab.
- Check the “Mirror Displays” checkbox in the bottom-left corner.
For Chromebook
- Click on the status area at the bottom right, where your account picture appears.
- Click on the Settings gear icon.
- In the “Device” section, select Displays.
- Click the “Mirror Internal Display” option.
Step 5. Start Your Presentation
Open your presentation software (PowerPoint, Keynote, Google Slides, etc.) and start the presentation mode.
Step 6. Adjust the Projector Settings if Needed
Ensure the image is sharp by adjusting the focus, correct any distortion with the keystone setting, and set the appropriate aspect ratio.
Pro Tips
- Resolution Matching: For the best visual experience, ensure the resolution of your device matches the projector’s resolution. This can be adjusted in the display settings of your device.
- Audio: If your presentation has audio or you’re using videos, ensure the audio output is set to the projector or connected external speakers.
- Practice: Familiarize yourself with the mirroring process before the actual presentation. It helps in building confidence and ensures a smooth experience.
I recall a seminar where the presenter was using a new device and wasn’t familiar with the mirroring process. A quick tutorial, similar to the steps above, saved the day. Remember, a little preparation goes a long way. Good luck with your presentation!
Why is my PowerPoint not Showing on Projector?
Encountering issues with PowerPoint not displaying on a projector is something I’ve seen more times than I can count.
It’s a common hiccup that can happen for various reasons, and I understand it can be quite stressful, especially if you’re about to present. Here are some troubleshooting steps based on my experiences:
1. Check Physical Connections
- Cables: Ensure all cables are properly connected between your laptop and the projector. Sometimes, the issue is as simple as a loose cable. I’ve had instances where simply re-securing a wobbly HDMI connection solved the problem.
- Inputs: Make sure you’ve selected the correct input source on the projector. It should match the port where your laptop is connected (e.g., HDMI 1, VGA, etc.).
2. Duplicate or Extend Display
Sometimes, your laptop might be set to “extend” rather than “duplicate” or “mirror” its display. Here’s how to check:
- Windows: Right-click on the desktop > “Display settings” > Scroll down to “Multiple displays” > Select “Duplicate these displays” from the dropdown menu.
- Mac: Go to “System Preferences” > “Displays” > “Arrangement” tab > Check the “Mirror Displays” checkbox.
3. Restart PowerPoint
Close PowerPoint and reopen it. Sometimes, the program doesn’t recognize a second display if it was connected after the program was started.
4. Check Display Settings
Windows: Press “Windows + P” on your keyboard to open a quick display setting. Choose “Duplicate” to mirror your display.
Mac: Ensure your display settings are set to mirror, and check if the projector is recognized in the “Displays” menu in system preferences.
5. Try a Different Application
Open a different application or simply try to display your desktop or another document. If this works, the issue might be with PowerPoint itself.
6. Reboot Your Computer
Classic move, but often effective. Shut down your laptop, give it a moment, then turn it back on. This can help reset the drivers or systems that might not be functioning correctly.
7. Update Display Drivers
Outdated or corrupted drivers could be the culprit. Check for the latest video drivers from your laptop manufacturer’s website, download and install them.
8. Projector Settings
Some projectors have multiple modes or settings that might interfere with displaying your laptop’s content. Check the projector’s manual or settings menu to ensure it’s in the correct mode.
9. Try Another Laptop or Projector
If available, trying another laptop or projector can help determine if the issue is with the projector itself or the laptop.
Pro Tips
Preparation: Always try to test your setup before the actual presentation to address any technical issues that may arise.
One of my most nerve-wracking experiences was when a client was about to present to potential investors, and we faced this issue. After keeping calm and methodically going through these steps, we found that a driver update was needed. Crisis averted!
So, take a deep breath, and systematically go through these checks. More often than not, the issue is simpler than it seems. Good luck!
Final Thoughts
And there you have it! Making a slideshow with music for a projector really isn’t as tricky as it might seem.
I’ve walked this path many times, and the joy of seeing photos come to life with music is always worth the effort.
With a bit of patience and these easy steps, you’ll be all set to share special moments in a memorable way. Give it a try, and enjoy the magic it brings to any gathering!
Author of this Post:

Kristy Roger
Home Cinema Consultant & Tech Enthusiast
Holding a background in Industrial and Electrical Technology from the University of Alberta, Kristy has spent 5+ years consulting on home theater products at a top electronics firm. As a certified Technical Professional with Lean Six Sigma credentials, Kristy expertise ranges from projector nuances to hands-on experience with leading models. Kristy have been sharing her knowledge online for two years, blending professional insights with personal experiences from her own home cinema setup. Off the screen, She is a dedicated mom to Jerry, Ryan, and our two pups, Cuddle and Paw.


