
How To Rotate Projector Screen With Remote? [7 Quick Steps]
-
 Written by:
Kristy Roger
Written by:
Kristy Roger
- Last Updated:
Ever struggled with rotating your projector screen to display just the right way using your remote?
Found yourself flipping through the manual or pressing buttons at random, hoping to fix an upside-down or sideways image? You’re not alone!
I remember the first time I faced this issue. It was during a family reunion, and we wanted to watch old home movies.
But projector displayed our cherished memories sideways!
But don’t worry! In this guide, I’ll walk you through the simple steps to rotate projector screen with remote.
And there’s more! You’ll also learn some troubleshooting tips for common projector hiccups and how to save your customized settings for future viewing sessions.
Let’s dive in and rotate that screen!
I recommend using the Table of Contents to quickly access the information you need.
My article is designed to cater to home cinema users of all levels, from Beginners to Advanced enthusiasts.
Table of Contents
How to Rotate Projector Screen With Remote?
Step 1: Check Compatibility
Not all projectors or screens come with the capability to rotate the image via remote. First and foremost, ensure your projector model supports this feature. I’ve tested models from brands like Epson, BenQ, and Optoma, and some of their higher-end models do offer this.
Step 2: Open the Menu
On your projector’s remote, there’s typically a ‘Menu’ or ‘Settings’ button. Press it to access the on-screen menu.
Step 3: Navigate to the Display Settings
Within the menu, look for an option labelled ‘Display’, ‘Image’, or something similar. This is where most of the image adjustments are made.
Step 4: Find the Rotation Option
Under the display or image settings, there should be an option for ‘Rotation’ or ‘Orientation’. Some projectors I’ve worked with label it as ‘H/V Flip’ (Horizontal/Vertical Flip).
Step 5: Select the Desired Rotation
Depending on your projector, you might have options to rotate the image by 90°, 180°, or even 270°. Some projectors also allow you to mirror the image, which can be useful for rear projection setups.
Step 6: Adjust and Fine-Tune
Once you’ve rotated the image, you might need to adjust the focus or keystone to ensure the image is still sharp and rectangular. Remember, rotating the image can sometimes lead to slight distortions, especially if the projector isn’t centered with the screen.
Step 7: Save Your Settings
Before exiting the menu, ensure you save any changes you’ve made. Some projectors have a specific ‘Save’ option, while others might automatically save changes as you make them.
Pro Tip
If you frequently switch between different orientations, consider investing in a projector with lens memory. This feature allows you to save specific lens settings (like zoom, focus, and shift) for different screen positions. It’s a game-changer, especially in multi-purpose rooms.
How to Flip Projector Screen Without Remote?
The age-old challenge of adjusting a projector without the convenience of a remote. I’ve been there, trust me.
I remember a time when I was setting up a vintage projector for a friend’s retro-themed movie night.
The remote was nowhere to be found, and we had to get creative. Here’s how you can rotate the projector screen without a remote:
Step 1: Manual Buttons
Most projectors come with a set of manual control buttons on the unit itself. These are typically located on the top or rear of the projector. Look for buttons labeled ‘Menu’, ‘Enter’, and directional arrows.
Step 2: Look for Menu
Press the ‘Menu’ button on the projector to bring up the on-screen menu. Using the directional arrows, navigate through the menu options.
Step 3: Navigate to Display Settings
Just like with the remote, you’ll want to find the ‘Display’ or ‘Image’ settings. This is where you’ll find the rotation options.
Step 4: Select the Rotation Option
Once in the display settings, look for ‘Rotation’, ‘Orientation’, or ‘H/V Flip’. Use the ‘Enter’ or ‘Select’ button to make changes.
Step 5: Adjust the Rotation
Using the directional buttons, select the desired rotation angle or flip option. Confirm any changes you make.
Step 6: Exit the Menu
Once you’ve made the necessary adjustments, navigate to the ‘Exit’ option in the menu and confirm.
Pro Tip
If you find yourself without a remote often, consider labelling the manual buttons with small stickers or markers. It can make the process quicker and less confusing, especially if you’re not familiar with the projector’s layout.
How do I Adjust the Screen Position on my Projector?
Adjusting the screen position on a projector is one of the most common tasks I’ve had to tackle in my home cinema setup journey.
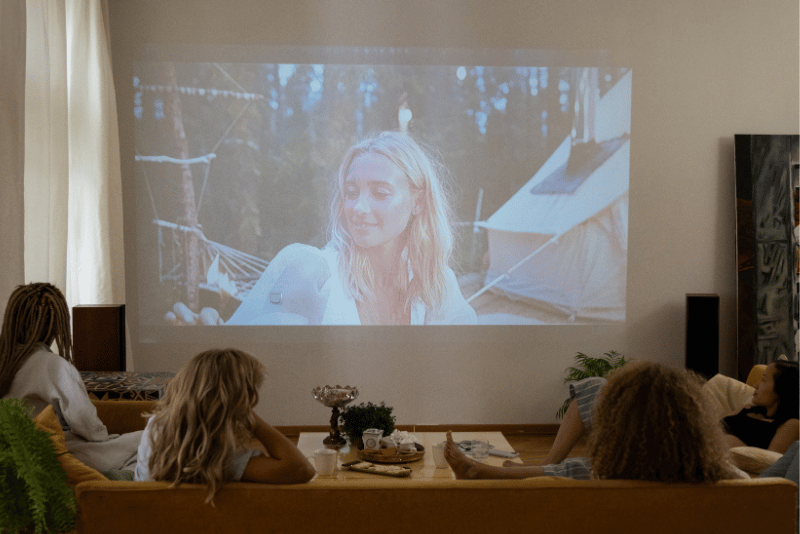
Whether it’s for a cozy movie night with friends or a presentation in a makeshift conference room, getting the screen position just right is crucial. Let me walk you through the process based on my hands-on experiences:
Step 1: Physical Placement
Before diving into settings, ensure your projector is placed on a stable surface and is roughly centered on the screen. The height of the projector can also affect the screen position. Sometimes, a simple physical adjustment can save you a lot of time in the settings menu.
Step 2: Access the Menu
Whether you’re using a remote or the manual buttons on the projector, press the ‘Menu’ or ‘Settings’ button to access the on-screen menu.
Step 3: Navigate to Display or Image Settings
This is where most of the screen adjustment options are located. Look for terms like ‘Display’, ‘Image’, or ‘Projection’.
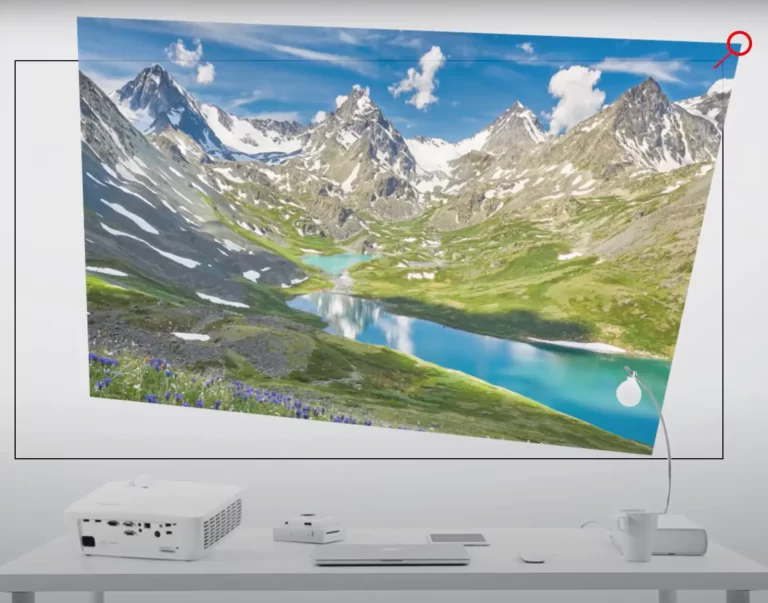
Step 4: Keystone Correction
If your image appears as a trapezoid rather than a rectangle, you’ll need to adjust the keystone. This setting allows you to correct the angle of the projection, making the image rectangular. Some projectors offer both vertical and horizontal keystone correction.
Step 5: Lens Shift
Some higher-end projectors, like certain models I’ve tested from Epson and Sony, offer a feature called lens shift. This allows you to move the image up, down, left, or right without physically moving the projector or distorting the image.
Step 6: Zoom and Focus
These controls adjust the size and sharpness of the image. Zooming in will make the image larger, while zooming out will make it smaller. The focus control ensures the image is sharp and clear.
Step 7: Test Patterns
Some projectors come with built-in test patterns. These are incredibly useful for aligning the image with your screen. They typically display grids or patterns that help you ensure the image is straight and centered.
Personal Tip
Always adjust the focus after making any other adjustments. Changing the zoom or screen position can sometimes throw the focus off slightly.
Remember, setting up a projector is as much an art as it is a science. With a bit of patience and practice, you’ll master the art of screen positioning in no time. And if you ever find yourself in a tricky setup situation, don’t hesitate to reach out. I’ve seen it all, and I’m here to help!
Can you Adjust Projector Angle?
Adjusting the projector angle is often necessary to ensure the projected image aligns properly with the screen, especially when the projector isn’t placed directly in front of the screen’s center.
From my hands-on experiences with various setups, here’s how you can adjust the projector angle and some related considerations:
Method 1. Physical Adjustment
Tilt: Most projectors come with adjustable feet or a stand that allows you to tilt the projector up or down. This is especially useful if the projector is placed on a table and needs to project upwards onto a screen.
Swivel: Some projector stands or mounts allow for side-to-side swiveling, which can help align the image horizontally.
Ceiling Mounts: If your projector is ceiling-mounted, the mount itself usually offers a range of adjustments for tilt, swivel, and rotation.
Method 2. Keystone Correction
After physically adjusting the projector’s angle, you might notice that the image appears as a trapezoid rather than a rectangle. This distortion is due to the projector not being perpendicular to the screen. Keystone correction is a feature in most projectors that compensates for this:
- Access the projector’s menu and navigate to the ‘Image’ or ‘Display’ settings.
- Look for ‘Keystone’ or ‘Keystone Correction’.
- Adjust the vertical and/or horizontal sliders until the image appears rectangular.
Method 3. Lens Shift
Higher-end projectors often come with a feature called lens shift. This allows you to move the projected image up, down, left, or right without tilting or swiveling the projector and without introducing keystone distortion:
- Access the projector’s menu or use dedicated controls on the projector or remote.
- Adjust the vertical and/or horizontal lens shift to position the image on the screen.
Method 4. Corner Correction or Four-Corner Adjustment
Some projectors offer a feature that allows you to adjust each corner of the image independently. This is especially useful for fine-tuning the image alignment in challenging setups.
Tips
- Limit Keystone Use: While keystone correction is handy, excessive use can degrade image quality. It’s always best to physically align the projector as closely as possible to reduce the need for keystone correction.
- Projector Placement: Ideally, the projector lens should be aligned with the center of the screen, both horizontally and vertically, for the best image quality.
Why Is My Projector Picture Upside-Down?
I’ve encountered this situation more times than I can count, both in my own home cinema setups and during consultations.
There are a few reasons why your projector might be displaying an upside-down image, and fortunately, it’s an easy fix.
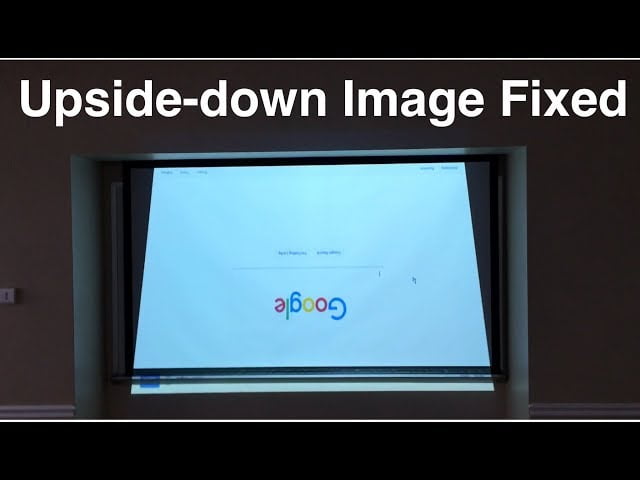
Let me walk you through the possible causes and solutions based on my hands-on experiences:
1. Ceiling Mounting
If you’ve recently mounted your projector to the ceiling or moved it from a table to the ceiling, the image will naturally be upside-down. Projectors are typically designed to sit on a table by default. When ceiling-mounted, they’re flipped upside-down, so the image needs to be inverted.
2. Accidental Setting Change
It’s possible that someone accidentally changed the projection mode setting on the projector, either via the remote or the on-device menu.
How to Correct the Upside-Down Image
Access the Projector Menu: Turn on your projector and access the on-screen menu. This can usually be done using the remote control or the buttons directly on the projector.
Navigate to the Image or Display Settings: Within the menu, look for a section labeled ‘Image’, ‘Display’, or something similar.
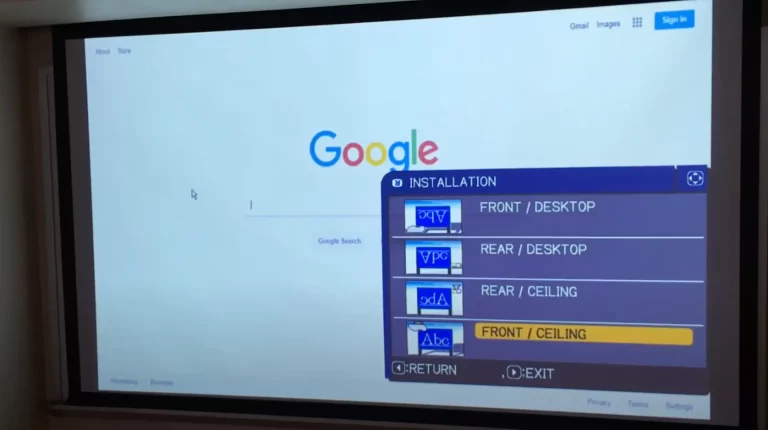
Find the Projection Mode: Within the image or display settings, there should be an option for ‘Projection Mode’, ‘Projector Orientation’, or ‘Projection Direction’.
Select the Correct Mode: You’ll typically see options like:
- Front: For table-top projection onto a screen in front of the projector.
- Rear: For projecting from behind a translucent screen.
- Front Ceiling: For ceiling-mounted projectors projecting onto a screen in front of the projector.
- Rear Ceiling: For ceiling-mounted projectors projecting onto a translucent screen from behind.
Choose the option that matches your setup. If your projector is on a table, select ‘Front’. If it’s ceiling-mounted, choose ‘Front Ceiling’.
Save and Exit: Confirm your selection and exit the menu. The image should now be correctly oriented.
Pro Tip
Always double-check the projector’s orientation settings after moving or remounting it. It’s a common oversight, and ensuring the correct setting will save you from a topsy-turvy viewing experience.
In conclusion, an upside-down image is usually due to a simple setting oversight. With a few clicks in the menu, you can have your projector displaying correctly and be ready for movie night, presentations, or any other viewing event.
Final Note
So, we learned how to fix our movie screen with the clicker! It’s like magic! You point, press buttons and the picture flips! Now, movie time is fun again, with no more head-tilting.
You did it, high-five! Remember, if the picture looks funny, grab your clicker. With a friend or on your own, you can make it right! Happy watching, friends!
Author of this Post:

Kristy Roger
Home Cinema Consultant & Tech Enthusiast
Holding a background in Industrial and Electrical Technology from the University of Alberta, Kristy has spent 5+ years consulting on home theater products at a top electronics firm. As a certified Technical Professional with Lean Six Sigma credentials, Kristy expertise ranges from projector nuances to hands-on experience with leading models. Kristy have been sharing her knowledge online for two years, blending professional insights with personal experiences from her own home cinema setup. Off the screen, She is a dedicated mom to Jerry, Ryan, and our two pups, Cuddle and Paw.


