
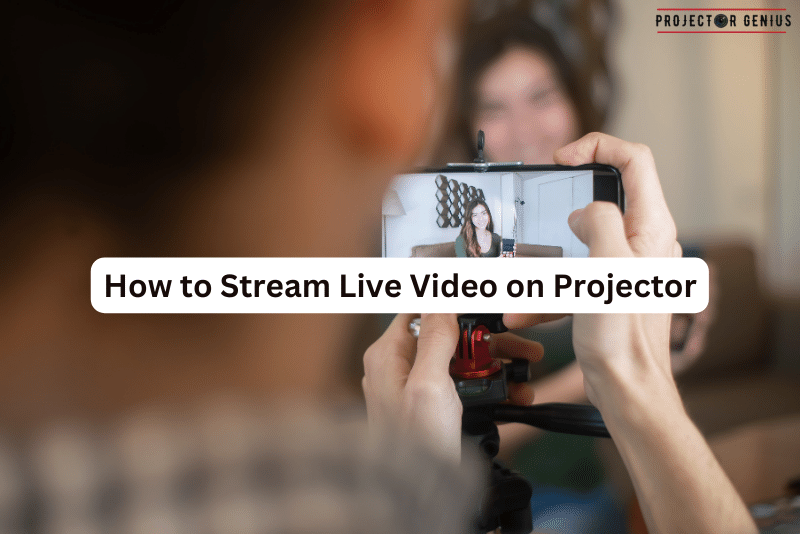
How to Stream Live Video on Projector
-
 Written by:
Kristy Roger
Written by:
Kristy Roger
- Last Updated:
Many live streamer users often find themselves overwhelmed while streaming live on projector. Don’t worry; you’re not alone in this predicament.
When I first tried streaming live on a projector, I faced several challenges. But with time and experience, I’ve learned the best practices. Here’s a guide to help you avoid the mistakes I made.
By following step-by-step instructions. You can effortlessly stream live video on projector using your laptop, MacBook, phone, streaming devices and Camera.
How to stream live video on projector? To stream live video on a projector, connect a compatible device (such as a laptop or streaming device) to the projector using an HDMI cable. Then, open the streaming platform of your choice (e.g., YouTube, Twitch) and start broadcasting the live video. The projector will display the live video feed for your audience to watch.
I recommend using the Table of Contents to quickly access the information you need.
My article is designed to cater to home cinema users of all levels, from Beginners to Advanced enthusiasts.
How to Stream Live Video on Projector from Laptop
Table of Contents

Streaming live video from a laptop to a projector is a relatively straightforward process. Here are the steps you can follow to do it:
Step 1: Open the Software or App
- Make sure you have the software or application installed on your laptop that is providing the live video feed. This could be video conferencing software (like Zoom, Skype, or Microsoft Teams), streaming software (like OBS Studio or Streamlabs OBS), or any other application that allows you to share your screen or camera feed.
Step 2: Check Available Ports on the Laptop/Macbook
- Examine your laptop to identify the available ports for video output. Common options include HDMI, VGA, Mini DisplayPort, USB-C, or Thunderbolt. The type of port your laptop has will determine the type of adapter you need.
Step 3: Check Available Ports on the Projector
- Inspect the projector to see what input ports it has. Most modern projectors have HDMI inputs, but some may also have VGA or other types of inputs. Ensure that you identify the appropriate input port on the projector.
Step 4: Get the Required Adapter
- Based on the ports available on your laptop and projector, you may need to purchase an adapter or cable that can connect the two devices. For example, if your laptop has HDMI and the projector has VGA, you’ll need an HDMI to VGA adapter. If both devices have HDMI ports, you can use an HDMI cable.
Step 5: Connect the Adapter to the Projector and Laptop
- Plug one end of the adapter or cable into your laptop’s video output port.
- Connect the other end of the adapter or cable into the corresponding input port on the projector.
Step 6: Configure the Video Source
- Turn on the projector and set it to the correct input source. This typically involves using the projector’s remote control or menu to select the input source that matches the port you connected your laptop to (e.g., HDMI 1, VGA, etc.).
- On your laptop, go to the display settings. You can usually access this by right-clicking on the desktop and selecting “Display Settings” (on Windows) or going to “System Preferences” > “Displays” (on macOS).
- Configure your laptop’s display settings to either extend or duplicate the screen, depending on your preference. This will determine whether you want to use the projector as an additional display or mirror your laptop’s screen.
- Start the software or application that provides the live video feed, and make sure it’s displaying on your laptop’s screen.
- If you’re using video conferencing software, select the projector as the camera source and share your screen as needed.
- The live video should now be displayed on the projector.
Please note that the exact steps may vary slightly depending on your laptop and projector models and the software you’re using for the live video feed.
How to Stream Live Video on Projector from Desktop
Streaming live video from a desktop computer to a projector is similar to streaming from a laptop. Here are the steps you can follow:
Step 1: Open the Software or App
- Start the software or application on your desktop that is providing the live video feed. This could be video conferencing software, streaming software, or any application that allows you to share your screen or camera feed.
Step 2: Check Available Ports on the Desktop
- Examine your desktop computer to identify the available ports for video output. Common options include HDMI, DisplayPort, VGA, DVI, or USB-C. The type of port your desktop has will determine the type of adapter you need.
Step 3: Check Available Ports on the Projector
- Inspect the projector to see what input ports it has. Most modern projectors have HDMI inputs, but some may also have VGA or other types of inputs. Ensure that you identify the appropriate input port on the projector.
Step 4: Get the Required Adapter
- Based on the ports available on your desktop and projector, you may need to purchase an adapter or cable that can connect the two devices. For example, if your desktop has HDMI and the projector has VGA, you’ll need an HDMI to VGA adapter. If both devices have HDMI ports, you can use an HDMI cable.
Step 5: Connect the Adapter to the Projector and Desktop
- Plug one end of the adapter or cable into your desktop’s video output port.
- Connect the other end of the adapter or cable into the corresponding input port on the projector.
Step 6: Configure the Video Source
- Turn on the projector and set it to the correct input source. This typically involves using the projector’s remote control or menu to select the input source that matches the port you connected your desktop to (e.g., HDMI 1, VGA, etc.).
- On your desktop, go to the display settings. You can usually access this by right-clicking on the desktop and selecting “Display Settings” (on Windows) or going to “System Preferences” > “Displays” (on macOS).
- Configure your desktop’s display settings to either extend or duplicate the screen, depending on your preference. This will determine whether you want to use the projector as an additional display or mirror your desktop’s screen.
- Start the software or application that provides the live video feed on your desktop, and make sure it’s displaying on your desktop’s screen.
- If you’re using video conferencing software, select the projector as the camera source and share your screen as needed.
- The live video should now be displayed on the projector.
As with a laptop, the exact steps may vary depending on your desktop and projector models and the software you’re using for the live video feed.
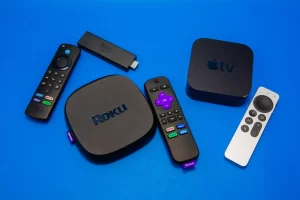
How to Stream Live Video on Projector from Streaming Device
Streaming live video from a streaming device, such as a set-top box, media player, or gaming console, to a projector differs slightly from streaming on a laptop or desktop, mainly due to the unique video output options of these devices. These steps also apply if you want to enjoy live sports on your projector:
Step 1: Open the Software or App
- Start the software or application on your streaming device that is providing the live video feed. This could be a streaming service app, a media player app, or any other app that allows you to watch content.
- Once, during an important event, my streaming device failed to connect to the projector. I later realized it was due to an outdated firmware. Always keep your devices updated!
Step 2: Check Available Ports on the Streaming Device
- Examine your streaming device to identify the available ports for video output. Common options include HDMI, RCA, or composite video. The type of port your streaming device has will determine the type of adapter you need.
Step 3: Check Available Ports on the Projector
- Inspect the projector to see what input ports it has. Most modern projectors have HDMI inputs, but some may also have VGA or other types of inputs. Ensure that you identify the appropriate input port on the projector.
Step 4: Get the Required Adapter
- Based on the ports available on your streaming device and projector, you may need to purchase an adapter or cable that can connect the two devices. For example, if your streaming device has HDMI and the projector has VGA, you’ll need an HDMI to VGA adapter. If both devices have HDMI ports, you can use an HDMI cable.
Step 5: Connect the Adapter to the Projector and Streaming Device
- Plug one end of the adapter or cable into your streaming device’s video output port.
- Connect the other end of the adapter or cable into the corresponding input port on the projector.
Step 6: Configure the Video Source
- Turn on the projector and set it to the correct input source. This typically involves using the projector’s remote control or menu to select the input source that matches the port you connected your streaming device to (e.g., HDMI 1, VGA, etc.).
- On your streaming device, navigate to the settings or display options and ensure that the video output is set to the appropriate resolution and aspect ratio for your projector.
- Start the software or application on your streaming device that provides the live video feed, and select the content you want to stream.
- The live video should now be displayed on the projector.
The exact steps may vary depending on your specific streaming device and projector models. Always consult the user manuals for your devices if you encounter any issues or need additional guidance. Additionally, if your streaming device has built-in casting capabilities (e.g., Chromecast), you may be able to cast content to the projector without the need for adapters.
How to Stream Live Video on Projector from Camera with Live Streaming Capabilities

To stream live video on a projector from a camera with live streaming capabilities, follow these steps:
Step 1: Open the Software or App
- Begin by launching the software or application on your camera that is providing the live video feed. This may include dedicated live streaming software or apps built into the camera.
Step 2: Check Available Ports on the Camera
- Examine your camera to identify the available ports for video output. Common options may include HDMI, SDI, or USB-C. The type of port your camera has will determine the type of adapter you need.
Step 3: Check Available Ports on the Projector
- Inspect the projector to identify its input ports. Most projectors have HDMI inputs, while some may also offer VGA, SDI, or other input options. Make sure you identify the appropriate input port on the projector.
Step 4: Get the Required Adapter
- Based on the ports available on your camera and projector, you may need to acquire an adapter or cable that can connect the two devices. For instance, if your camera has HDMI output and the projector has VGA input, you’ll need an HDMI to VGA adapter. If both devices have HDMI ports, a standard HDMI cable should suffice.
Step 5: Connect the Adapter to the Projector and Camera
- Plug one end of the adapter or cable into your camera’s video output port.
- Connect the other end of the adapter or cable into the corresponding input port on the projector.
Step 6: Configure the Video Source
- Power on the projector and set it to the correct input source. Typically, this involves using the projector’s remote control or menu to select the input source that matches the port you connected your camera to (e.g., HDMI 1, VGA, etc.).
- On your camera, navigate to the settings or menu to ensure that the video output is configured correctly for the projector.
- Begin streaming from your camera’s software or app, and make sure that the live video feed is displaying on the projector.
Following these steps, you’ll be able to stream live video from a camera with live streaming capabilities to a projector for various purposes, such as presentations, events, or streaming content to a larger audience.
How to Stream Live Video on Projector Wirelessly
To stream live video on a projector wirelessly, you can use a wireless display technology or device such as Miracast, Chromecast, AirPlay, or a wireless HDMI transmitter.
Wireless streaming can be a game-changer. I once attended a seminar where the speaker seamlessly switched between devices during the presentation, thanks to wireless streaming.
Here’s a general guide on how to set up wireless streaming to a projector:
Requirements:
- A projector with built-in wireless capabilities or a compatible wireless adapter.
- A source device (e.g., laptop, smartphone, or tablet) with wireless streaming support.
- A stable Wi-Fi network.
Steps to Stream Live Video on Projector Wirelessly
Step 1: Set up the Projector
- Ensure your projector is connected to a power source and turned on.
- If your projector has built-in wireless capabilities, access its wireless settings and connect it to your Wi-Fi network.
- If your projector doesn’t have built-in wireless capabilities, you’ll need to connect a compatible wireless adapter (e.g., a Miracast or Chromecast dongle) to its HDMI or other video input port.
Step 2: Connect the Source Device
- Make sure your source device (e.g., laptop, smartphone, or tablet) is connected to the same Wi-Fi network as the projector.
- Enable the wireless streaming feature on your source device. The specific steps for this may vary depending on your device and the technology it supports.
Step 3: Stream the Video
If using Miracast or similar technology
- On your source device, go to the “Settings” or “Display” menu.
- Select “Cast Screen,” “Screen Mirroring,” or a similar option.
- Choose the projector from the list of available devices.
- Your source device’s screen will be mirrored on the projector, allowing you to stream live video wirelessly.
If using Chromecast
- Ensure your source device has the Google Home app installed.
- Open the app and tap the Cast icon.
- Select the projector as the casting destination.
- Open the app or content you want to stream, and it will appear on the projector.
If using AirPlay (for Apple devices)
- Ensure both your source device and the projector are connected to the same Wi-Fi network.
- Swipe down from the top-right corner of your iOS device or open the Control Center.
- Tap “Screen Mirroring” and select the projector from the list of available devices.
Step 4: Adjust Settings
- On your source device, configure the settings for the video you want to stream. This may involve opening an app, selecting a video, or using a browser to navigate to the live stream URL.
Step 5: Enjoy the Live Video
- The live video content from your source device should now be wirelessly displayed on the projector. You can control playback and volume from your source device.
Please note that the specific steps and compatibility may vary depending on the devices you are using. It’s essential to refer to the user manuals for your projector, source device, and any wireless streaming adapters you use for detailed instructions and troubleshooting tips.
Final Thoughts
Over the years, I’ve realized that while technology evolves, the basics remain the same. Always invest in good quality equipment and stay updated with the latest trends.
Streaming live video on a projector can be accomplished through various methods, depending on your source device and available equipment.
Whether you’re using a laptop, desktop, streaming device, or camera with live streaming capabilities, the key steps involve identifying the necessary adapters, connecting the devices, and configuring the video source to display on the projector.
Additionally, for a wireless streaming setup, compatibility with technologies like Miracast, Chromecast, AirPlay, or wireless HDMI transmitters can provide a convenient and cable-free solution.
Ultimately, the choice of method depends on your specific equipment and preferences, but with the right setup, you can enjoy live video content on a projector for various purposes, from presentations to entertainment and beyond.
Author of this Post:

Kristy Roger
Home Cinema Consultant & Tech Enthusiast
Holding a background in Industrial and Electrical Technology from the University of Alberta, Kristy has spent 5+ years consulting on home theater products at a top electronics firm. As a certified Technical Professional with Lean Six Sigma credentials, Kristy expertise ranges from projector nuances to hands-on experience with leading models. Kristy have been sharing her knowledge online for two years, blending professional insights with personal experiences from her own home cinema setup. Off the screen, She is a dedicated mom to Jerry, Ryan, and our two pups, Cuddle and Paw.


