
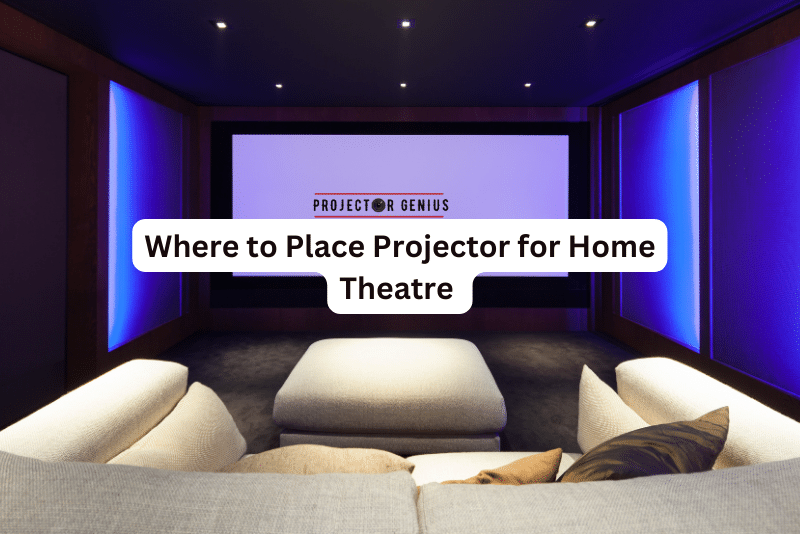
Where to Place Projector for Home Theater? A Complete Guide
-
 Written by:
Kristy Roger
Written by:
Kristy Roger
- Last Updated:
Setting up a projector for a home theatre can be an exciting and immersive experience.
But “Where to place projector for home theater?”
Here are different ways to achieve a great home theatre setup with your projector:
- Wall Projection
- Motorized Projector Screen
- Ceiling Recessed Projection
- Rear Projection
- Portable Projector Stand
- Projector Enclosure or Cabinet
- Short-Throw or Ultra-Short-Throw Projection
- Outdoor Projection
- Inflatable Projection Screen
I recommend using the Table of Contents to quickly access the information you need.
My article is designed to cater to home cinema users of all levels, from Beginners to Advanced enthusiasts.
Table of Contents
Wall Projection
Wall projection is a common and straightforward method of setting up a projector for a home theatre. It involves mounting the projector on a ceiling mount or shelf and positioning it opposite the desired projection wall. Here’s a detailed explanation of each step:
1. Mounting the Projector
- Choose a suitable location on the ceiling or a sturdy shelf that provides a clear line of sight to the projection wall. Ensure that the projector is level and securely attached to the mount or shelf.
- The mounting position may vary based on the projector’s throw distance, zoom capabilities, and the desired screen size.
2. Projection Surface
- From my own experience, using a dedicated projection screen significantly enhances the viewing experience compared to a regular wall. The difference in color vibrancy and clarity is noticeable.
- If using a wall, make sure it is smooth and free from imperfections that could affect image quality.
- If you’re on a budget and can’t invest in a high-quality projection screen, consider using a smooth, white bedsheet as a temporary solution. It works surprisingly well!
3. Projection Screen Paint
- As an alternative to a physical screen, you can use special projection screen paint to create a projection surface directly on the wall. High-gain projection paint can enhance image brightness and clarity, creating a more vibrant and immersive viewing experience.
- Follow the manufacturer’s instructions for applying the projection paint to achieve the best results.
4. Adjusting Throw Distance and Zoom
- The projector’s throw distance is the distance between the projector and the projection surface. It determines the size of the projected image.
- By adjusting the projector’s zoom lens or using the keystone correction (if available), you can fine-tune the image size and aspect ratio to match your preferences.
- Measure the throw distance and adjust the projector’s position or zoom settings accordingly to achieve the desired screen size.
5. Image Calibration
- I remember the first time I set up a projector in my living room. I was so excited, but I made the mistake of not calibrating the image settings. The colors were off, and the picture was too dim. After spending some time adjusting the brightness, contrast, and color temperature, the difference was night and day!
- You may also want to adjust the projector’s aspect ratio settings to match the content’s native aspect ratio (e.g., 16:9 for widescreen movies).
Wall projection is a versatile and popular setup for home theatres, as it allows for easy installation and does not require a dedicated projection screen. However, the quality of the projection surface and the projector’s positioning are critical factors in achieving the best image quality. Proper calibration and fine-tuning ensure an enjoyable and immersive movie-watching experience in the comfort of your home.
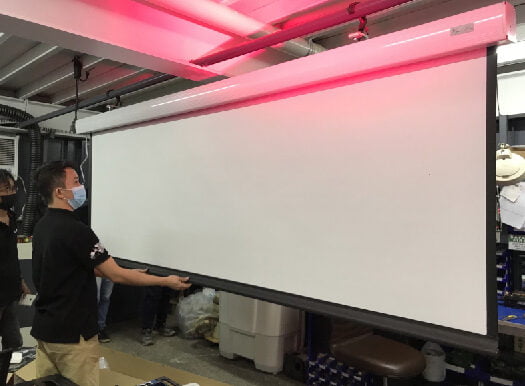
Motorized Projector Screen
A motorized projector screen is an excellent choice for a home theatre setup that offers convenience and a sleek appearance. This type of projection screen is designed to roll up and down automatically using an electric motor, controlled by a remote control or a wall switch.
A friend of mine once had a manual pull-down screen, and after a movie night at my place, he was so impressed with the ease of my motorized screen that he upgraded his setup the very next week!
Here’s a detailed explanation of how to set up and use a motorized projector screen:
1. Investing in a Motorized Projection Screen
- Purchase a motorized projection screen from a reputable brand or manufacturer. Motorized screens come in various sizes and aspect ratios to suit different room dimensions and content formats.
- Consider the screen material and gain (reflectivity) to ensure optimal image brightness and viewing angles. High-quality projection screens offer better colour reproduction and image clarity.
2. Mounting the Screen
- Decide on the ideal location to mount the screen. You can choose to mount it on the wall or the ceiling, depending on your room layout and personal preferences.
- Use sturdy brackets or mounts to secure the screen in place. Ensure that the mounting position allows for proper screen extension and retraction without any obstructions.
3. Electrical Connection
- Motorized projector screens require an electrical connection to power the motor. Make sure you have access to a power outlet near the screen’s mounting location.
- If you’re mounting the screen on the ceiling, consider concealing the power cable within the ceiling to maintain a clean and tidy appearance.
4. Pairing with a Motorized Projector Lift (Optional)
- For an even more discreet and hidden setup, you can pair the motorized screen with a motorized projector lift. The lift allows the projector to be concealed in the ceiling or a dedicated enclosure when not in use.
- When you activate the projector, the lift lowers it into position, and the motorized screen rolls down automatically, creating a seamless and clutter-free setup.
5. Remote Control or Wall Switch
- Operate the motorized screen using the included remote control or a wall switch. With remote control, you can effortlessly extend or retract the screen at the touch of a button.
- Some motorized screens may also come with additional features, such as adjustable height settings or pre-set positions.
Motorized projector screens offer several advantages, including convenience, space-saving capabilities, and a professional look for your home theatre. With the touch of a button, you can transform your room into a cinematic experience, and when not in use, the screen can be neatly rolled up or hidden away, maintaining the aesthetics of your living space.
Ceiling Recessed Projection
Ceiling recessed projection is a sophisticated and elegant way to set up a projector in a home theatre or any room where a clean and hidden appearance is desired. This setup involves installing a recessed projector mount in the ceiling, which allows the projector to be completely concealed when not in use.
I once visited a home theater where the owner had a ceiling recessed setup. The magic began when he pressed a button, and the projector smoothly descended from the ceiling. It was a cinematic experience right from the start!
Here’s a detailed explanation of how to achieve a ceiling-recessed projection:
1. Recessed Projector Mount
- Choose a high-quality recessed projector mount that is suitable for your projector model and weight.
- The recessed mount is designed to be installed flush with the ceiling, providing a seamless and discreet appearance.
2. Professional Installation
- For the best results, consider hiring a professional installer to handle the installation. They can ensure that the recessed mount is securely attached to the ceiling and aligned correctly.
3. Projector Compatibility
- Ensure that your projector is compatible with a recessed mount and has the necessary features for this setup, such as a motorized lens shift and zoom.
- Some projectors are specifically designed for ceiling recessed installations, with motorized mechanisms that allow the projector to move into position automatically.
4. Concealing the Projector
- Once the recessed mount is installed, the projector can be hidden inside the ceiling when not in use. This provides a clutter-free and visually appealing room environment.
5. Motorized Lowering System (Optional)
- To enhance the convenience of the setup, you can pair the recessed projector mount with a motorized lowering system.
- When you activate the projector, the motorized system lowers it into position for projection. When you’re done, the projector can be raised back into the ceiling, remaining hidden from view.
6. Screen and Projection Adjustment
- Choose a suitable projection screen, either wall-mounted or motorized, to pair with the ceiling recessed projection.
- Adjust the projector’s throw distance and zoom to achieve the desired screen size and aspect ratio.
Ceiling recessed projection is an excellent option for those who value a minimalist and unobtrusive home theatre setup. When not in use, the projector seamlessly disappears into the ceiling, leaving no visible equipment or cables. This setup is especially beneficial for rooms with limited space or a desire for a clean, high-end aesthetic.
While ceiling recessed projection provides an elegant solution, it may require some additional planning and investment due to the recessed mount and motorized lowering system. However, the result is a truly immersive home theatre experience with a hidden projector that adds a touch of sophistication to your living space.
Rear Projection
In Rear projection setup, the projector is positioned behind a specialized translucent screen, and the image is projected onto the backside of the screen, facing the audience.
During a community event, we used a rear projection setup for a large audience. The visuals were stunning, and there were no shadows or obstructions, making it a hit among the attendees.
Here’s a more detailed explanation of rear projection:
1. Translucent Projection Screen
- Rear projection requires a special type of projection screen that is designed to be translucent, allowing light to pass through it. The screen material is often made of semi-transparent or diffusive materials, such as rear projection films or fabrics.
- The screen is set up as a freestanding frame or mounted on a suitable structure, creating a surface that appears neutral or slightly diffused when not in use.
2. Projector Placement
- The projector is positioned behind the translucent screen, typically at a considerable distance from the screen itself. The distance between the projector and the screen depends on the throw ratio of the projector and the desired screen size.
- The projector is generally placed on a dedicated platform or mount to ensure stability and proper alignment.
3. Image Projection
- When the projector is turned on, it projects the image onto the backside of the translucent screen. The light from the projector passes through the screen material, and the image becomes visible on the front side of the screen, facing the audience.
- Since the projection is done from the back, the audience sees a bright and clear image without any shadows or obstructions from the projector.
4. Clean and Unobstructed Front View
- One of the main advantages of rear projection is that it provides a clean and unobstructed front view. The projector is hidden from the audience’s sight, creating a seamless and elegant display setup.
- Unlike front projection setups, where the projector may be suspended from the ceiling or placed in front of the screen, rear projection eliminates any distractions from the projection area.
5. Versatility and Use of Cases
- Rear projection is used in a variety of applications, including home theatres, corporate presentations, trade shows, exhibitions, digital signage, and events.
- Large-scale rear projection setups are commonly seen in theatrical performances, where actors can interact with dynamic projected backgrounds without casting shadows.
Rear projection offers a unique and visually captivating display solution with a clean and professional appearance. It is particularly suitable for environments where a sleek and unobtrusive setup is desired.
However, it does require a dedicated space with sufficient depth to accommodate the projector and screen distance. Additionally, the choice of a high-quality translucent screen material is crucial to achieving optimal image brightness, contrast, and clarity in a rear projection setup.
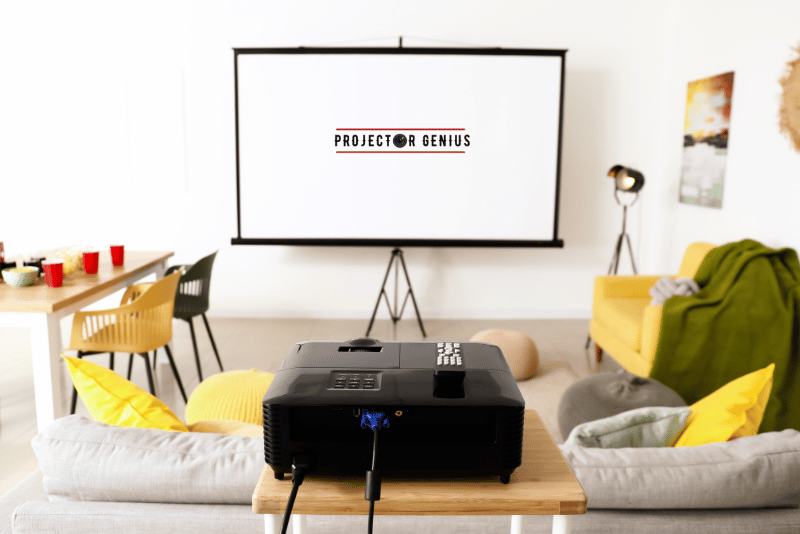
Portable Projector Stand
A portable projector stand or cart is a versatile and convenient accessory for setting up a projector in various locations. It is a movable and adjustable platform designed to securely hold the projector and provide a stable projection surface. Here’s a more detailed explanation of the portable projector stand:
1. Mobility and Portability
- The main advantage of a portable projector stand is its mobility. It typically comes with wheels or casters, allowing you to move the projector easily from one location to another without the need for permanent installation.
- This portability is especially useful in situations where you want to use the projector in different rooms, in outdoor settings, or during travel.
2. Adjustable Height and Tilt
- Portable projector stands are designed with adjustable height and tilt features. This allows you to customize the projector’s positioning, ensuring that the projected image is properly aligned with the screen or projection surface.
- By adjusting the height and tilt, you can achieve the desired screen size and aspect ratio for the best viewing experience.
3. Stability and Safety
- Despite being portable, these stands are engineered to be stable and secure. They are made from sturdy materials like metal or reinforced plastic to support the weight of the projector and prevent wobbling during projection.
- Some models may have additional features such as locking mechanisms to keep the stand in place once you have positioned it.
4. Cable Management
- Many portable projector stands come with integrated cable management systems. This helps keep the projector’s power cord, video cables, and other connections organized and prevents them from tangling during setup and relocation.
5. Universal Compatibility
- Portable projector stands are designed to accommodate various projector models and sizes. They usually have adjustable arms or mounting plates that can fit different projector types.
- This versatility ensures that you can use the stand with multiple projectors or upgrade your projector without needing to change the stand.
6. Multi-Functional Use
- In addition to projectors, some portable stands are designed to hold other devices like laptops, tablets, or document cameras, making them suitable for presentations, video conferencing, and educational purposes.
Portable projector stands are an excellent option for those who need flexibility and ease of setup with their projector. They are commonly used in educational settings, conferences, trade shows, and temporary projection setups.
Additionally, they are a practical choice for home users who prefer the convenience of moving their projector around the living room, backyard, or any other location as needed. When choosing a portable projector stand, consider factors like weight capacity, height range, stability, and compatibility with your specific projector model.
Projector Enclosure or Cabinet
A projector enclosure or cabinet is a practical and visually appealing solution for concealing the projector in a home theatre setup. It involves building a custom enclosure or using a pre-made cabinet specifically designed to house the projector discreetly. Here’s a more detailed explanation of this setup:
1. Custom-built Enclosure or Cabinet
- The enclosure or cabinet is designed to fit the dimensions of the projector and provide ample space for ventilation and cable management.
- It can be custom-built by a professional carpenter or purchased as a pre-made unit from specialized AV furniture manufacturers.
2. Hidden Projection Setup
- The projector is placed inside the enclosure or cabinet, and the cables are organized neatly within the structure to maintain a clean appearance.
- When not in use, the projector is hidden from view, tucked away behind closed doors or panels.
3. Aesthetics and Clutter-free Environment
- The primary benefit of using a projector enclosure or cabinet is the aesthetic improvement it brings to the home theatre space. Without a visible projector, the room looks more organized and clutter-free.
- The cabinet design can be customized to match the overall decor of the room, creating a seamless and integrated look.
4. Protection from Dust and Damage
- By keeping the projector within the enclosure, you protect it from dust, dirt, and potential accidental damage.
- Dust can affect the projector’s performance and image quality over time, so keeping it enclosed when not in use helps maintain its longevity.
5. Enhanced Safety
- If you have children or pets at home, a projector enclosure adds an extra layer of safety, preventing accidental contact with the projector’s lens or any sensitive components.
6. Improved Sound Isolation (Optional)
- Some projector enclosures come with soundproofing materials or design features that help reduce the noise generated by the projector’s cooling fans.
- This can be especially useful for maintaining a quiet and immersive viewing experience.
7. Remote Control Access
- When designing the enclosure or cabinet, consider adding a discreet opening or a panel that allows for the remote control signals to reach the projector.
- This way, you can still operate the projector without the need to open the enclosure.
Projector enclosures or cabinets are an excellent option for homeowners who prioritize aesthetics and want to maintain a clean and organized home theatre environment.
They offer a practical solution to keep the projector hidden and protected while also contributing to a more immersive movie-watching experience.
Additionally, the custom design options allow you to tailor the enclosure to fit your specific projector and room requirements, ensuring seamless integration into your home theatre setup.
Short-Throw or Ultra-Short-Throw Projection
Short-throw and ultra-short-throw projection are specialized projector setups designed to project large images from a short distance, making them ideal for small rooms or spaces where traditional long-throw setups are not feasible. Here’s a more detailed explanation of these projection techniques:
1. Short-Throw Projection
- Short-throw projectors are designed to project large images from a short distance from the screen or wall. The throw ratio of a projector determines the distance needed to achieve a certain screen size.
- Typically, short-throw projectors have a throw ratio of around 0.4 to 0.6, meaning they can project a 100-inch diagonal image from a distance of approximately 4 to 6 feet.
2. Ultra-Short-Throw Projection
- Ultra-short-throw projectors take this concept a step further by projecting even larger images from an even shorter distance. The throw ratio of ultra-short-throw projectors is usually less than 0.4.
- An ultra-short-throw projector can project a 100-inch diagonal image from a distance of only a few inches to a foot away from the screen or wall.
3. Advantages for Small Spaces
- The primary advantage of short-throw and ultra-short-throw projections is that they allow for big-screen entertainment in limited spaces. These projectors can create a cinematic experience in small living rooms, bedrooms, classrooms, or conference rooms where traditional long-throw setups may not be practical.
4. Reduced Shadows and Glare
- In traditional long-throw setups, the projector needs to be placed farther from the screen, which can result in people casting shadows on the projection area or experiencing glare from the projector’s light source. Short-throw and ultra-short-throw projectors minimize these issues since they are positioned closer to the screen.
5. Flexible Mounting Options
- Short-throw and ultra-short-throw projectors offer more flexibility in mounting options. They can be placed on a low TV stand, or coffee table, or mounted on the wall above or below the screen.
- This versatility allows for easy integration into different room layouts and furniture arrangements.
6. Interactive Applications
- Ultra-short-throw projectors are commonly used in interactive applications, such as interactive whiteboards or tabletop displays, where users can interact directly with the projected content.
7. Screen Considerations
- When using short-throw or ultra-short-throw projectors, it’s essential to choose a compatible projection screen or a suitable wall surface that preserves image brightness, contrast, and clarity at close distances.
- Some short-throw projectors come with an ambient light rejecting (ALR) screen to combat ambient light and improve image visibility in bright rooms.
Short-throw and ultra-short-throw projectors are excellent solutions for users with limited space or those seeking a more compact and user-friendly projection setup. Whether for home entertainment, presentations, or interactive applications, these projectors offer convenience and versatility without compromising image size and quality.
When considering a short-throw or ultra-short-throw projector, evaluate your room’s dimensions and the screen size you desire to ensure the projector’s throw ratio aligns with your specific needs.
Outdoor Projection
Outdoor projection is a popular and enjoyable way to bring the home theater experience to the great outdoors. It involves setting up a projector and screen in an outdoor environment to watch movies, sports events, or any other content under the open sky.
Outdoor movie nights are a personal favorite of mine. There’s something magical about watching a film under the stars.
Here’s a more detailed explanation of outdoor projection:
1. Suitable Projector and Screen
- To get started with outdoor projection, you’ll need a projector suitable for outdoor use. Look for projectors with higher brightness levels (measured in lumens) to combat ambient light and maintain a clear image during evening screenings.
- For the projection surface, you can either use a dedicated outdoor projector screen or a smooth, white-painted wall. An outdoor projector screen is designed to withstand outdoor conditions and is easy to set up and take down.
2. DIY Projection Screen
- If you don’t have access to an outdoor projector screen, you can create a DIY solution using suitable materials. A simple white bedsheet, canvas tarp, or projector screen fabric stretched between poles or a wall can serve as an impromptu projection surface.
3. Location and Setup
- Choose a suitable outdoor location for the projection setup. Look for an area with a flat and clear surface to place the projector and screen. Ensure that there are no obstructions that could block the projected image.
- The projector should be positioned at an appropriate distance from the screen, taking into consideration the projector’s throw ratio and the desired screen size.
4. Ambient Light Considerations
- Outdoor projection often involves dealing with ambient light from surrounding sources, such as streetlights or nearby buildings. While higher brightness projectors can handle some ambient light, it’s best to schedule screenings during twilight or nighttime for the best image quality.
5. Audio Setup
- Consider an audio setup to accompany the outdoor projection. External speakers, portable Bluetooth speakers, or a soundbar can enhance the overall movie-watching experience.
6. Weather and Protection
- Be mindful of the weather conditions. If there’s a chance of rain or adverse weather, it’s essential to protect the projector and any electrical equipment from moisture and damage.
- Some outdoor projector screens come with weather-resistant materials, and some projectors have weatherproofing features.
7. Event Planning
- Outdoor projection is perfect for backyard movie nights, family gatherings, barbecues, or special events. Consider the seating arrangement and provide blankets or outdoor furniture for comfort.
Outdoor projection provides a unique and immersive cinematic experience under the stars. Whether it’s a casual movie night with friends or a memorable event, outdoor projections create lasting memories and foster a sense of community.
Just remember to plan for weather conditions, optimize the projection setup for ambient light, and ensure a suitable audio setup to complement the visuals.
Inflatable Projection
An inflatable projection screen is a fun and convenient solution for hosting outdoor movie nights and other events. It offers a portable and easy-to-setup option for creating a large projection surface, making it ideal for outdoor gatherings, parties, and community events.
For my nephew’s birthday, we set up an inflatable projection screen in the backyard. The kids watched animated movies and had a blast. It was the highlight of the party.
Here’s a more detailed explanation of inflatable projection screens:
1. Inflatable Design
- An inflatable projection screen is designed as a portable air-filled structure. It is made of durable materials such as PVC or nylon, which can withstand outdoor use and inflation.
2. Easy Setup
- To set up an inflatable projection screen, you typically need an electric or manual air pump. Inflation usually takes a few minutes, and the screen quickly takes shape as it fills with air.
3. Screen Sizes
- Inflatable projection screens come in various sizes, ranging from small screens suitable for backyard movie nights to large screens for community events or outdoor movie festivals.
- The screen size determines the maximum image size the projector can display.
4. Stability and Tethers
- To maintain stability, inflatable screens are usually equipped with tethers and stakes that anchor the screen to the ground. This prevents the screen from moving or tipping over due to wind or other external factors.
5. Portability and Storage
- One of the main advantages of inflatable screens is their portability. When deflated, the screen can be folded into a compact size, making it easy to transport and store.
- Many inflatable screens come with a carry bag for convenient transportation.
6. Outdoor Movie Night Experience
- Inflatable projection screens provide an immersive outdoor movie night experience. They create a big-screen cinematic ambiance in any open space, whether it’s a backyard, park, or beach.
7. Audio and Accessories
- To complete the outdoor movie setup, consider using external speakers or a portable audio system for better sound quality.
- Some inflatable screens also come with optional add-ons like inflatable enclosures for projectors or integrated speaker systems.
8. Versatility
- In addition to movie nights, inflatable screens can be used for various outdoor activities such as sports game viewings, video gaming, presentations, and outdoor karaoke parties.
Inflatable projection screens offer a fantastic way to enjoy movies and other entertainment in a social and outdoor setting. They are easy to set up and provide a larger-than-life viewing experience.
Whether you’re hosting a family movie night in your backyard or organizing a community event, an inflatable projection screen can be a highlight of the occasion, bringing people together for a memorable and fun experience under the stars.
Final Thoughts
Remember to optimize the projector’s image settings, including brightness, contrast, colour, and aspect ratio, based on your room’s lighting conditions and the content you’ll be watching.
Additionally, consider using a high-quality audio system to complement the visual experience and create a true home theatre atmosphere.
Author of this Post:

Kristy Roger
Home Cinema Consultant & Tech Enthusiast
Holding a background in Industrial and Electrical Technology from the University of Alberta, Kristy has spent 5+ years consulting on home theater products at a top electronics firm. As a certified Technical Professional with Lean Six Sigma credentials, Kristy expertise ranges from projector nuances to hands-on experience with leading models. Kristy have been sharing her knowledge online for two years, blending professional insights with personal experiences from her own home cinema setup. Off the screen, She is a dedicated mom to Jerry, Ryan, and our two pups, Cuddle and Paw.


