
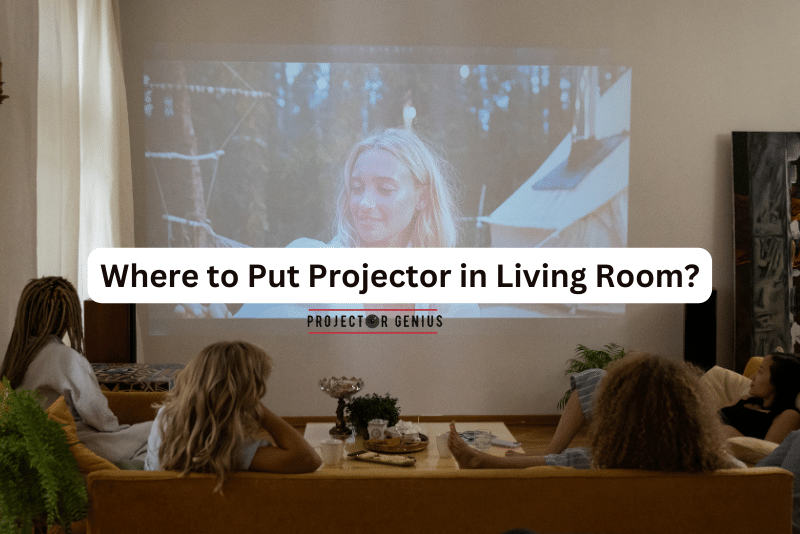
Where to Put Projector in Living Room?
-
 Written by:
Kristy Roger
Written by:
Kristy Roger
- Last Updated:
When it comes to creating a cinematic experience in your living room, the placement of your projector is a critical factor.
Finding the perfect spot for your projector can make or break your home theater setup
In this guide, we’ll explore the best strategies and considerations for deciding where to put projector in a living room, ensuring that you can enjoy immersive entertainment without compromising on aesthetics or functionality.
Where to put projector in living room? The ideal placement for a projector in a living room is typically ceiling-mounted or placed on a dedicated stand or shelf. Consider factors like throw distance, screen size, and avoiding obstacles to ensure a great viewing experience while maintaining the room’s aesthetics.
I recommend using the Table of Contents to quickly access the information you need.
My article is designed to cater to home cinema users of all levels, from Beginners to Advanced enthusiasts.
Table of Contents
Where to Put Projector in Living Room?
Here are Different Projector Setup Ideas to alter your Living Room.
Ceiling Mount Projector Setup
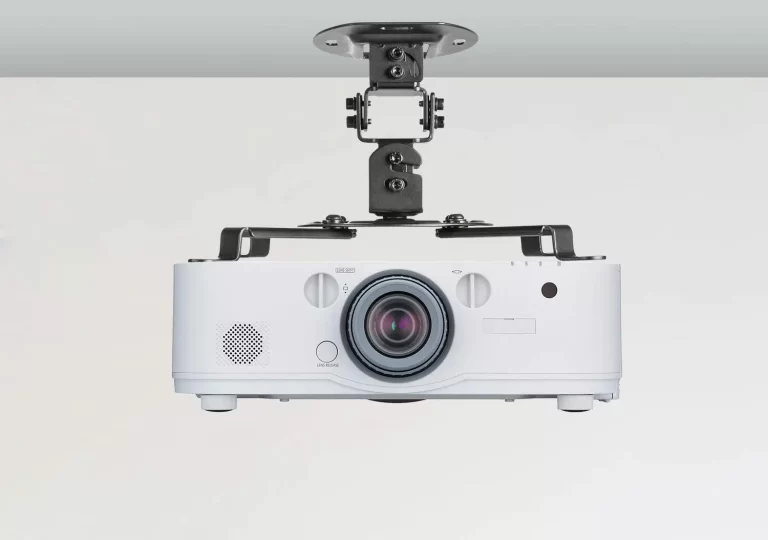
A ceiling mount is a method of setting up a projector in which the projector is securely fixed to the ceiling using a projector mount. Ceiling mounting is a popular and space-saving option. It involves fixing the projector to the ceiling using a projector mount. This setup keeps the projector out of the way and provides a clean look with fewer cables visible. It also reduces the risk of shadows or obstructions in the projection path.
Benefits of Ceiling Mount
Space-saving with Projector
Ceiling mounting allows you to utilize the vertical space in the room, freeing up floor space and keeping the projector out of the way. Small living room or areas with limited space benefit from this, as it eliminates the need for a projector stand or table.
Enhanced Room Aesthetics with Projector
A ceiling-mounted projector seamlessly integrates in a Living Room design, contributing to a clean and clutter-free look. Cables can be concealed along the ceiling or within cable management channels, minimizing visible wires and creating a professional appearance.
Uninterrupted Viewing with Projector
With the projector mounted on the ceiling, the likelihood of people passing in front of it and causing shadows on the screen is reduced. This guarantees an uninterrupted and immersive viewing experience for movies, presentations, or gaming.
Precise Projection with Projector
Ceiling mounting facilitates the precise positioning of the projector to achieve the best projection angle and screen alignment. Adjusting the projector’s tilt, pitch, and yaw becomes easy, ensuring the image is accurately oriented on the screen.
Safety and Stability with Projector
Top-notch projector mounts offer a stable and secure platform for the projector, minimizing the risk of accidental knocks or falls. They are designed to securely hold the projector in place, even when there are minor vibrations or movements in the ceiling.
Efficient Heat Dissipation with Projector
Ceiling mounting aids in dissipating the heat generated by the projector more effectively. Since heat naturally rises, when the projector is mounted on the ceiling, the accumulation of heat in the surrounding area is minimized.
Improved Cooling with Projector
Ceiling mounting facilitates better airflow around the projector, contributing to enhanced cooling and potentially extending the projector’s lamp life and overall lifespan.
Family Together
An advantageous aspect of this arrangement is its ability to unite the entire family. This setup will indeed bring the whole family together as you can host events, parties, or gatherings of family or friends. Additionally, it creates a shared and memorable experience for everyone involved.
It’s crucial to recognize that ceiling mounting demands meticulous planning and installation. Factors such as the projector’s throw distance and the desired screen size need consideration to ensure proper projector positioning for optimal image quality. Additionally, verifying that the ceiling structure can support the projector’s weight and mount is essential. Engaging a professional installer is recommended for accurate mounting and setup, preventing potential damage or safety concerns.
Tabletop Placement
Placing the projector on a sturdy table or shelf is a straightforward setup option. This allows for easy adjustments and mobility if needed. Tabletop placement is especially useful if you frequently move the projector between different rooms or locations.
Benefits of Tabletop Placement
1. Easy Setup
Tabletop placement requires minimal installation effort. You can place the projector on the table, connect the necessary cables, and start using it right away. It is an ideal option for those who prefer a hassle-free setup or do not want to make any permanent modifications to the room.
2. Adjustability
Placing the projector on a table allows for easy adjustments in positioning and image alignment. You can move the projector forward or backward on the table to achieve the desired image size on the screen or wall. Additionally, you can adjust the projector’s tilt and height to fine-tune the projection angle.
3. Mobility
Tabletop placement offers portability, making it convenient if you plan to move the projector between different rooms or locations. Whether you want to set up the projector in a Living Room, bedroom, or outdoor area, or take it to a friend’s house, tabletop placement allows for easy relocation.
4. Cost-effective
This setup option eliminates the need for purchasing a projector mount or ceiling installation, which can be cost-effective, especially if you are on a budget or need a temporary projection solution.
5. Cable Management
With tabletop placement, you have easy access to the projector’s input ports, allowing for straightforward cable management. You can route the cables neatly along the table or use cable organizers to keep the area tidy and avoid cable clutter.
6. Room Flexibility
Placing the projector on a table provides flexibility in choosing the screen location and size within the room. You can project onto a blank wall or use a portable projection screen that can be set up at various distances from the projector.
Despite its advantages, tabletop placement may have some limitations. The projector’s position on the table could obstruct the view of the audience, especially if people are seated close to the table. Additionally, tabletop placement may not be suitable for large-scale installations or setups that require a more permanent and refined appearance.
Overall, tabletop placement is an excellent option for those seeking a flexible, easy-to-adjust, and portable setup for their projector. It is particularly beneficial for casual viewing, gaming, or situations where mobility and quick setup are essential.
Portable Projector Stand
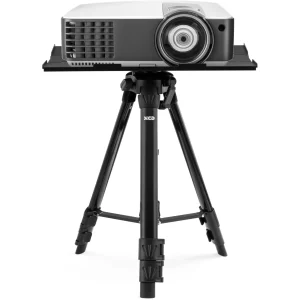
A portable projector stand, also known as a projector cart, is a freestanding and mobile device designed to hold a projector securely at an optimal height and position. This stand provides a convenient solution for setting up and using a projector in different locations or rooms.
Benefits of a portable projector stand
1. Mobility and Portability
Portable projector stands are equipped with wheels or casters, allowing you to move the projector easily from one place to another. This mobility is especially useful if you want to use the projector in multiple rooms, for outdoor events, or during business presentations held in different locations.
2. Adjustable Height
Most portable projector stands come with adjustable height settings. This feature enables you to customize the projector’s position and achieve the desired projection angle and screen alignment. Whether you need to project onto a wall or a dedicated screen, you can adjust the stand’s height accordingly.
3. Sturdy and Stable Design
Despite their portability, portable projector stands are designed to be sturdy and stable. They typically have a solid base and a secure platform to hold the projector securely during use. This ensures that the projector remains steady and stable while projecting images or videos.
4. Cable Management
Many portable projector stands have built-in cable management systems. These systems allow you to organize and conceal the projector’s cables, keeping the setup neat and free from tangled wires.
5. Quick Setup
Using a portable projector stand eliminates the need for permanent installations or complicated mounting procedures. You can set up the stand and projector quickly, making it an ideal solution for temporary or impromptu projection needs.
6. Space-saving
When not in use, portable projector stands can be folded or collapsed for easy storage. This feature is especially beneficial for those with limited storage space or those who only need to use the projector occasionally.
7. Multi-functional
Portable projector stands are versatile and can also serve as AV carts for other presentation equipment, such as laptops, tablets, or audio devices. Some stands may come with additional shelves or compartments for storing accessories and presentation materials.
Overall, a portable projector stand provides a flexible and convenient way to use your projector in various settings. Whether you’re hosting movie nights, giving presentations, or simply enjoying entertainment in different rooms of your home, a portable projector stand allows you to set up and position the projector effortlessly, enhancing the versatility and mobility of your projection setup.
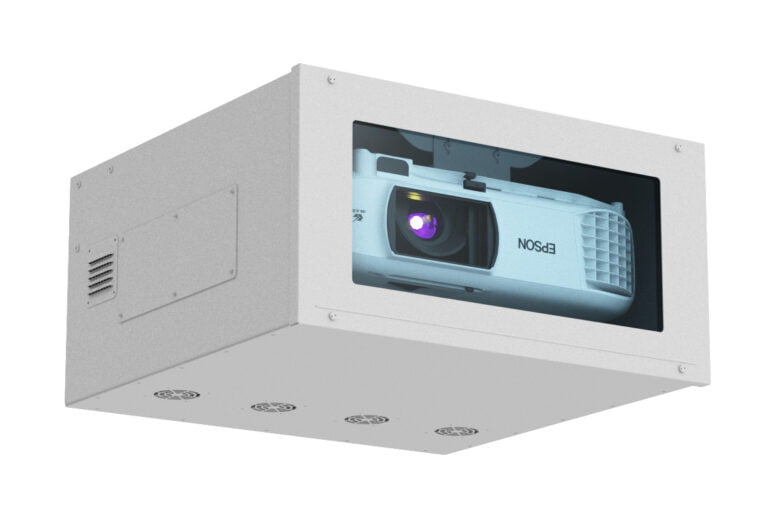
Projector Enclosure or Cabinet
A projector enclosure or cabinet is a custom-built housing designed to conceal and protect the projector when it is not in use. A clean and clutter-free room is achieved with this setup, ensuring the longevity and safety of the projector.
Benefits of a projector enclosure or cabinet
1. Concealment
The primary purpose of a projector enclosure is to hide the projector from view when it is not in use. When the projector is not actively projecting, it can be stored inside the enclosure, keeping it out of sight and maintaining a tidy appearance in a Living Room or entertainment area.
2. Clutter Reduction
By concealing the projector within the enclosure, you can avoid having the projector occupy valuable space on tables, shelves, or ceilings. This helps reduce visual clutter and creates a more organized and streamlined in a room setup.
3. Protection from Dust and Debris
Projector enclosures provide a protective barrier against dust, dirt, and debris that can accumulate over time and affect the projector’s performance. Keeping the projector inside an enclosure helps maintain its internal components in better condition, leading to improved longevity and reliability.
4. Security
An enclosed projector is less exposed to accidental damage or mishandling. This can be especially important in households with children or pets, where the projector might be at risk of being bumped or knocked over.
5. Enhanced Ventilation
Many projector enclosures are designed with ventilation systems that ensure proper airflow around the projector. Adequate ventilation helps dissipate heat generated by the projector, preventing overheating and potential damage to internal components.
6. Customization
Projector enclosures can be customized to fit the specific dimensions of your projector, ensuring a snug and secure fit. Additionally, you can choose from various materials and finishes to match the enclosure with your living room.
7. Easy Access
Enclosures are typically designed with easy access in mind, allowing you to retrieve the projector quickly whenever you want to use it. Some enclosures feature hinged doors or removable panels for convenient access to the projector’s inputs and controls.
When considering a projector enclosure or cabinet, ensure that it is large enough to accommodate the projector comfortably and that it provides adequate ventilation to prevent overheating. Additionally, consider factors such as placement, accessibility, and aesthetics to create a setup that seamlessly integrates your living room with a projector while keeping it protected and hidden when not in use.
Rear Projection
Rear projection is where the projector is positioned behind a specially designed translucent screen and the image is projected onto the backside of the screen. This creates your living room into a seamless and unobstructed front view, as the projector and its components are hidden from sight.
Benefits of Rear Projection
1. Hidden Setup
One of the primary advantages of it is the hidden setup. With the projector placed behind the screen, there is no visible projector in a Living Room. This creates a clean and aesthetically pleasing look, ideal for home theatres, commercial displays, trade shows, and other events where a professional appearance is essential.
2. Unobstructed Front View
Unlike traditional front projection setups where the projector and its light path can cast shadows or obstruct the view, rear projection eliminates such issues. The audience enjoys an unobstructed front view of the content without any distractions or interference.
3. Space-saving
Rear projection helps save valuable floor space in your living room. With the projector positioned behind the screen, there is no need for a dedicated area for the projector itself or a projector mount. This is particularly beneficial in smaller living room or spaces with limited room for equipment.
4. Enhanced Safety
Rear projection offers enhanced safety, as the projector is out of reach and less likely to be tampered with or accidentally bumped. This is advantageous in environments with high foot traffic, public displays, or areas frequented by children.
5. Ambient Light Control
Rear projection is excellent for controlling ambient light. Since the screen is translucent and designed to work with the projector’s light source from behind, it minimizes the impact of external light sources, resulting in better image quality and contrast.
6. Improved Image Quality
Rear projection screens are specifically designed to work with rear projector setups, optimizing light diffusion and reflection for better image quality. The screen material ensures uniform brightness and wide viewing angles, making it suitable for larger audiences.
7. Simplified Installation
Rear projection can be easier to install and set up compared to traditional front projector setups. It eliminates the need for careful projector placement, image alignment, and potential interference with the projection path.
While rear projection offers numerous benefits, it also has some considerations. Rear projection requires dedicated space behind the screen for the projector and appropriate ventilation to dissipate heat effectively. The translucent screen used for rear projection can be more expensive than standard front projection screens.
Rear projection is an excellent choice for situations where a sleek and uncluttered front view is desired, creating an immersive and visually appealing experience for audiences without any visual distractions from the projector.
In-Ceiling Projector Lift
An in-ceiling projector lift is a motorized mechanism designed to hide the projector discreetly in the ceiling when it is not in use and lower it into position when needed for projection. This setup offers a hidden and elegant solution for integrating a projector into a room’s design, especially in environments where a clean and uncluttered appearance is desired.
Benefits of in-ceiling projector lift
1. Hidden Setup
The primary advantage of an in-ceiling projector lift is the ability to conceal the projector completely when it is not in use. This creates a seamless and clutter-free look in the room, as the projector is out of sight and does not interfere with the room’s aesthetics.
2. Space-saving
With the projector hidden in the ceiling, valuable floor and wall space are freed up. There is no need for a projector mount or dedicated area for the projector, making it ideal for rooms with limited space or for maintaining a clean and minimalist design.
3. Protection
Storing the projector in the ceiling when not in use protects it from dust, dirt, and accidental damage. This helps maintain the projector’s internal components in better condition, leading to improved longevity and reliability.
4. Safety
An in-ceiling projector lift ensures the safety of the projector by keeping it securely hidden in the ceiling, away from potential hazards or tampering. This is particularly beneficial in environments with high foot traffic or where there is a risk of the projector being bumped or knocked over.
5. Convenient Setup
When you want to use the projector, simply activate the motorized lift, and the projector smoothly lowers into position for projection. This setup eliminates the need for manual handling and positioning of the projector, making it a convenient and user-friendly solution.
6. Enhanced Ventilation
In-ceiling projector lifts are designed with ventilation in mind to ensure proper airflow around the projector when it is concealed in the ceiling. Adequate ventilation helps dissipate heat generated by the projector, preventing overheating and potential damage to internal components.
7. Automated Control
Some in-ceiling projector lifts come with automation options, allowing you to control the lift using remote controls, wall switches, or even through integration with home automation systems. This adds an extra level of convenience and ease of use.
While in-ceiling projector lifts offer numerous benefits, they require careful planning and installation. The ceiling structure must be able to support the weight of the projector and lift mechanism. Additionally, consideration should be given to the projector’s throw distance and the desired screen size to ensure the projector is positioned correctly for optimal image quality.
In summary, an in-ceiling projector lift provides your living room a sophisticated and hidden solution for incorporating a projector. It creates a clean and clutter-free look, while also protecting and preserving the projector’s functionality for a seamless and enjoyable projection experience.
Short-Throw or Ultra-Short-Throw Projectors for Living Room
Short-throw and ultra-short-throw projectors are specialized types of projectors that offer distinct advantages in specific environments, especially in small living room or areas with limited space. These projectors are designed to be placed close to the screen or wall, allowing for a large projected image even in tight spaces. Here’s a more detailed explanation of short-throw and ultra-short-throw projectors:
1. Short-Throw Projector
Short-throw projectors have a relatively low throw ratio, which means they can project a large image from a short distance. Unlike traditional projectors that require a significant projection distance, short-throw projectors can be placed just a few feet away from the screen or wall. This makes them suitable for smaller living room where there is not much space to position the projector far from the screen.
2. Ultra-Short-Throw Projectors
Ultra-short-throw projectors take the concept of short throw even further by offering an even shorter throw ratio. These projectors can be placed very close to the screen or wall, often just inches away. This creates a larger projected image without the need for much distance between the projector and the screen. Ultra-short-throw projectors are commonly used in interactive whiteboard setups in classrooms or for creating large displays in limited spaces.
Key Advantages of Short-Throw and Ultra-Short-Throw Projectors
1. Space-saving
The most significant advantage of these projectors is their ability to save space. By requiring minimal projection distance, they eliminate the need for a large room or ample space between the projector and the screen. Small living room, classroom, boardroom, or any area with limited space benefit from this.
2. Reduced Shadows
Placing the projector close to the screen reduces the chance of casting shadows on the screen or obstructing the image, as viewers are less likely to walk between the projector and the screen. This provides an uninterrupted and immersive viewing experience.
3. Flexibility in Positioning
Short-throw and ultra-short-throw projectors offer flexibility in projector placement. They can be positioned on a shelf, coffee table, or even mounted on the wall directly above or below the screen. This adaptability allows for creative and convenient installations without the need for a dedicated projector mount.
4. Interactive Features
Ultra-short-throw projectors are often used in interactive applications, such as interactive whiteboards or touch displays. These projectors enable users to interact directly with the projected content, making them valuable tools for education and collaborative work environments.
It’s important to note that while short-throw and ultra-short-throw projectors offer specific benefits, they may have some trade-offs in terms of image brightness and cost compared to traditional projectors.
Additionally, the image size achievable by these projectors is limited compared to standard projectors with longer throw distances. However, for those seeking a projection solution in confined spaces or looking for interactive capabilities, short-throw and ultra-short-throw projectors are excellent options.
Final Thoughts
Compared to different setup, a living room projector emerges as a progressively budget-friendly choice. Projectors have the ability to project an image onto a significantly larger viewing area, whereas a television of similar size would incur substantial costs. Moreover, a living room projector setup allows you to capture every intricate detail in your ultra HD content.
With the right projector and setup, you can transform your living room into a captivating and immersive entertainment space or a productive hub for presentations and educational content.
Author of this Post:

Kristy Roger
Home Cinema Consultant & Tech Enthusiast
Holding a background in Industrial and Electrical Technology from the University of Alberta, Kristy has spent 5+ years consulting on home theater products at a top electronics firm. As a certified Technical Professional with Lean Six Sigma credentials, Kristy expertise ranges from projector nuances to hands-on experience with leading models. Kristy have been sharing her knowledge online for two years, blending professional insights with personal experiences from her own home cinema setup. Off the screen, She is a dedicated mom to Jerry, Ryan, and our two pups, Cuddle and Paw.


