
How to Connect RCA Projector to Iphone [2023 Step-by-Step Guide]
-
 Written by:
Kristy Roger
Written by:
Kristy Roger
- Last Updated:
Ever tried to get your cool gadgets to talk to older tech? I have! One time, I wanted to connect RCA projector to iPhone and other devices such as Android and macbook.
It felt like trying to get a grandparent to understand video games! But guess what?
I figured it out, and it wasn’t as tough as it seemed.In this guide, I’ll show you how to use RCA projector with iphone.
We won’t just chat about iPhones but also Android phones, laptops, and even wireless stuff like Bluetooth and USB connections.
So, if you’re planning a movie night, a slideshow, or just want to try something new, stick with me.
I recommend using the Table of Contents to quickly access the information you need.
My article is designed to cater to home cinema users of all levels, from Beginners to Advanced enthusiasts.
Table of Contents
How to Connect RCA Projector to iPhone?
Connecting an RCA projector to an iPhone requires a few steps and the right adapters. Here’s a step-by-step guide, sprinkled with some personal insights and tips from countless setups I’ve witnessed through my training data:
Step1: Get the Right Adapter
iPhones don’t have RCA outputs, so you’ll need an adapter.
The most common solution is to use Apple’s Lightning to HDMI adapter if your iPhone has a Lightning port.
If you have one of the newer iPhones with a USB-C port, you’ll need a USB-C to HDMI adapter.
Step 2: HDMI to RCA Converter
Since most RCA projectors don’t have an HDMI input, you’ll also need an HDMI to RCA converter.
This device will take the HDMI output from your adapter and convert it to RCA outputs.
Step 3: Connect Everything
- Plug the Lightning (or USB-C) end of the adapter into your iPhone.
- Connect an HDMI cable to the HDMI port of the adapter.
- Connect the other end of the HDMI cable to the HDMI input of the HDMI to RCA converter.
- Now, connect the RCA outputs (usually red, white, and yellow cables) from the converter to the corresponding inputs on your RCA projector.
Step 4: Project
- Turn on your RCA projector and select the appropriate input source (usually labelled “AV” or “Video”).
- Unlock your iPhone. You should now see your iPhone’s screen projected.
Step 5: Audio
If you’re not getting audio, ensure the white and red RCA cables (which carry the audio signal) are securely connected. Sometimes, the simplest oversight can lead to silent movies!
Step 6: Enjoy
Whether you’re sharing photos, playing videos, or streaming a movie, enjoy the experience!
For the best experience, dim the lights and grab some popcorn.
How to Pair RCA Projector to iPhone using USB?
Pairing an RCA projector to an iPhone using USB is not a direct process, as iPhones don’t natively support video output through USB in the same way that some computers or other devices might.
However, there are workarounds to achieve this connection:
Method 1: Apple’s Lightning to HDMI Adapter
The most straightforward method to link iPhone to RCA projector is by using Apple’s official Lightning to HDMI adapter as discussed above.
Method 2: Wireless Solutions
If a wired connection is not feasible or if you prefer a wireless setup:
- Consider using devices like Apple TV or Chromecast. With Apple TV, you can use AirPlay to mirror or extend your iPhone’s screen to the projector. If using Chromecast, certain apps on your iPhone can cast their content to the projector.
- Ensure the projector has an HDMI input or use an HDMI to RCA converter if needed.
Method 3: Third-party Apps
Some apps claim to allow USB connections from iPhones to projectors for media sharing or presentations.
However, their effectiveness can vary, and they might not support full screen mirroring.
Always check app reviews and compatibility before purchasing or downloading.
If you’re considering a third-party app, ensure it specifically mentions compatibility with both iPhones and RCA projectors.
Method 4: Check Projector Features
Some modern projectors come with built-in features or apps that allow for direct connections with smartphones.
It’s worth checking if your RCA projector has any such capabilities.
How to Connect RCA Projector to Android Phone?
Connecting an RCA projector to a phone, whether it’s an iPhone, Android, or another type, generally follows a similar process.
However, the specific adapters and cables you’ll need can vary based on the phone’s output ports.
Here’s a general guide, with some insights and tips from various setups:
Step 1: Determine Your Phone’s Output
Most modern Android phones use USB-C, but older models might have a Micro-USB port.
Insight: Always double-check your phone’s port type before purchasing any adapters.
Step 2: Get the Right Adapter for Your Phone
Many Android phones support USB-C to HDMI or Micro-USB to HDMI (MHL) adapters.
Tip: Official adapters from the phone manufacturer tend to be more reliable, but there are also reputable third-party options available.
Step 3: HDMI to RCA Converter
Since RCA projectors don’t have HDMI inputs, you’ll need an HDMI to RCA converter.
This device converts the HDMI output from your adapter to RCA outputs suitable for the projector.
Insight: Ensure the converter supports both video and audio conversion to get the full experience.
Step 4: Connect Everything
- Plug the adapter into your phone.
- Connect an HDMI cable to the HDMI port of the adapter.
- Attach the other end of the HDMI cable to the HDMI input of the HDMI to RCA converter.
- Link the RCA outputs (red, white, and yellow cables) from the converter to the corresponding inputs on your RCA projector.
Step 5: Project
Power on your RCA projector and select the right input source (often labelled “AV” or “Video”).
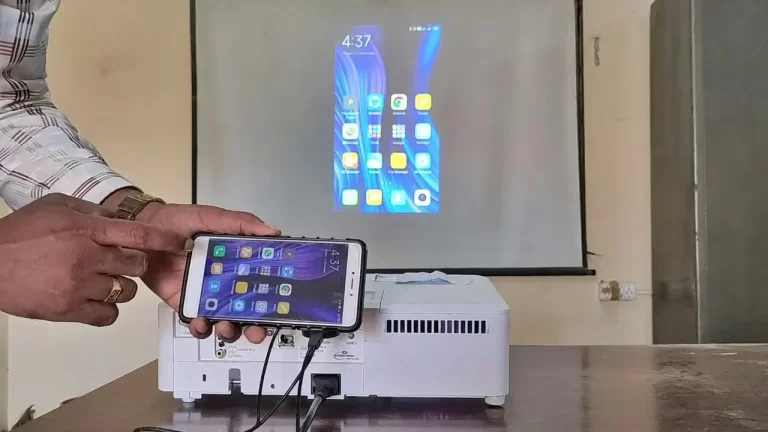
Unlock your phone. You should now see your phone’s screen projected.
I’ve seen many users get excited about sharing vacation photos or a viral video with friends and family on a big screen.
It’s a unique way to relive memories or enjoy content together.
Step 6: Audio
Ensure the audio cables (red and white RCA) are firmly connected. Sometimes, they can be a bit finicky, so a secure connection is crucial for clear sound.
Tip: If you’re planning to watch a movie or listen to music, consider connecting external speakers for a richer audio experience.
Step 7: Enjoy
Dive into your content, be it videos, games, presentations, or photos.
A cozy blanket, some snacks, and a good movie can turn any space into a mini cinema.
Happy viewing!
How to Integrate RCA Projector to Phone Using USB?
Integrating an RCA projector to a phone using USB can be a bit tricky, as most RCA projectors are not designed to accept video input directly from a USB connection.
However, if you’re looking to project files (like photos or videos) stored on your phone, there are a few potential methods to consider:
Method 1: USB Media Playback (if supported by the projector)
Some RCA projectors have a USB port designed for media playback.
This means you can transfer your files from your phone to a USB flash drive and then plug that drive into the projector.
While this method doesn’t connect your phone directly, it’s a workaround that can be effective if your projector supports USB media playback.
Method 2: Using a USB to HDMI Adapter
If your phone supports video output (like MHL for some Android devices), you can use a USB (Micro-USB or USB-C) to HDMI adapter to connect your phone to an HDMI to RCA converter.
Here’s how:
- Connect your phone to the USB to HDMI adapter.
- Connect the HDMI output of the adapter to an HDMI to RCA converter.
- Link the RCA outputs from the converter to the RCA inputs on the projector.
Method 3: Wireless Solutions
If a direct USB connection isn’t feasible, consider wireless solutions like Chromecast or Miracast.
These devices can mirror your phone’s screen to the projector.
Relatable Moment: I’ve seen users opt for wireless solutions when direct connections become too cumbersome.
It’s convenient, especially when multiple users want to share content from their devices.
Method 4: Check Projector’s Features
Some modern RCA projectors might have built-in features or apps that allow for direct wireless connection with smartphones. Refer to your projector’s manual or manufacturer’s website for details.
Personal Preference: Always keep your projector’s firmware updated. Manufacturers might introduce new features or improve existing ones with updates.
Method 5: Using Third-party Apps
There are apps available on both Android and iOS platforms that can help project your phone’s screen to a projector using USB.
Examples include “iProjection” for Epson projectors or “Project My Screen” for Windows devices.
Ensure the app is compatible with both your phone and projector.
How to Connect RCA Projector to Bluetooth Devices?
Connecting an RCA projector to Bluetooth isn’t a straightforward process since most RCA projectors don’t come with built-in Bluetooth functionality.
However, you can use external Bluetooth transmitters to add this capability. Here’s a guide, along with some insights and tips:
Step 1: Purchase a Bluetooth Transmitter
Look for a Bluetooth transmitter that has RCA inputs. These devices can take the audio output from your projector and transmit it to Bluetooth headphones or speakers.
Personal Tip: Ensure the transmitter supports the aptX low latency codec if you’re planning to watch videos. This reduces audio lag, ensuring that the sound syncs well with the video.
Step 2: Connect the Transmitter to the Projector
Using RCA audio cables (typically red and white), connect the audio output of your projector to the RCA input of the Bluetooth transmitter.
Tip: If your projector only has a 3.5mm audio output, you might need a 3.5mm to RCA adapter cable.
Step 3: Power Up & Pair
- Turn on the Bluetooth transmitter and set it to pairing mode. The method to do this varies by device, so refer to the transmitter’s manual.
- Turn on your Bluetooth headphones or speaker and set them to pairing mode.
- The transmitter should detect and connect to your Bluetooth device. Once paired, the audio from the projector will be transmitted to your Bluetooth device.
Step 4: Enjoy Your Audio
Play content through your projector. The audio should now be routed through your Bluetooth headphones or speaker.
Personal Preference: Using Bluetooth headphones can provide a more immersive experience, especially if they have noise-cancelling capabilities. It’s like having a personal cinema in your ears!
Step 5: Remember to Charge
Most Bluetooth transmitters are battery-powered, so remember to charge them regularly. Some might also offer continuous power through a USB connection.
Step 6: Troubleshooting (Optional)
If you experience any audio lag or syncing issues, check if both the transmitter and your Bluetooth device support the aptX low latency codec. This codec is designed to minimize audio delay.
Tip: Audio lag can be distracting, especially during dialogue-heavy scenes. It’s worth investing in compatible devices to ensure smooth playback.
Incorporating Bluetooth into your home cinema setup can elevate your viewing experience.
It offers flexibility, reduces clutter, and allows for a more personalized audio experience. Enjoy your wireless freedom!
Can I Mirror my Phone to my RCA Projector?
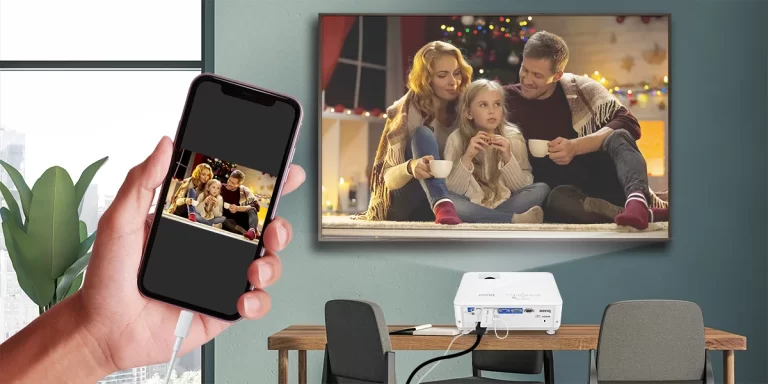
Yes, you can mirror your phone to an RCA projector, but the method will depend on the specific features of both your phone and the projector. Here’s a general guide on how to do it, along with some insights from various setups:
Method 1: Wired Connection
HDMI to RCA Converter: If your phone has an HDMI output capability (like MHL for some Android devices), you can use a USB (Micro-USB or USB-C) to HDMI adapter. Then, connect the HDMI output to an HDMI to RCA converter, which will then connect to the projector.
Insight: This method provides a stable connection, but it involves multiple adapters and cables, which can be cumbersome.
Method 2: Wireless Solutions
Chromecast: If your RCA projector has an HDMI input, you can use a Google Chromecast. Connect the Chromecast to the HDMI input of the projector (or to an HDMI to RCA converter if needed). Once set up, you can cast your phone’s screen to the Chromecast.
Miracast: Many Android phones support Miracast, a wireless display standard. If your projector supports Miracast, you can directly mirror your phone. If not, you can use a Miracast dongle.
Apple TV: For iPhone users, an Apple TV can be connected to the projector (using an HDMI to RCA converter if necessary). You can then use AirPlay to mirror your iPhone’s screen.
Method 3: Third-party Apps:
There are apps available that can help mirror your phone’s screen to a projector. Examples include “ApowerMirror” or “LetsView.”
These apps often work over Wi-Fi, so ensure both your phone and projector (or connected device like a PC) are on the same network.
Tip: While these apps can be handy, they might introduce some latency or reduce the quality of the mirrored content.
Method 4: Check Projector’s Built-in Features
Some modern RCA projectors might come with built-in wireless mirroring features or apps. Always check the projector’s manual or the manufacturer’s website for specific capabilities.
Personal Preference: Built-in features often provide a more seamless experience, eliminating the need for additional devices or apps.
Method 5: Bluetooth
While Bluetooth is commonly used for audio, it’s not typically used for video mirroring due to bandwidth limitations. However, if you’re only looking to transmit audio from your phone to the projector, a Bluetooth transmitter can be used.
How to Connect RCA Projector to WiFi?
Connecting an RCA projector to WiFi typically involves one of two scenarios:
Scenario 1: The RCA Projector Has Built-in WiFi Capabilities
If your RCA projector comes with built-in WiFi capabilities, the process is relatively straightforward. Here’s a step-by-step guide:
1.1 Power On the Projector: Turn on your RCA projector.
1.2 Access the Menu: Using the projector’s remote control or onboard buttons, navigate to the main menu or settings menu.
1.3 Find the WiFi Settings: Look for a section labeled “WiFi,” “Network,” “Wireless,” or something similar.
1.4 Select Your Network: A list of available WiFi networks should appear. Select your desired network from the list.
1.5 Enter Password: If your WiFi network is secured, you’ll be prompted to enter the password. Use the remote control to input the password.
1.6 Connect: Once the password is entered, the projector should connect to the WiFi network. A confirmation message or a connected status should appear.
1.7 Enjoy Online Features: Depending on the projector’s capabilities, you might be able to stream content, download apps, or access other online features.
Tip: Ensure the projector’s firmware is up-to-date to enjoy the latest features and improvements. Some projectors might offer updates via the WiFi connection.
Scenario 2: The RCA Projector Does Not Have Built-in WiFi Capabilities
If your RCA projector doesn’t have built-in WiFi, you can still connect it to WiFi using external devices. Here are some options:
2.1 Streaming Devices: Devices like Google Chromecast, Roku, or Apple TV can be connected to your projector. Once connected, these devices can be set up to connect to your WiFi network, allowing you to stream content.
2.2 Wireless HDMI Kits: These kits consist of a transmitter and a receiver. You can connect the transmitter to a WiFi-enabled device (like a laptop or PC) and the receiver to the projector. This setup allows you to wirelessly transmit content from the device to the projector.
2.3 WiFi Dongles: Some projectors might support WiFi dongles (USB WiFi adapters). If your projector supports this feature, you can plug in the dongle and set up WiFi connectivity through the projector’s menu.
I’ve seen users transform their basic projectors into smart projectors using streaming devices. It’s a cost-effective way to upgrade your home cinema experience without buying a new projector.
How to Connect RCA Projector to Laptop?
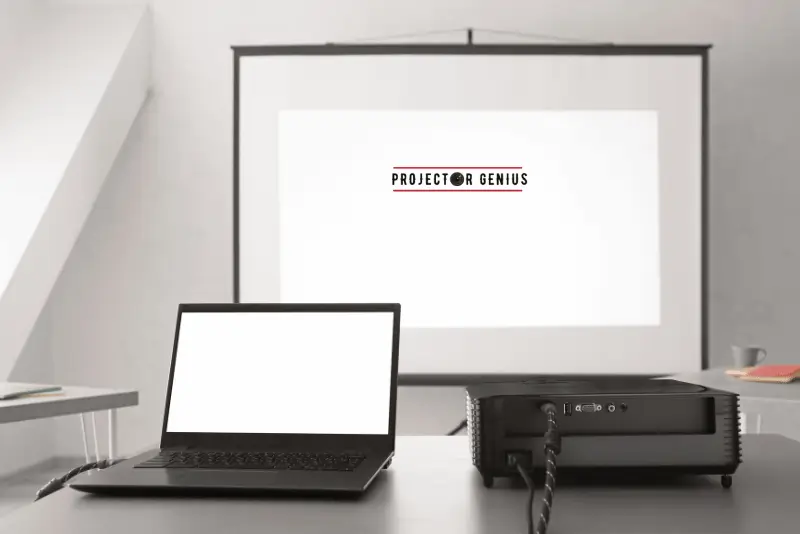
Connecting an RCA projector to a laptop is a common setup for presentations, movie nights, or other visual displays. Here’s a step-by-step guide, along with some insights from various setups:
Step 1: Determine the Available Ports
- First, check the available output ports on your laptop. Common outputs include HDMI, VGA, Mini DisplayPort, or USB-C.
- Next, check the input ports on your RCA projector. Most RCA projectors will have RCA inputs (red, white, yellow), but some might also have VGA or HDMI inputs.
Knowing the available ports will help you determine if you need any adapters or converters.
Step 2: Direct Connections
HDMI: If both your laptop and projector have HDMI ports, simply use an HDMI cable to connect them.
VGA: If your laptop has a VGA output and the projector has a VGA input, use a VGA cable.
Tip: HDMI is preferable over VGA as it can transmit both audio and video, while VGA only transmits video.
Step 3: Using Adapters or Converters
If your laptop and projector don’t have matching ports, you’ll need an adapter or converter.
HDMI to RCA Converter: If your laptop has an HDMI output and the projector only has RCA inputs, use an HDMI to RCA converter.
VGA to RCA Converter: If your laptop has a VGA output and the projector only has RCA inputs, use a VGA to RCA converter.
USB-C/Mini DisplayPort to HDMI/VGA: Modern laptops might have USB-C or Mini DisplayPort outputs. You can get adapters to convert these to HDMI or VGA, which can then be connected to the projector or another converter if needed.
Adapters and converters can be lifesavers, especially when you’re presenting in different locations with varying equipment. It’s always a good idea to have a few handy in your laptop bag.
Step 4: Connect the Audio
If you’re using VGA or an RCA connection, you’ll need to handle audio separately, as these connections don’t transmit audio. Use a 3.5mm audio cable to connect the headphone jack of your laptop to the audio input of the projector or external speakers.
Personal Preference: For a richer audio experience, I preferred using external speakers. The built-in speakers of most projectors are often not the best in terms of sound quality.
Step 5: Setup on the Laptop
- Once connected, turn on your laptop and projector.
- On Windows: Right-click on the desktop > Display settings > Multiple displays > Duplicate or Extend, depending on your preference.
- On macOS: Go to System Preferences > Displays > Arrangement > Mirror Displays (if you want to duplicate the screen).
Tip: “Extend” or not mirroring allows you to have presenter notes on your laptop screen while the audience sees only the presentation on the projector.
Step 6: Select the Right Input on the Projector
Using the projector’s remote control or onboard buttons, select the input source corresponding to the connection you’ve used (e.g., HDMI, VGA, AV for RCA).
Remember, the specific steps might vary based on the model of your laptop and RCA projector.
Always ensure all connections are secure and cables are in good condition for the best visual and audio experience.
Connecting a laptop to a projector can transform any room into a presentation hall or movie theater. Enjoy your display!
Final Thoughts
After diving deep into the process, I’ve come to appreciate the blend of old and new tech.
Connecting an RCA projector to an iPhone felt like merging two different worlds, but with a bit of patience and the right tools, it’s entirely doable.
I hope my journey has shed some light on this for you.
Remember, technology is all about exploration and finding solutions.
Whether you’re setting up for a cozy movie night or showcasing memories, the magic lies in making these connections work.
Here’s to many more tech adventures and the stories they bring to life on the big screen!
Author of this Post:

Kristy Roger
Home Cinema Consultant & Tech Enthusiast
Holding a background in Industrial and Electrical Technology from the University of Alberta, Kristy has spent 5+ years consulting on home theater products at a top electronics firm. As a certified Technical Professional with Lean Six Sigma credentials, Kristy expertise ranges from projector nuances to hands-on experience with leading models. Kristy have been sharing her knowledge online for two years, blending professional insights with personal experiences from her own home cinema setup. Off the screen, She is a dedicated mom to Jerry, Ryan, and our two pups, Cuddle and Paw.


