
How To Adjust Projector To Fit Screen [4 Tested Methods]
-
 Written by:
Kristy Roger
Written by:
Kristy Roger
- Last Updated:
Ever struggled with getting your projector to perfectly fit the screen?
I remember when I faced the same issue while setting up my home cinema. But don’t fret! Here are several tried-and-true methods to adjust projector to fit screen:
- Adjusting the zoom and focus for that perfect fit.
- Exploring keystone correction for a distortion-free view.
- Navigating aspect ratios to match your content seamlessly.
- Fine-tuning color and brightness for an optimal visual experience.
Ready to dive in? Let’s get started!
I recommend using the Table of Contents to quickly access the information you need.
My article is designed to cater to home cinema users of all levels, from Beginners to Advanced enthusiasts.
Table of Contents
Step-by-Step Guide to Adjust Projector to Fit Screen
Adjusting a projector to fit your screen correctly is a crucial step in creating a stunning home cinema experience.
I’ve had my fair share of trial and error with various projector models in my own home cinema, so here’s a step-by-step guide on how to do it right:
Step 1: Position the Projector
Select the Ideal Location: First, choose where you want to place your projector. This should be determined by factors like room layout, screen size, and throw distance (the distance between the projector and the screen). Be mindful of the projector’s lens center, as this is where the image will be projected from.
Step 2: Set Up the Projector
Connect Your Sources: Connect your video sources, such as a Blu-ray player, gaming console, or streaming device to the projector. Make sure all cables are properly plugged in.
Power On: Turn on the projector and let it warm up. This may take a few minutes.
Step 3: Adjust the Image Size and Focus
Zoom and Lens Shift: If your projector has a zoom lens and lens shift, use these adjustments to change the image size and position on the screen. Zoom in or out to make the image larger or smaller, and use lens shift to move the image up, down, left, or right.
Keystone Correction: If your projector is not perfectly aligned with the screen, you might need to use keystone correction to adjust the image’s shape and make it rectangular.
Focus: Adjust the projector’s focus until the image is sharp and clear. This is usually done by rotating the focus ring on the projector lens.
Step 4: Fine-Tune the Image
Screen Position: Ensure the screen is mounted or positioned correctly. It should be level and at the right height for your audience. Use a level to make sure it’s not tilted.
Projector Position: If you have the flexibility to move the projector, fine-tune its position for the best image size and focus. Keep the projector perpendicular to the screen to minimize distortion.
Step 5: Test and Adjust
Test Different Content: Play a variety of content (movies, games, etc.) to make sure the image fits well for all types of media. Sometimes, you may need to make small adjustments for specific sources.
Step 6: Save Your Settings
Save Presets: Many projectors allow you to save your preferred settings as presets. This is particularly helpful if you switch between different aspect ratios or content types frequently.
Step 7: Calibrate for Best Picture Quality
Color and Brightness: Use the projector’s built-in calibration settings or a calibration disc to optimize color accuracy and brightness. Adjust settings like contrast, color temperature, and gamma.
Step 8: Maintain Your Setup
Regular Checks: Periodically check your projector’s position and settings, as they can shift over time. Dust the lens and clean the filters to maintain optimal image quality.
How do I Adjust Projector to Fit Screen with Remote?
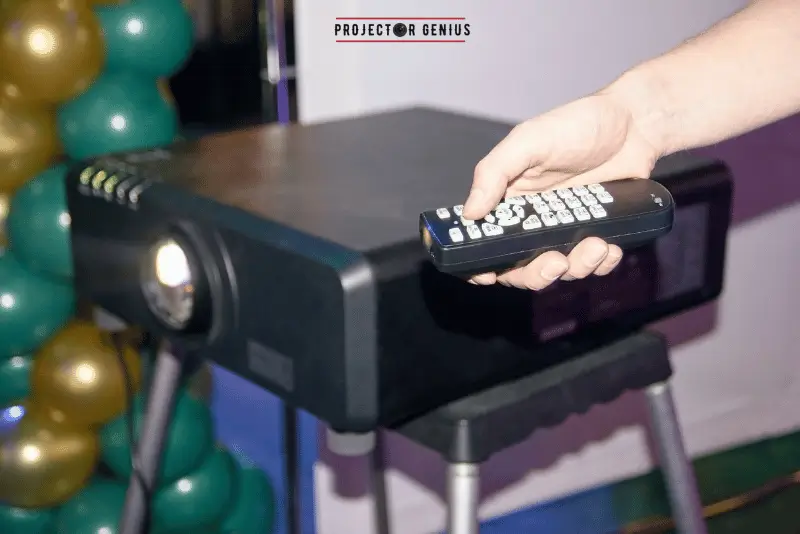
Adjusting a projector to fit your screen using a remote control can be a convenient process. Here’s a step-by-step guide based on my own hands-on experiences with various projector models:
Step 1: Power On the Projector and Select Input Source
Turn On the Projector: Use the power button on the remote control to turn on the projector. Allow it a few moments to warm up.
Select Input Source: Use the remote to navigate to the input source menu. This could be labeled as “Source,” “Input,” or something similar. Choose the source (e.g., HDMI, VGA, etc.) that is connected to your video device.
Step 2: Access the Menu
Open the Menu: Look for a button on the remote labeled “Menu” or a similar term. Press it to access the projector’s settings menu.
Step 3: Adjust Image Size and Position
Navigate to Image Settings: Within the menu, locate the settings related to image adjustment. This might be under options like “Image,” “Picture,” or “Projection Settings.”
Zoom and Lens Shift (If Available): Some projectors have zoom and lens shift capabilities that allow you to adjust the image size and position. Use the corresponding buttons on the remote to make these adjustments.
Keystone Correction (If Needed): If the projector isn’t perfectly aligned with the screen, you can use keystone correction. Navigate to the keystone adjustment options and use the remote to correct the image’s shape.
Step 4: Focus the Image
Locate Focus Settings: Look for options related to focus or sharpness within the menu.
Adjust Focus: Use the remote’s arrow buttons or dedicated focus buttons to fine-tune the focus until the image is sharp and clear.
Step 5: Test and Fine-Tune
Test Different Content: Play various types of content to ensure the image fits well for all media. You may need to make small adjustments for specific sources.
Step 6: Save Presets (If Available)
Save Settings: Some projectors allow you to save your preferred settings as presets. This can be particularly useful if you switch between different aspect ratios or content types frequently.
Step 7: Exit the Menu
Close the Menu: Once you’re satisfied with the adjustments, navigate to the option to exit or close the menu.
Step 8: Additional Calibrations (Optional)
Fine-Tune Color and Brightness: If needed, you can further optimize color accuracy and brightness using the calibration options in the menu.
Step 9: Power Off
Turn Off the Projector: When you’re finished using the projector, use the power button on the remote to turn it off.
How to Fix the Aspect Ratio on Projector?

Fixing the aspect ratio on your projector is important for ensuring that the images are displayed correctly without distortion. I’ve created a step-by-step guide based on my experience with different projector models:
Step 1: Access the Menu
Turn On the Projector: Use the power button on the remote control to turn on the projector. Allow it a few moments to warm up.
Open the Menu: Look for a button on the remote labeled “Menu” or a similar term. Press it to access the projector’s settings menu.
Step 2: Navigate to Aspect Ratio Settings
Locate Aspect Ratio Options: Within the menu, look for options related to aspect ratio, picture size, or screen format. This might be under options like “Image,” “Picture,” or “Projection Settings.”
Step 3: Select the Correct Aspect Ratio
Choose the Desired Ratio: Use the arrow buttons on the remote to navigate through the available aspect ratio options. Common aspect ratios include 4:3 (standard), 16:9 (widescreen), and 2.35:1 (cinemascope), among others.
View the Changes: As you cycle through the aspect ratio options, the image on the screen will change to reflect the selected ratio. Choose the one that best fits your screen and content.
Step 4: Test Different Content
Play Various Content: Test the selected aspect ratio with different types of content (movies, games, etc.) to ensure that it displays correctly and without distortion.
Step 5: Save Settings (If Available)
Save as Preset (Optional): Some projectors allow you to save your preferred aspect ratio setting as a preset. This can be particularly useful if you frequently switch between different content types.
Step 6: Exit the Menu
Close the Menu: Once you’re satisfied with the aspect ratio settings, navigate to the option to exit or close the menu.
Step 7: Test Again
Double-Check: Play different content again to make sure the aspect ratio is consistent and correct.
How to Make the Projector Screen Smaller without moving it?
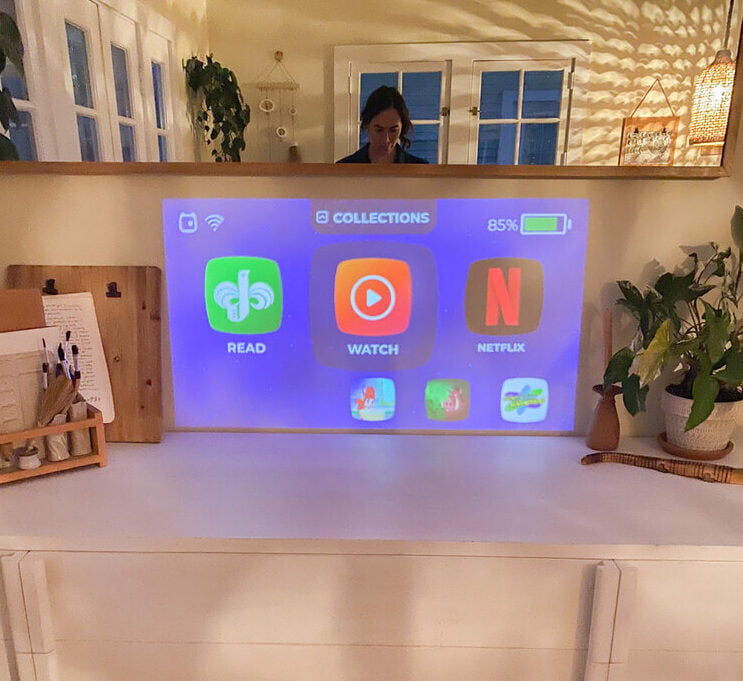
If you want to make the projected image on your screen smaller without physically moving the projector, you have a few options:
1. Adjust Zoom
If your projector has a zoom lens, you can use it to make the image smaller:
- Access the projector’s menu using the remote control.
- Look for an option related to “Zoom” or “Lens Adjustment.”
- Use the zoom controls to decrease the image size.
2. Change the Screen Aspect Ratio
If your projector and screen support different aspect ratios, you can select a smaller aspect ratio to reduce the size of the image:
- Access the projector’s menu using the remote control.
- Look for an option related to “Aspect Ratio” or “Screen Format.”
- Choose a smaller aspect ratio (e.g., from 16:9 to 4:3) if available.
3. Use Keystone Correction
Keystone correction adjusts the shape of the image. While it’s primarily used for correcting distortion when the projector isn’t aligned perfectly with the screen, you can use it very subtly to shrink the image:
- Access the projector’s menu using the remote control.
- Find the “Keystone Correction” option.
- Make small adjustments to slightly reduce the size.
Please note that using keystone correction excessively can lead to a loss in image quality, so use this option sparingly.
Frequently Asked Questions (FAQs)
How do I know which Aspect Ratio to Choose for my Screen?
Choosing the right aspect ratio depends on the content you’ll be projecting. If you’re mainly watching movies or using a widescreen format, go for 16:9. For presentations or older content, 4:3 might be a better fit.
Remember, it’s about matching the aspect ratio of your projector with the content you’ll enjoy most.
What is Keystone Correction and when should I use it?
Keystone correction is a nifty feature that helps correct the trapezoidal distortion that can occur when a projector is not perfectly aligned with the screen.
Essentially, it digitally adjusts the image to make it appear square and straight, even if the projector is at an angle.
You should use keystone correction when you’re unable to position the projector directly in front of the screen due to space constraints or other factors.
It’s especially handy in situations where getting the projector perfectly aligned isn’t possible, like in a small room or at an odd angle.
However, keep in mind that while keystone correction is a useful tool, it’s best to use it sparingly. Excessive use can slightly reduce image quality. So, whenever you can, try to position the projector as squarely as possible to get the best visual experience.
Final Thoughts
In this guide, I’ve walked you through a comprehensive tutorial on adjusting the projector to fit your screen perfectly.
Based on my hands-on experiences with various projector models, I’ve covered essential steps, from precise positioning to fine-tuning image size and focus.
By accessing the projector’s menu and utilizing the remote control, you can create an immersive cinematic experience in your own home.
Remember, calibration for accurate colors and brightness, along with regular maintenance, ensures optimal performance.
With these adjustments, your home cinema can transform into a haven for cinematic experiences, delivering unparalleled entertainment in the comfort of your own space.
Enjoy the immersive visuals, and feel free to share your feedback or any questions you may have in the comments below. Thank you for reading!
Author of this Post:

Kristy Roger
Home Cinema Consultant & Tech Enthusiast
Holding a background in Industrial and Electrical Technology from the University of Alberta, Kristy has spent 5+ years consulting on home theater products at a top electronics firm. As a certified Technical Professional with Lean Six Sigma credentials, Kristy expertise ranges from projector nuances to hands-on experience with leading models. Kristy have been sharing her knowledge online for two years, blending professional insights with personal experiences from her own home cinema setup. Off the screen, She is a dedicated mom to Jerry, Ryan, and our two pups, Cuddle and Paw.


