
How to Fix Projector Blue Tint Problem?[ 6 Steps Troubleshooting Guide]
-
 Written by:
Kristy Roger
Written by:
Kristy Roger
- Last Updated:
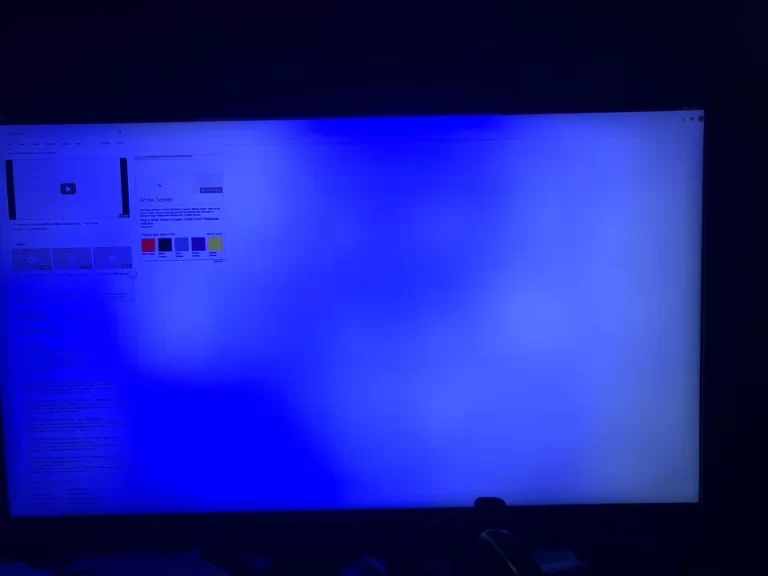
Ah, the infamous blue tint on the projector! I’ve faced color issues a few times myself. It’s a bit frustrating when everything you project has a chilly, blue hue, right?
But don’t fret! I’ve found some straightforward solutions to tackle this problem. Let’s roll up our sleeves and get that projector displaying colors correctly, without that pesky blue overlay. Ready to dive in?
I recommend using the Table of Contents to quickly access the information you need.
My article is designed to cater to home cinema users of all levels, from Beginners to Advanced enthusiasts.
Table of Contents
What Are the Common Causes of Projector Blue Tint?
Let’s delve into the common culprits behind that pesky blue tint on your projector screen. Understanding these factors can help us pinpoint the issue and get it sorted out.
Incorrect Color Settings
You’d be surprised how often this happens. Sometimes, the default color settings on a projector might not be calibrated properly, leading to a noticeable blue tint. I remember setting up a leading projector model in my own home cinema and facing a similar issue. It’s like having your TV’s color settings set too high, but in this case, it’s leaning towards blue. We’ll need to dive into the projector’s menu settings and make some adjustments.
Cable Issues
Cables are the unsung heroes of home entertainment systems, but they can also be the source of problems. If a cable is damaged, improperly connected, or simply not up to the task, it can lead to color imbalances, including that annoying blue tint. We’ll want to check all the connections and possibly swap out the cable for a fresh one.
Source Device Problems
The source device, be it a DVD player, gaming console, or computer, can sometimes be the culprit. If the output signal from the device isn’t quite right, it can result in odd coloration on the projector screen. We’ll need to verify the settings on the source device and perhaps test with a different one to see if that’s the issue.
Lamp Life
Projectors use lamps to produce light, and these lamps have a finite lifespan. As they near the end of their life, they can sometimes start to skew colors, including adding a blue hue. Checking the usage hours of the lamp is a crucial step. If it’s on its last legs, it might be time for a replacement.
These are the main suspects when it comes to the projector blue tint problem. By understanding these common causes, we’re better equipped to tackle the issue head-on and get your home cinema back in top form.
How to Fix Projector Blue Tint Problem? Step-by-Step Guide
Now that we’ve identified the common causes of the blue tint on your projector, let’s roll up our sleeves and get to work. Follow these detailed steps to restore your projector’s color balance and enjoy a crisp, vibrant display:
Step 1: Accessing Color Settings
Alright, the first thing we want to do is get into the nitty-gritty of your projector’s settings. Power up your projector and make sure it’s displaying an image.
Using either your projector’s remote control or the buttons on the projector itself, look for the menu button or on-screen display (OSD) button. This is usually represented by a little gear icon or something similar.
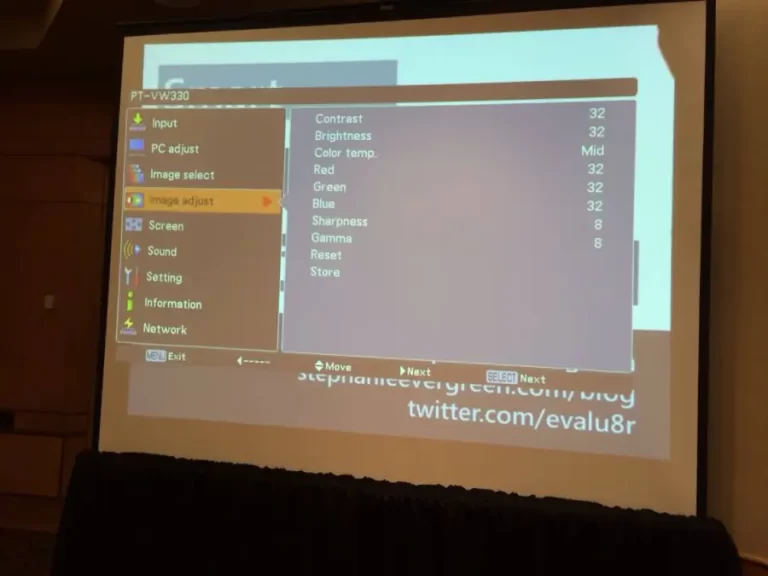
Once you’ve located it, press it. This should bring up the menu options on your screen. Now, let’s navigate through these options until we find what we’re looking for – the “Color” or “Picture” settings. They might also be labeled as “Display” or “Image” settings, depending on your model.
Within this menu, you’re likely to come across specific options like “Color Temperature,” “Tint,” or “Color Balance.” These are the ones we’re interested in. They allow us to tweak the color output.
Step 2: Resetting to Default Values
Now, if you’ve found the color settings, there should be an option to reset them back to their factory default values. This can be a real lifesaver.
Select this option and follow the prompts to confirm the reset. What this does is essentially take all the color-related settings back to the way the manufacturer intended them. It’s like hitting the reset button on a puzzle – everything falls back into place.
Step 3: Adjusting White Balance
If, after the reset, the blue tint is still giving you grief, it’s time for some fine-tuning. We’re going to play around with the white balance.
Within the color settings, you’ll find options like “Red Gain,” “Green Gain,” and “Blue Gain.” These represent the intensity of each primary color.
Gradually, and I mean very gradually, adjust the blue gain slightly downward. Pay close attention to the projection as you make these adjustments. You’re looking for that blue tint to fade away. It’s a bit like adjusting a radio dial to get the perfect signal.
Step 4: Checking Cable Connections
This one’s often overlooked, but it’s important. Let’s ensure our connections are solid.
First off, power down both the projector and the source device – be it a DVD player, laptop, or what have you.
Now, take a close look at the cables connecting the source device to the projector. Are they snugly plugged in? Any signs of wear or damage? If so, it might be time for a replacement.
If possible, try using a different cable altogether. This helps rule out any potential issues with the cable itself.
Step 5: Testing with Different Sources
This step is about detective work. We want to see if the issue is specific to one source device.
So, grab another device – it could be a different DVD player, computer, or game console. Connect it to the projector and observe. Does the blue tint persist, or is the image clear?
If the blue tint is still present, it’s more likely a projector issue. If not, the problem might lie with the original source device.
Step 6: Checking Lamp Usage Hours
Projector lamps have a lifespan, just like any other bulb. We want to make sure yours isn’t nearing the end of its journey. I’ve tested various projector models, and it’s always surprising how a simple lamp replacement can revitalize the entire system.
Access the projector’s menu once more and find the section that provides information about the lamp or usage hours. Here, you’ll get details about how many hours the lamp has been in action.
If it’s getting close to its maximum recommended usage, it might be time to consider a replacement. A fresh lamp can make a world of difference in color accuracy.
Advanced Troubleshooting Steps
Step 1: White Balance Adjustment
Okay, we’re diving into the fine-tuning territory now. The white balance is a critical setting for achieving accurate colors. It determines the intensity of the primary colors (red, green, and blue) in the projected image.
- Accessing White Balance Settings: Go back to the color settings menu we explored earlier. Look for options like “Red Gain,” “Green Gain,” and “Blue Gain.” These controls allow you to adjust the intensity of each color channel.
- Balancing the Colors: To correct the blue tint, focus on the blue gain. Gradually reduce it. Keep a close eye on the projection while making these adjustments. You’re aiming for a balanced, natural-looking image.
- Fine-Tuning: Make small adjustments, and pause to observe the changes. It’s a bit like tuning a musical instrument – patience and small adjustments are key.
Step 2: Factory Reset
If we’re still struggling with that blue tint, a factory reset can be a powerful tool.
- Accessing Factory Reset Option: Head back to the main menu, and look for the option related to system or settings. There should be an option to perform a factory reset.
- Confirming the Reset: Once you’ve found it, confirm your choice. Remember, this will revert all settings back to the way they were when the projector left the factory.
- Reconfiguration: After the reset, you’ll need to set up your preferences again. This includes language, display mode, and any other customized settings you had.
Step 3: Firmware Updates
Sometimes, a software update can be the key to resolving certain issues.
- Checking for Updates: Visit the manufacturer’s website or consult the projector’s user manual to find out how to check for firmware updates. This might involve connecting the projector to a computer.
- Installing Updates: If an update is available, follow the provided instructions for installation. This process can vary depending on the projector model.
- Post-Update Testing: After the update is complete, test the projector to see if the blue tint issue has been resolved.
Frequently Asked Questions (FAQs)
What is causing the Blue Tint on my Projector?
Alright, let’s tackle the elephant in the room: that bothersome blue tint on your projector. It’s a frustration we’ve all faced at one point or another. The culprit here usually boils down to a few common factors.
One, it could be a simple case of incorrect color settings. Tweaking those knobs and buttons without a clear understanding can lead to a blue hue takeover. Then, there’s the possibility of cable issues. Believe it or not, a faulty or incompatible cable can wreak havoc on your color output.
Sometimes, it’s the source device itself that’s causing the ruckus. Incorrect output settings or a problematic HDMI port can be the root of the issue. And let’s not forget our trusty projector lamp – if it’s nearing the end of its operational hours, it might be dimming out and causing that blue tint to rear its head.
How do I Access Color Settings on my Projector?
Accessing the color settings on your projector is a crucial step in tackling that pesky blue tint issue. Let’s walk through it together:
- Power Up the Projector: First things first, make sure your projector is turned on and displaying an image.
- Locate the Menu Button: Look for the menu button on your projector or its remote control. It’s usually represented by an icon that looks like a little gear or a set of sliders.
- Navigate to the Color Settings: Press the menu button to bring up the on-screen menu. From here, you’ll see a list of options. Look for anything related to “Color,” “Picture,” or “Display.” These are the settings we want to adjust.
- Explore the Color Menu: Once you’ve found the color settings, dive in. You might come across options like “Color Temperature,” “Tint,” or “Color Balance.” These are the controls that influence the color output.
- Make Adjustments: Depending on your specific model, you’ll have different ways to adjust these settings. It might involve arrow keys, a dial, or a slider. Play around with them to see how they affect the image.
Can using a different cable solve the Blue Tint issue?
Absolutely, trying out a different cable can actually be a game-changer when dealing with that persistent blue tint on your projector. Here’s the lowdown:
You see, cables are like the unsung heroes of our entertainment setup. They carry the signals from our devices to the projector, and sometimes, they can be the source of unexpected color issues.
A damaged or incompatible cable can disrupt the signal, resulting in color imbalances, including that annoying blue tint. Swapping it out for a different, reliable cable can often work wonders in restoring the color accuracy.
So, if you’re facing this blue tint problem, it’s definitely worth giving a different cable a shot. It’s a simple fix that might just save you a lot of frustration and enhance your viewing experience. Trust me, I’ve seen it work wonders!
Is it possible to fix the Blue Tint without professional help?
Yes, it’s entirely possible to tackle the blue tint issue on your projector without needing to call in the cavalry. Many times, it’s a matter of understanding the settings and making a few adjustments. I’ve personally fixed similar issues in my own home cinema setup, watching movies with my kids, Jerry and Ryan, and enjoying a perfect visual experience.
With some patience and a bit of troubleshooting, you can often pinpoint the cause of the blue tint and take steps to correct it. This might involve resetting color settings, adjusting white balance, or even trying out a different cable.
Of course, if you’re ever unsure about a particular step or if the issue persists after your efforts, don’t hesitate to seek professional help. They have the expertise to handle more complex problems. But rest assured, many times, you can get your projector back to top form with a bit of DIY troubleshooting.
What should I do if the Lamp is nearing the end of its life?
If you find yourself in a situation where the lamp in your projector is nearing the end of its operational hours, don’t panic. This is a pretty common scenario, and there’s a straightforward solution.
First things first, consult your projector’s user manual or menu options to find out how to check the lamp usage hours. This will give you a clear idea of just how close it is to the end of its lifespan.
If it’s approaching the maximum recommended usage, it’s probably a good idea to start thinking about a replacement. A fresh lamp can make a world of difference in color accuracy and overall brightness. Plus, it ensures you get the best viewing experience possible.
Now, depending on your projector model, replacing the lamp can be a straightforward process. In most cases, it involves a few simple steps like opening a compartment, removing the old lamp, and slotting in the new one.
However, if you’re not entirely comfortable with this process, or if your projector is still under warranty, it’s wise to consult the manufacturer or a professional technician. They’ll have the know-how to handle the task with precision.
Remember, taking proactive steps like replacing an aging lamp can significantly enhance your viewing experience. So, if it’s time for a lamp swap, go ahead and give your projector the refresh it deserves!
Conclusion
In conclusion, addressing the blue tint issue on your projector is a task that can be accomplished with some patience and a bit of troubleshooting finesse. By understanding the common causes, such as incorrect color settings, cable issues, source device problems, and lamp life, you’re equipped with the knowledge to take the first steps towards a solution.
Additionally, exploring advanced troubleshooting steps like white balance adjustment, factory reset, and firmware updates can provide further avenues for resolving the issue. These steps delve into more intricate adjustments, offering a more comprehensive approach to tackling the problem.
Remember, it’s perfectly feasible to navigate these troubleshooting steps on your own, without the need for professional assistance. However, if you ever feel uncertain or if the issue persists, don’t hesitate to seek support from the manufacturer’s customer service or consult a technician.
Ultimately, by following these steps and being thorough in your approach, you’re well on your way to enjoying a vibrant, true-to-life viewing experience on your projector. Happy viewing!
Author of this Post:

Kristy Roger
Home Cinema Consultant & Tech Enthusiast
Holding a background in Industrial and Electrical Technology from the University of Alberta, Kristy has spent 5+ years consulting on home theater products at a top electronics firm. As a certified Technical Professional with Lean Six Sigma credentials, Kristy expertise ranges from projector nuances to hands-on experience with leading models. Kristy have been sharing her knowledge online for two years, blending professional insights with personal experiences from her own home cinema setup. Off the screen, She is a dedicated mom to Jerry, Ryan, and our two pups, Cuddle and Paw.


