
How To Fix Color On Projector? [10 Tips]
-
 Written by:
Kristy Roger
Written by:
Kristy Roger
- Last Updated:
Setting up a projector for that perfect movie night or presentation can be a thrilling experience. But what happens when the colors on the screen don’t quite match your expectations? Perhaps you’ve noticed that the visuals are too red, too blue, or just not as vibrant as they should be.
Trust me, I’ve been there, and it can be both frustrating and puzzling.Over the years, I’ve consulted on numerous home theater setups and faced a myriad of color-related challenges.
From the subtle nuances of color calibration to the more evident issues like a yellow spot or a persistent red hue, each problem requires a unique solution.
But here’s the good news: with the right knowledge and a bit of patience, you can transform your projector’s visuals from lackluster to breathtakingly accurate.
In this comprehensive guide, we’ll delve deep into the world of projector color correction. From understanding common color problems to step-by-step solutions and preventive measures, we’ve got you covered.
So, are you ready to embark on a colorful journey to projector excellence? Let’s get started!
I recommend using the Table of Contents to quickly access the information you need.
My article is designed to cater to home cinema users of all levels, from Beginners to Advanced enthusiasts.
Table of Contents
What Are Some Common Color Problems?
Ah, the age-old question of why projectors sometimes misbehave with colors. Here are some common reasons why someone might face color issues with their projector:
Lamp Degradation
Projector lamps have a finite lifespan. As they age, their brightness diminishes, and this can affect color accuracy. I remember a client who was so attached to his old projector that he didn’t want to change the lamp. When he finally did, the difference was like night and day.
Incorrect Color Settings
Sometimes, in the excitement of setting up a new projector, one might accidentally choose the wrong color profile or make unintended adjustments. I’ve done this myself! I once spent an entire evening watching movies with a “Sports” color mode without realizing it.
Ambient Light
The presence of ambient light can significantly alter the perceived colors on the screen. I recall advising a family to rearrange their home cinema setup because a large window was causing reflections and washing out the colors.
Faulty Cables or Connections
A damaged HDMI or VGA cable can cause color discrepancies. I’ve had a few instances where simply changing the cable resolved the issue. It’s always a good idea to have a spare cable on hand.
Source Device Settings
Sometimes, the device connected to the projector (like a Blu-ray player or computer) might have its own color settings that conflict with the projector’s. I remember helping a friend who couldn’t figure out why his movies looked odd, only to discover his DVD player was set to an odd color mode.
Calibration Errors
If you’ve attempted to calibrate your projector using a tool or software and the colors are off, it’s possible that the calibration was not done correctly. I’ve been there – spending hours calibrating only to realize I’d missed a crucial step.
Internal Electronics
Like all electronic devices, projectors have internal components that can malfunction. A fault in the internal electronics can lead to color issues. I once consulted for a cinema where an entire batch of projectors had a manufacturing defect that affected color reproduction.
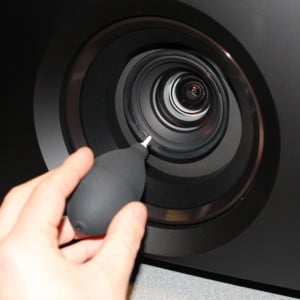
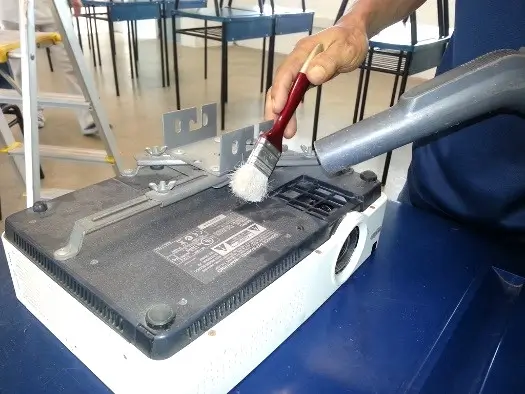
Dust and Dirt
Believe it or not, dust and dirt can accumulate on the projector’s lens or internal components, affecting the image quality. Regular maintenance is essential. I learned this the hard way when, after months of neglect, my own projector started displaying a hazy image.
How to Fix Color on Projector using different methods?
Here’s a step-by-step guide to help you fix the color on your projector:
Check the Source
- Before diving into the projector settings, ensure that the source (e.g., DVD player, computer, streaming device) is sending the correct color output. Sometimes, the issue might be with the source and not the projector itself. I remember a case where someone spent hours tweaking their projector settings, only to find out their laptop was in “Night Mode”!
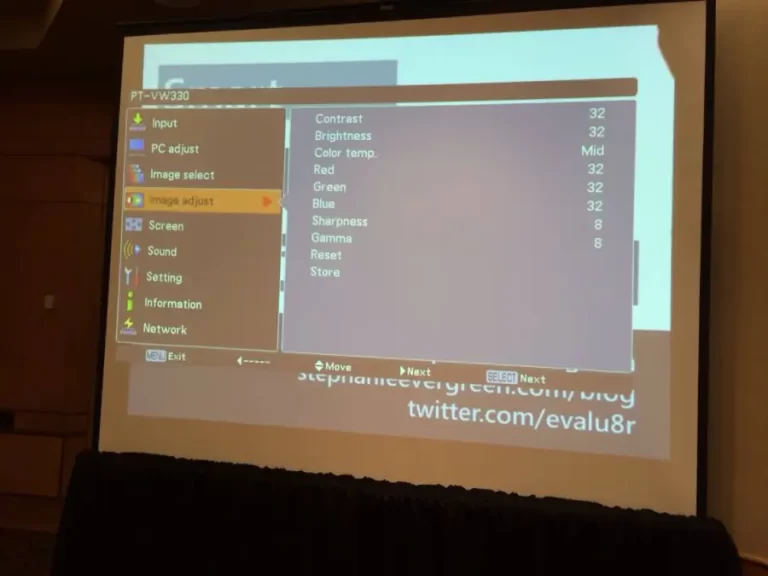
Basic Settings
- Access the projector’s menu using the remote control or onboard buttons.
- Navigate to the “Picture” or “Image” settings.
- Adjust the “Brightness”, “Contrast”, “Color”, and “Tint” settings. Sometimes, a simple adjustment here can make a world of difference.
Color Mode
- Most modern projectors have different color modes like “Cinema”, “Dynamic”, “Sports”, etc. Try switching between these modes to see if one offers better color accuracy for your viewing environment.
Color Temperature
- This setting adjusts the warmth or coolness of the image. If your image appears too blue, you might want to opt for a warmer color temperature, and vice versa.
Advanced Color Settings
- Some projectors offer advanced color settings where you can individually adjust the red, green, and blue (RGB) levels. If you’re comfortable, you can dive into these settings, but I’d recommend doing so with caution. It’s easy to make the image look worse if you’re not sure what you’re doing.
Check the Lamp
- Over time, the projector lamp can degrade, leading to color imbalances. If your projector is old or has been used for many hours, it might be time to replace the lamp. I’ve heard of a situation where someone was about to buy a new projector, but a simple lamp replacement made it as good as new!
Cables and Connections
- Ensure that all cables are securely connected. A loose HDMI or VGA cable can cause color discrepancies. Also, consider trying a different cable altogether; sometimes, a faulty cable is the culprit.
Firmware Update
- Manufacturers occasionally release firmware updates that can improve performance and fix known issues. Check the manufacturer’s website to see if there’s an update available for your projector model.
Calibration
- For those who are serious about getting the best color accuracy, consider investing in a calibration tool. These devices can analyze the projected image and provide precise adjustments for optimal color accuracy. It’s like giving your projector a professional spa day!
Consult the Manual
- When in doubt, refer to the projector’s user manual. It often contains troubleshooting tips and specific instructions for your model.
Remember, every projector and viewing environment is unique. What works for one setup might not work for another. It’s all about finding the right balance for your space.
Tips For Preventing Projector Discoloration
Drawing from my years of experience and the countless hours I’ve spent setting up and testing various projector models in my own home cinema, here are some tips to prevent projector discoloration:
Regular Maintenance
Dust and dirt can accumulate on the projector’s lens, leading to a hazy or discolored image. Regularly clean the lens with a soft, lint-free cloth. I remember a time when a simple lens cleaning dramatically improved the image quality of a client’s projector.
Adequate Ventilation
Ensure your projector has enough space around it for proper ventilation. Overheating can affect the projector’s performance and lead to discoloration over time. I’ve seen this firsthand in a cramped setup where the projector had little room to breathe.
Use Quality Cables
Invest in high-quality cables. Cheap or damaged cables can lead to signal degradation and color issues. In my own setup, I always ensure I’m using the best cables I can afford.
Calibrate Periodically
Over time, a projector’s colors can drift from their original settings. Periodic calibration ensures that colors remain accurate. I’ve spent many evenings fine-tuning my own projector to get those colors just right.
Limit Brightness
Running your projector at its maximum brightness can lead to faster lamp degradation. If possible, use a lower brightness setting that still provides a clear image. This can extend the life of the lamp and maintain consistent colors.
Replace the Lamp
Projector lamps have a finite lifespan. As they age, their brightness and color accuracy can diminish. Be proactive about replacing the lamp when it nears the end of its life. I recall a client who waited too long, and by the time he replaced the lamp, the projector had other issues due to the strain.
Avoid Direct Sunlight
If possible, position your projector and screen away from direct sunlight. Prolonged exposure can lead to discoloration of the screen and affect the perceived colors from the projector.
Update Firmware
Manufacturers sometimes release firmware updates that can improve performance and fix known issues. Keeping your projector’s firmware updated can prevent potential color discrepancies.
Use a Quality Screen
The screen you project onto plays a significant role in color reproduction. Invest in a good quality screen that complements your projector. I’ve had clients who upgraded their screens and were amazed at the difference it made.
Be Mindful of Ambient Light
As I’ve mentioned before, ambient light can wash out colors. Using blackout curtains or shades can help maintain color accuracy during daytime viewings.
In my years of setting up and consulting on home theaters, I’ve learned that a little preventive care goes a long way. It’s always a joy to see a well-maintained projector delivering stunning visuals year after year. Happy projecting!
Frequently Asked Questions (FAQs)
How do you Calibrate the Color on a Projector?
To calibrate the color on a projector, begin by accessing the projector’s settings menu. Locate the “Picture” or “Display” options. Adjust the brightness first, making sure it’s not too high or low. Then, set the contrast to achieve a balanced visual. Next, adjust the color saturation until it looks natural. Fine-tune the tint or hue if necessary.
Proceed to the advanced settings, if available. These may include individual color controls like red, green, and blue. Make subtle changes, checking for improvement. Avoid extreme adjustments to prevent distortion. Utilize test patterns or calibration discs for accuracy.
Consider using a calibration tool, like a colorimeter, for precise results. Follow the manufacturer’s instructions for optimal use. Finally, save the settings for future use. Regularly revisit and readjust as lighting conditions change. This ensures a consistently vibrant and accurate picture.
How often should I Calibrate my Projector for Optimal Color?
In my experience, to maintain optimal color quality on my projector, I typically aim to calibrate it every few months. This ensures that the visuals stay vivid and accurate over time.
However, if there are significant changes in lighting conditions or if I notice a shift in color quality, I won’t hesitate to recalibrate sooner. It’s important to keep in mind that different projectors may have varying needs, so it’s a good practice to consult the manufacturer’s recommendations for specific guidance.
Regular calibration not only enhances the viewing experience but also prolongs the lifespan of the projector by preventing potential issues related to color accuracy. So, I find it worthwhile to set reminders for myself to perform this maintenance task and enjoy consistently impressive visuals.
How to Fix my Projector Yellow Spot?
Fixing a yellow spot on my projector was a bit of a challenge, but here’s what worked for me. First, I carefully inspected the lens and the projection surface to make sure there wasn’t any dust or debris causing the discoloration. Using a soft, lint-free cloth, I gently cleaned both the lens and the surface.
If the yellow spot persisted, I checked the color settings on the projector. It’s possible that an imbalance in the color settings could be causing the issue. I adjusted the color saturation and hue settings, making sure they were in line with the manufacturer’s recommendations.
Another step I took was to check the projector’s lamp. Over time, a worn-out lamp can affect color accuracy. If the lamp showed signs of aging, I replaced it with a new one, making sure it was compatible with my projector model.
In some cases, the yellow spot may be a result of a malfunctioning color wheel. If I suspected this was the issue, I sought professional help for a thorough diagnosis and potential replacement.
Lastly, I ensured that the projector was properly ventilated. Overheating can lead to color irregularities. I checked the airflow around the projector and cleaned any vents or filters to ensure it was running at an optimal temperature.
How to Fix Projector Red Problem?
When facing a red problem with my projector, I took several steps to address it. Firstly, I examined the cables connecting the projector to the source. Sometimes, a loose or damaged cable can cause color issues. I made sure they were securely plugged in and replaced any damaged cables.
Next, I checked the color settings on the projector itself. Sometimes, a misconfiguration can lead to an overemphasis on a specific color. I adjusted the red settings, ensuring they were balanced with the other colors.
If the issue persisted, I inspected the projector’s lamp. A fading or malfunctioning lamp can affect color accuracy. If it showed signs of wear, I replaced it with a compatible new one.
Additionally, I considered the projection surface. A colored or uneven surface can distort colors. I tested the projector on a different surface to see if the red issue persisted.
In some cases, the red problem might be related to the color wheel. If I suspected this was the case, I sought professional help for a thorough diagnosis and potential replacement.
Lastly, I ensured the projector had proper ventilation. Overheating can lead to color irregularities. I checked for any blocked vents or clogged filters and cleared them.
How do I know when it’s time to replace my Projector Lamp?
Recognizing when it’s time to replace my projector lamp is crucial for maintaining optimal performance. Firstly, I pay close attention to the brightness of the projected image. If it starts to noticeably diminish, it’s a clear sign that the lamp is nearing the end of its lifespan.
Another indicator I watch for is color accuracy. If I notice a significant shift in color balance or if certain colors appear faded or distorted, it could be a sign that the lamp is deteriorating.
Additionally, I keep an eye out for warning messages or indicators on the projector itself. Many projectors have built-in systems that provide notifications when the lamp is due for replacement.
Furthermore, I take note of the lamp’s operating hours. Most projectors have a lamp hour counter in their settings menu. Once the lamp approaches its rated lifespan (usually around 2000-5000 hours, depending on the model), it’s wise to start considering a replacement.
If I notice any flickering or irregularities in the projection, that’s a clear indication that the lamp is on its way out. It’s important not to ignore these signs, as a failing lamp can lead to further damage to the projector.
In my experience, being proactive about replacing the lamp ensures that I can enjoy consistent, high-quality projections without any unexpected interruptions. It’s always a good idea to have a spare lamp on hand so that I can make the switch as soon as I start noticing these signs. This way, I can continue to enjoy my home cinema experience without any disruptions.
How does Ambient Light affect Darker Scenes in Movies?
Ambient light can significantly impact the viewing experience, especially during darker scenes in movies. When there’s ambient light in the room, it reduces the contrast ratio on the screen.
Contrast ratio is the difference between the darkest and lightest parts of an image. In darker scenes, it’s crucial for details to be distinguishable, and for shadows to have depth. However, when ambient light is present, it illuminates the entire room, making it harder to perceive the subtle differences in shades.
This can result in a loss of detail, especially in shadowy areas, making it difficult to see finer elements like facial expressions or objects in the background. The depth and three-dimensionality that are intended to be conveyed in the scene may be compromised.
Additionally, ambient light can wash out colors, making them appear less vibrant and accurate. This is particularly noticeable in darker scenes where contrast and color accuracy are crucial for conveying the intended mood and atmosphere.
To counteract the effects of ambient light, one can invest in technologies like high-contrast screens, or consider using curtains or blinds to block out external light sources. Additionally, choosing a viewing environment with minimal ambient light can greatly enhance the experience during darker scenes.
Conclusion
Calibrating a projector is a meticulous process that involves adjusting key settings like brightness, contrast, saturation, and hue. These adjustments serve as the building blocks for achieving accurate and vibrant color reproduction.
Utilizing reference images or specialized calibration tools provides a crucial benchmark for color accuracy, ensuring that whites are balanced, contrasts are clear, and colors are vivid without appearing overly saturated.
It’s important to note that calibration is not a one-time task, but an ongoing endeavor. Factors like bulb aging and alterations in the viewing environment can necessitate periodic recalibration.
This process demands a keen eye for detail and a commitment to precision, ultimately enabling the projector to consistently deliver visuals that are true to life.
By investing time and effort into calibration, you unlock the full potential of your projector, elevating the quality of your viewing experience to new heights.
Author of this Post:

Kristy Roger
Home Cinema Consultant & Tech Enthusiast
Holding a background in Industrial and Electrical Technology from the University of Alberta, Kristy has spent 5+ years consulting on home theater products at a top electronics firm. As a certified Technical Professional with Lean Six Sigma credentials, Kristy expertise ranges from projector nuances to hands-on experience with leading models. Kristy have been sharing her knowledge online for two years, blending professional insights with personal experiences from her own home cinema setup. Off the screen, She is a dedicated mom to Jerry, Ryan, and our two pups, Cuddle and Paw.


