
How to Fix Projector Screen Wrinkles [8 Tested Methods]
-
 Written by:
Kristy Roger
Written by:
Kristy Roger
- Last Updated:
So, you’ve got your projector set up, your popcorn’s ready, but wait—what’s that? Wrinkles on your projector screen? Ugh, I know how annoying that can be.
Fixing wrinkles on a projector screen is a lot like dealing with wrinkled clothes—it’s an ongoing task. Each time I set up for movie night or a big presentation, I find myself testing new methods to smooth out those wrinkles.
Just like there’s no one-size-fits-all solution for every type of fabric in your closet, different screens might respond better to different techniques.
So, in this guide, not only will we cover various ways to tackle this issue, but I’ll also share some of my own experiments. That way, you can find the most effective method for your specific screen. Let’s dive in and get that screen looking its best!
I recommend using the Table of Contents to quickly access the information you need.
My article is designed to cater to home cinema users of all levels, from Beginners to Advanced enthusiasts.
Table of Contents
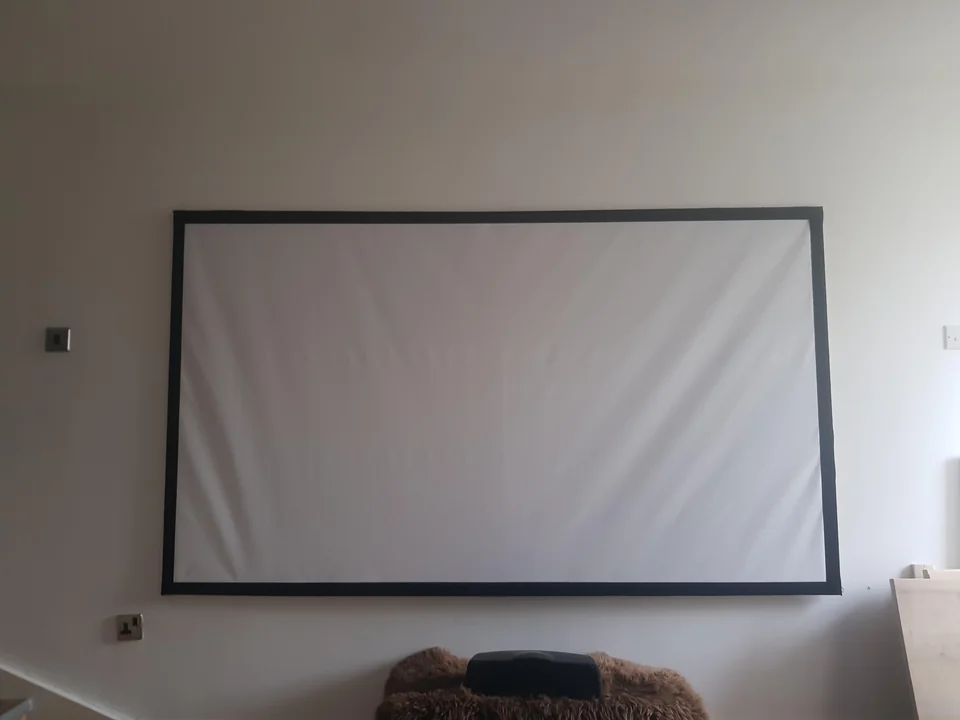
How Do Projector Screens Get Wrinkled?
When it comes to projector screen wrinkles, a handful of factors can lead to this frustrating issue. One common culprit is improper storage. If a screen gets folded or rolled up in a hasty manner, it can result in unsightly creases. These creases then stubbornly stick around, marring your viewing experience.
Another reason wrinkles can occur is the quality of the material itself. Sometimes, screens made from subpar materials lack the durability needed to stay smooth and taut. This can lead to sagging and wrinkling over time. It’s like trying to stretch a worn-out elastic band it just doesn’t hold up.
Transportation and handling also play a significant role in this drama. If a screen is handled roughly during setup or transportation, it can develop wrinkles. Think of it like handling delicate glassware—careless movements can lead to unintended consequences.
Environmental factors, such as extreme temperatures or high humidity, can also wreak havoc on your screen. These conditions can cause the material to expand or contract, leading to wrinkles. It’s like when a shirt gets crumpled up after being left out in the rain—it needs some attention to look good again.
Lastly, even the sturdiest screens can’t defy the march of time. Over the years, wear and tear can take its toll, leading to the inevitable appearance of wrinkles. It’s a bit like how a well-loved teddy bear starts to show its age after countless hugs and adventures.
8 Tried-and-True Methods to Get Wrinkles Out of Projector Screen
Method 1: Hand Stretching (70% Effective)
Let me tell you how I do hand stretching to get rid of those annoying wrinkles on my projector screen.
First, I stand in front of that wrinkly screen. I want to see clearly where the problem areas are. Then, my hands reach up to grab the top two corners. Holding them tight but gentle to avoid tearing, I start pulling outward. As I do this, I’m feeling the screen’s fabric getting a bit tighter. That’s a good sign; wrinkles hate tightness!
Next, I shift my focus to the bottom corners. One hand at a time, I pull on each one. My goal is to make the whole screen tight and smooth. I pay special attention to pulling evenly, so one side doesn’t end up looser than the other.
After that, I take a step back. With my eyes, I scan the screen from top to bottom. I’m looking for any wrinkles that decided to stick around. If I spot any, my hands get back to work. A little extra pull usually convinces those stubborn wrinkles to leave.
Finally, Most of the projector screen wrinkles are gone, and the screen looks way better.
Method 2: Heat Gun or Hair Dryer (95% Effective)
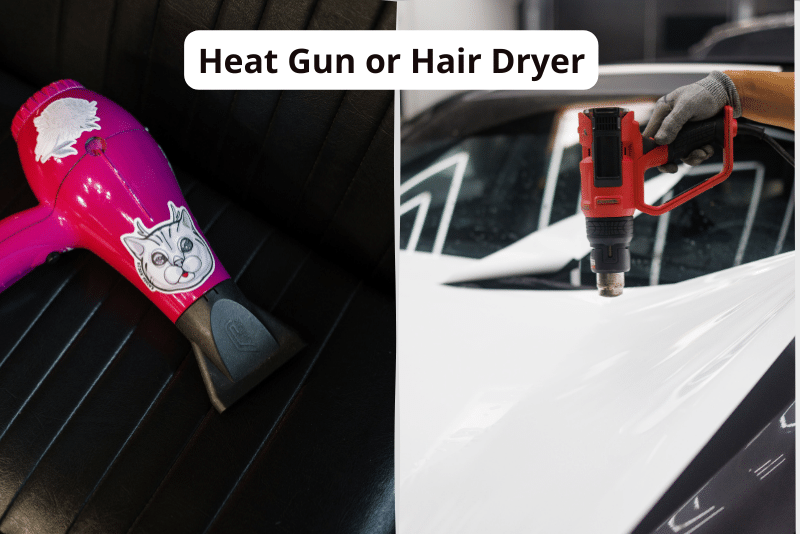
Let me tell you about my experience with using heat gun or Hair dryer to smooth out those pesky screen wrinkles.
When I first noticed wrinkles on my screen, I felt a bit frustrated. I wanted a quick solution. Then, I remembered my trusty heat gun and my hair dryer. Either of these could do the trick, I thought.
So, I grabbed my heat gun. Before turning it on, I double-checked to ensure it was on a low setting. Too much heat can harm the screen, and I didn’t want that. Then, I began to wave it over the wrinkled spots. I kept a safe distance, making sure the gun was never too close.
The warmth started doing its magic. The material slowly began to loosen and relax. I saw the wrinkles fading, which made me feel quite happy.
But sometimes, I choose my hair dryer instead. It’s gentler and just as effective. Once again, I select the lowest heat setting. Holding the dryer in one hand, I start moving it back and forth over the troubled areas. Always in motion, my hand never lets the dryer linger in one spot for too long. I don’t want to burn or melt anything.
After a few minutes, I stop and check my work. The screen looks smoother, and those wrinkles? They’re almost all gone. Thanks to the gentle heat, my screen is back to looking its best.
Method 3: Steamer (95% Effective)
How I use a handheld steamer to tackle those stubborn wrinkles on my projector screen.
First, I grab my steamer from the closet. I fill it with water and wait for it to heat up. A little light usually tells me when it’s ready. Holding the steamer in one hand, I stand in front of the wrinkled screen. My eyes scan for the areas that need the most help.
Next, I start steaming. I aim the steamer at the wrinkled spots, making sure not to get too close. We don’t want any burns or water spots! The steam comes out and starts to hit the fabric. I feel excited as I see it doing its job.
Gently, I move the steamer back and forth. No lingering in one place, because I want to treat the entire area evenly. Soon, the fabric starts to relax. I notice the wrinkles are beginning to fade away.
After that, I take a step back. My eyes go over the entire screen to check my work. If any wrinkles remain, I give them a second dose of steam. But most of the time, they’re gone on the first try.
Finally, I put the steamer back in its place, feeling quite pleased. Those wrinkles that were ruining my movie nights? They’re history, thanks to my trusty steamer. So simple, yet so effective!
Method 4: Wrinkle Release Spray (90% Effective)
Let me tell you about a neat trick I tried: wrinkle release spray.
One day, while looking through my laundry supplies, my eyes landed on a bottle of wrinkle release spray. I wondered, could this help with my wrinkled screen? After all, it worked wonders on my shirts.
Before jumping in, I did my homework. I looked for my screen’s care label. I needed to know if using the spray was safe. No one wants a ruined projector screen, right?
Feeling confident, I started the process. Holding the bottle a good distance away, I sprayed a fine mist onto the wrinkles. I made sure not to drench it. Just a light coating did the trick.
Next, I waited a few moments. I wanted to let the spray work its magic. Soon, I began to smooth out the screen using my hands. Gently, I worked from the top down, pressing and guiding the fabric.
After a bit, I stepped back to admire my handiwork. To my delight, most of the wrinkles had vanished! It felt like a small victory.!
Method 5: Tension Adjustment (85% Effective)
Let me tell you about using tension adjustments to solve my wrinkled screen problem.
So, I have this projector screen that comes with tension adjustments. They’re little knobs or screws on the sides or corners. One day, I noticed wrinkles on my screen and thought, “Enough is enough!”
First, I located these tension adjustments. Some were on the sides, while others hid in the corners. After finding them, my hand reached for a knob. I started to give it a gentle turn. My goal? Make that screen as tight as a drum!
Next, I moved on to another knob. Twisting it carefully, I felt the screen pull tight. It’s like the fabric was getting a facelift. I couldn’t help but smile as I saw some of those annoying wrinkles start to disappear.
Then, I took a break to check my progress. Stepping back, I looked at the screen from different angles.
Most wrinkles (85-90%) were gone, but a few stubborn ones remained. No worries! I went back and gave those knobs another little twist.
Finally, My screen looked much better, almost like new. And the best part? I did it all by myself using the screen’s own tension adjustments. Simple, yet so effective!
Method 6: Tension Frames (99% Effective)
Using a tension frame seemed like a smart move to get rid of those pesky wrinkles on my projector screen. Here’s how I did it:
- I Started with the Basics: First, I got a tension frame kit that fit my screen size. It had a frame, some clips, and things to hang it up.
- I Spread Out: I laid my screen flat on the ground. This way, I could see all the wrinkles clearly.
- Frame Time: Following the simple instructions, I put the frame together. It was just about connecting the pieces.
- Clipping On: I began by attaching one corner of the screen to the frame. Then, I went around, making sure to pull the screen tight.
- A Quick Look: After attaching the screen, I checked for any leftover wrinkles. I moved the clips a bit to make the screen tight and smooth.
- Hanging Up: I used the tools from the kit to hang the frame where I wanted it. I made sure it was straight and at the right height.
- Last Check: Once up, I looked again for any saggy parts or wrinkles. A few clip adjustments did the trick.
- Keeping It Nice: Every so often, I check to make sure the screen stays tight. If it’s a bit loose, I just adjust the clips.
- Using this frame made my projector screen look so much better. No more wrinkles, just a smooth screen for movie nights!
Method 7: Ironing (100% Effective)
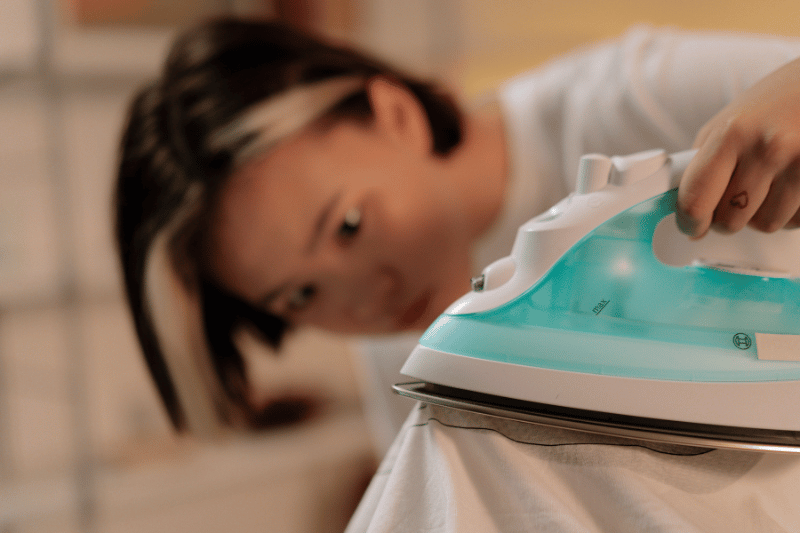
How I used an iron to deal with those stubborn wrinkles on my fabric-based projector screen.
First, I grabbed my trusty iron from the laundry room. I also picked up a thin cloth, knowing I’d need it to protect my screen. Then, I adjusted the iron’s temperature to its lowest setting. Nobody wants a burnt or melted screen, right?
Once the iron was warm but not hot, I laid the cloth carefully on the wrinkled part of the screen. I wanted to make sure the iron wouldn’t touch the screen directly.
Next, I began ironing over the cloth. Gentle, even strokes were my technique. I took my time, making sure to cover all the wrinkled areas. Slowly, I noticed the fabric starting to smooth out. A feeling of accomplishment began to build inside me.
After ironing for a few minutes, I stepped back to check out the screen. Wow, it looked a lot better! The 90% wrinkles had mostly disappeared, making the screen look nearly new again.
Finally, I turned off the iron and put it away, along with the cloth. So, there you have it. If you have a fabric-based screen and it’s safe to iron, this method might just do wonders for you, just like it did for me. But don’t forget that cloth barrier; it’s a screen-saver, literally!
Method 8: Professional Help (95% Effective)
So, I tried many tricks to fix my wrinkled projector screen. Some worked a bit, while others didn’t. After a while, I thought, “Maybe I need an expert’s touch.”
First, I researched companies that specialize in screen repairs. I wanted someone with good reviews and a history of happy customers. After all, my screen deserves the best care!
Then, I made a call to schedule an appointment. The expert came over, looked at my screen, and gave me some options. One choice was to have the screen professionally stretched. This would make it tight and wrinkle-free. Another option? Getting a brand-new screen. It sounded tempting!
After thinking it over, I realized something important. I love watching movies and shows on a perfect screen. For me, it’s all about the experience. If I needed to spend a little money to get that, it seemed worth it.
In the end, professional help seemed like the best route. They have the tools and know-how to make my screen look fantastic. And, let’s be honest, sometimes we need an expert’s touch to make things right. So, if you’re stuck with a stubbornly wrinkled screen, think about calling in the pros. You might be glad you did!
FAQ (Frequently Asked Question)
Can I use an Iron to Remove Wrinkles from Projector Screen?
I’ve wondered the same thing before! Using an iron directly on a projector screen might seem like a quick fix, but it’s risky. The heat can damage the screen’s material or even melt it. If I really want to try this method, I’d place a thin cloth over the screen and use the iron on a low setting.
But honestly, there are safer methods out there to get rid of those pesky wrinkles. It’s always best to check the screen’s manual or manufacturer’s guidelines before trying anything. Safety first!
How Long does it take to Remove Wrinkles from a Fabric Projector Screen using Steam?
Using steam on a fabric projector screen can be effective, but the time it takes varies. For me, it usually takes about 10 to 20 minutes, depending on the screen’s size and the number of wrinkles. I gently steam the screen, moving steadily to avoid soaking any one spot.
After steaming, I let it dry completely. Remember, it’s essential to be patient and not rush the process. And always, before steaming, I check the manufacturer’s guidelines to ensure I won’t damage the screen.
Are there any risks involved in using Wrinkle Release Sprays?
Yes, using wrinkle release sprays does come with some risks. First, these sprays might contain chemicals that could harm the fabric of the projector screen. I’ve heard of cases where the screen’s texture or color changed after using such sprays.
Also, there’s a chance the spray could leave spots or stains. Before I use any product on my screen, I always test a small, hidden area first. And, of course, I read the screen’s care instructions to make sure I don’t accidentally damage it. Safety first!
Can I Prevent Wrinkles by Keeping my Screen Rolled Up?
Absolutely! Keeping your projector screen rolled up when not in use is one of the best ways to prevent wrinkles. When the screen stays extended for long periods, it’s more susceptible to creases, especially if there’s any pressure or weight on it.
By rolling it up, I ensure the screen remains smooth and free from external pressures. However, it’s essential to roll it up gently and ensure there’s no debris or dust on the screen, as these can cause marks or damage over time. It’s a simple habit, but it does wonders in maintaining a wrinkle-free screen.
What is the Ideal Humidity Level for Preventing Wrinkles?
For preventing wrinkles, especially on fabric projector screens or other delicate materials, maintaining a balanced indoor humidity level is crucial. I’ve found that the ideal humidity level is between 40% and 60%. When the air is too dry, materials can become brittle and more prone to wrinkling.
On the other hand, high humidity can lead to moisture accumulation, making fabrics saggy and potentially leading to mold or mildew. By keeping the humidity in this balanced range, I ensure the longevity of my projector screen and reduce the risk of wrinkles. Investing in a good humidifier or dehumidifier, depending on your environment, can be a game-changer in this regard.
Final Thoughts
In wrapping up, addressing wrinkles on a projector screen is essential for a clear, enjoyable viewing experience. While there are various methods to tackle this issue, it’s crucial to choose the one best suited for your screen type and setting.
Remember, prevention is often the best approach, so maintaining optimal humidity and proper storage can go a long way. But if wrinkles do appear, with a little care and the right technique, you can restore your screen to its smooth glory and enjoy your visuals as they were meant to be seen.
Author of this Post:

Kristy Roger
Home Cinema Consultant & Tech Enthusiast
Holding a background in Industrial and Electrical Technology from the University of Alberta, Kristy has spent 5+ years consulting on home theater products at a top electronics firm. As a certified Technical Professional with Lean Six Sigma credentials, Kristy expertise ranges from projector nuances to hands-on experience with leading models. Kristy have been sharing her knowledge online for two years, blending professional insights with personal experiences from her own home cinema setup. Off the screen, She is a dedicated mom to Jerry, Ryan, and our two pups, Cuddle and Paw.


