
Best Material for Projector Screen [2023 Complete Guide]
-
 Written by:
Kristy Roger
Written by:
Kristy Roger
- Last Updated:
Over the years, I’ve experimented with various materials for projector screen, each with its own set of advantages and quirks. From fabrics to reflective compounds, the choices seemed endless.
When I embarked on my journey to create the ultimate home cinema experience, I quickly realized that the heart of any great projection isn’t just the projector itself, but the screen upon which its light casts.
It’s not just about a blank space to display images; it’s about finding the perfect canvas that captures every detail, color, and nuance.
But which material truly stands out for delivering the best visual experience?
Hint: Matte White is my go to choice!
Dive in with me as I explore and share my insights on the best materials for projector screens, ensuring that every movie night, presentation, or gaming session is nothing short of spectacular.
![Best Material for Projector Screen [Complete Guide 2023]](https://projectorgenius.com/wp-content/uploads/2023/10/Best-Material-for-Projector-Screen-Complete-Guide-2023.webp)
I recommend using the Table of Contents to quickly access the information you need.
My article is designed to cater to home cinema users of all levels, from Beginners to Advanced enthusiasts.
Table of Contents
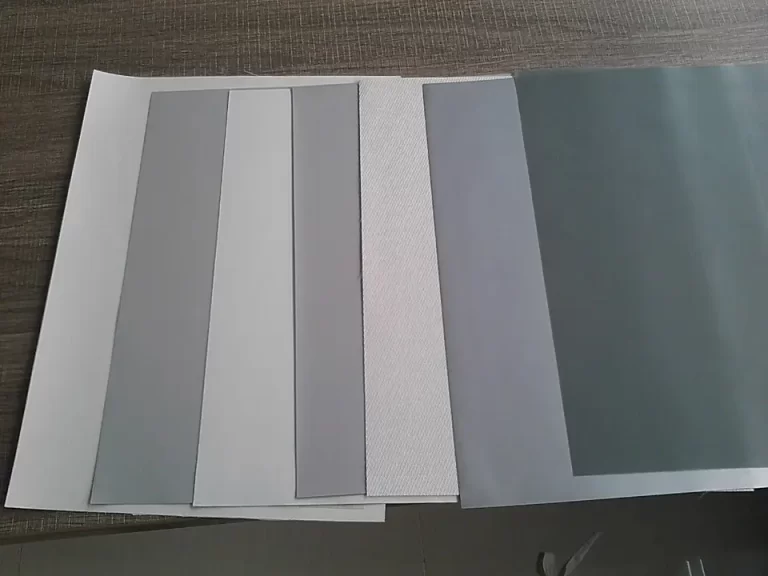
Factors to Consider Before Choosing Best Material for Projector Screen
![Best Material for Projector Screen [Complete Guide 2023]](https://projectorgenius.com/wp-content/uploads/2023/10/Best-Material-for-Projector-Screen-Complete-Guide-2023-1-768x384.webp)
When I first decided to set up my own home theater, I was overwhelmed by the sheer number of options available for projector screens.
I quickly realized that the screen material plays a pivotal role in the overall viewing experience. Here are some factors I learned to consider, and I hope they help you too:
Room Lighting
- Ambient Light: I can’t stress enough how important lighting is. In my living room, which gets a lot of natural light, I struggled with washed-out images until I opted for an Ambient Light Rejecting (ALR) screen. If your room has a lot of ambient light, this might be a game-changer for you too.
- Controlled Lighting: On the other hand, in my basement where I can control the lighting, a matte white screen worked wonders. It’s all about matching the screen to your room’s lighting conditions.
Projector Brightness
- I learned the hard way that not all projectors are created equal. Some are brighter than others. If you have a dim projector, you might want to consider a high-gain screen to boost the image brightness.
Viewing Angle
- My family loves movie nights, and we often have friends over. Not everyone sits dead center, so a wide viewing angle was crucial for us. Some high-gain screens can limit the viewing angle, so keep that in mind based on your seating arrangement.
Room Size and Screen Size
- My first screen was, embarrassingly, too big for my room. It’s essential to measure your space and think about how large a screen you can comfortably fit. Remember, it’s not just about size but also about viewers’ distance from the screen.
Projector Type and Throw Distance
- I initially overlooked this, but different projectors have different throw distances (the distance between the projector and the screen). Some materials are better suited for short-throw projectors, while others work best with long-throw ones.
Acoustic Considerations
- I’m a bit of an audiophile, so sound quality is paramount for me. If you’re placing speakers behind the screen, you’ll need an acoustically transparent material. It’s a bit pricier, but the sound experience is worth it.
Budget
- Let’s be real; budget matters. While I’d love to have the top-of-the-line everything, I had to balance quality with cost. Some materials are more affordable than others, so determine what you’re willing to spend and find the best material within that range.
Aesthetic and Installation
- I wanted my home theater to look sleek. Think about whether you want a fixed frame, a pull-down screen, or something motorized. The installation method can also influence the material choice.
Desired Image Quality
- I’m a stickler for vibrant colors and deep blacks. Depending on what you’re watching, you might prioritize brightness, color accuracy, or contrast. It’s all about personal preference.
Maintenance and Durability
- With kids around, I needed something durable and easy to clean. Some materials are more resistant to wear and tear, and others are easier to maintain.
Special Features
- I love 3D movies, so I needed a screen compatible with 3D projections. Depending on your needs, you might want to look into screens with special coatings or features.
In the end, choosing the right projector screen material made a world of difference in my home theater experience. It’s worth taking the time to consider these factors and find the perfect fit for your space and viewing habits.
If you’ve ever dealt with a blurry projector screen, you know how frustrating it can be. Fortunately, there are solutions available. Check out our guide on How to Fix Blurry Projector Screen.
Types of Projector Screen Materials
Matte White
Matte White is one of the most traditional choices when it comes to projector screens. Its smooth, white surface evenly diffuses light in all directions, making it a versatile option for many settings.
This material is particularly beneficial in rooms with controlled ambient light, offering a broad viewing angle that ensures consistent image quality for viewers spread out in a room.
However, in spaces with significant ambient light, a matte white screen might not offer the best contrast, and images can appear somewhat washed out.
High Contrast Gray
High Contrast Gray screens, as the name suggests, have a darker surface that enhances the contrast by improving the black levels in the projected image.
This gray surface has the added advantage of absorbing stray ambient light better than its white counterpart. This results in deeper blacks and a more vibrant contrast, especially beneficial for movies with many dark scenes or rooms with some ambient light.
On the flip side, they might not be as bright as white screens, especially if paired with a low-lumen projector.
Glass Beaded
Glass Beaded screens are quite unique. They come embedded with tiny reflective glass beads that amplify the light, producing a significantly brighter image.
This high-gain characteristic can make even a low-lumen projector produce a bright image. However, this brightness comes at a cost. The viewing angle on glass beaded screens is relatively limited due to the reflective nature of the beads.
Additionally, over time, these beads can detach from the screen, leading to a less than optimal viewing experience.
Acoustically Transparent
Acoustically Transparent screens are a marvel for audiophiles. Made from either woven fabric or a perforated material, they’re designed with one primary goal in mind: to let sound pass through.
This feature is perfect for home theaters where speakers are placed behind the screen, ensuring that the sound isn’t muffled or distorted.
The result is an immersive audio-visual experience that truly stands out. However, due to their design, these screens might slightly reduce image brightness.
Rear Projection
Rear Projection screens are designed for setups where the projector is positioned behind the screen rather than in front. This configuration is often seen in commercial settings or places where space in front of the screen is limited.
The primary advantage of rear projection screens is that they can produce bright and clear images even in well-lit environments. Plus, presenters can stand in front of the screen without casting shadows or blocking the projection.
High Gain Screens
High Gain Screens are crafted to reflect more light directly back towards the audience. This characteristic makes them particularly suitable for environments with some ambient light or for projectors with lower lumens.
The result is a brighter image. However, this increased brightness often comes with a narrower viewing angle, meaning the best view is directly in front of the screen.
Ambient Light Rejecting (ALR)
Ambient Light Rejecting (ALR) screens are a godsend for rooms with a lot of ambient light, such as living rooms with large windows.
These screens are designed to reject light coming from the sides or from above, focusing solely on the light emitted from the projector.
This ensures that the projected image remains bright and clear even in well-lit conditions.
Silver Screens
Silver Screens have a metallic silver surface that’s particularly adept at retaining the polarization of 3D movies. This makes them an ideal choice for 3D projections.
Additionally, their reflective nature offers a high gain, resulting in brighter images. They were more common in the early days of cinema but have seen a resurgence with the advent of 3D technology.
Fresnel
Fresnel screens are a bit more specialized. They utilize a series of concentric circles (like those on a Fresnel lens) to focus the projected light, enhancing brightness and clarity. They’re often used in rear-projection televisions and can be great for short-throw projectors.
Perforated Screens
Perforated Screens are designed with tiny holes that allow sound to pass through. This design is especially useful for cinemas or theaters where speakers are placed behind the screen.
The perforations are typically small enough that they don’t noticeably affect the image quality, while still allowing for clear sound transmission.
DIY Screen Material
DIY Screen Material refers to materials that aren’t specifically designed for projectors but can be used to create makeshift projector screens.
Examples include painted walls, sheets, or other smooth, light-colored surfaces. While they can be cost-effective, the image quality might not match that of a dedicated projector screen.
Blackout Cloth
Blackout Cloth is a fabric commonly used for blocking out light in curtains. Due to its light-blocking properties, it’s also popular as a DIY projector screen material.
When stretched and mounted on a frame, it provides a smooth surface that can deliver decent image quality for those on a budget.
For those who enjoy outdoor screenings, dealing with bugs can be a hassle. Check out our tips on How to Keep Bugs Off from Projector Screen for a bug-free experience
What is the Best Projector Screen Material for Different Purposes?
The choice of projector screen material can significantly influence the quality of the projected image, and the best material often depends on the specific purpose or use-case scenario. Let’s delve deeper into the ideal materials based on different purposes:
Best Projector Screen Material Home Cinema
For those looking to recreate the cinematic experience at home, image quality is paramount. In a controlled environment where ambient light can be minimized, Matte White screens are often the go-to choice. They offer a wide viewing angle and accurate color reproduction, ensuring movies look their best. However, if the room has some ambient light, a High Contrast Gray screen can enhance black levels, making it ideal for movies with dark scenes.
Best Projector Screen Material Outdoor
Outdoor environments present unique challenges due to uncontrollable ambient light. High Gain Screens are beneficial here, reflecting more light back towards the audience and ensuring a brighter image. Additionally, some screens are designed to be durable and resistant to the elements, making them ideal for outdoor use.
Best Projector Screen Material for Conference Rooms & Presentations
In corporate settings, clarity and visibility from all angles are crucial. Matte White screens, with their wide viewing angles, are suitable for large audiences in conference rooms. For interactive presentations or when presenters need to stand close to the screen, Rear Projection screens can be invaluable. They allow presenters to stand in front of the screen without casting shadows.
Best Projector Screen Material for Gaming
Video games often have dynamic visuals that benefit from vibrant colors and deep blacks. High Gain Screens can make the graphics pop, especially in rooms with some ambient light. For daytime gaming or rooms with significant ambient light, ALR (Ambient Light Rejecting) Screens help maintain image clarity.
Best Projector Screen Material for Sports Bars & Bright Environments
Places like sports bars require screens that can deliver clear images even in well-lit conditions. ALR Screens are perfect for this, rejecting light from the sides and top and focusing solely on the light from the projector.
Home Theaters with Speakers Behind the Screen
Sound quality is just as important as image quality in a home theater. Acoustically Transparent Screens, which allow sound to pass through, are ideal for setups where speakers are placed behind the screen. This ensures that the audio from the movie or show isn’t muffled or distorted.
Best Projector Screen Material 3D Projections
3D movies require screens that can retain the polarization of the projected image. Silver Screens are designed for this purpose. Their reflective surface not only retains polarization but also offers a high gain, resulting in brighter 3D images.
Best Projector Screen Material Short-Throw Projectors
These projectors are designed to project large images from a short distance. Specialized screen materials that reduce hot-spotting (areas of the screen that are much brighter than others) are essential. Fresnel screens, with their ability to focus projected light, can be a good match for short-throw projectors.
Best Projector Screen Material Portable or On-the-Go Presentations
For presenters on the move, portability is key. Flexible, retractable materials that are durable yet lightweight are ideal. Blackout Cloth, when mounted on a portable frame, can serve as an effective and budget-friendly option.
In conclusion, the purpose of the projection plays a significant role in determining the best screen material. By aligning the material with the specific needs of the environment and content, one can ensure an optimal viewing experience.
Accidents happen, and projector screens can get ripped. Learn how to fix them with our guide on How to Fix Ripped Projector Screen.
Screen vs Paint
When setting up a projection system, a fundamental decision many face is whether to invest in a dedicated projector screen or utilize a wall coated with projection-friendly paint. Both avenues come with their unique sets of advantages and challenges.
Projector Screen
Dedicated projector screens are crafted with the primary purpose of optimizing the viewing experience. Their surfaces are specifically designed to reflect light in a manner that enhances image quality, often incorporating special coatings or textures that boost color accuracy, brightness, and contrast.
This specialization often results in a more vibrant and clearer image. Moreover, the versatility of screens is notable. They come in various materials tailored for different viewing environments, from rooms flooded with ambient light to those where sound quality is paramount.
Additionally, screens, especially retractable ones, offer the convenience of portability. They can be set up when needed and stored away afterward, making them ideal for spaces with multiple uses. However, this premium experience often comes with a higher price tag.
Plus, once you’ve chosen a screen size, you’re committed to it, limiting flexibility if you wish to change projection sizes later.
Paint
On the other hand, projection paint offers a different set of benefits. One of its primary appeals is flexibility.
With a can of projection paint, you can transform any wall into a projection surface, adjusting the size or even the shape to fit your specific needs. This adaptability often comes at a more affordable price point than high-quality screens, making it an attractive option for those on a budget.
A painted wall also offers a seamless look, devoid of borders or frames, which can blend effortlessly with the room’s decor.
However, this option isn’t without its challenges. The quality of the projected image can be significantly influenced by the wall’s condition. Imperfections, such as bumps or cracks, can distort the image.
And while there are high-quality projection paints in the market, they might not always match the performance of a dedicated screen in terms of image attributes like brightness or contrast.
Maintenance can also be a concern; painted walls, over time, might require touch-ups or a fresh coat to maintain their appearance and performance.
In conclusion, the choice between a screen and paint hinges on individual preferences, the intended use, and budget considerations.
While screens often edge out in terms of performance, projection paint provides a blend of flexibility and affordability that might be perfect for many scenarios.
As with many decisions, it’s essential to assess your specific needs and the nuances of your projection environment before making a choice.
Can I use a white wall as a projector screen?
Yes, you can use a white wall as a projector screen, but there are some considerations to keep in mind:
- Surface Quality: The wall should be smooth and free of imperfections. Any bumps, cracks, or textures can distort the projected image. If your wall isn’t smooth, you might consider sanding it or applying a skim coat of plaster to create a more even surface.
- Color and Reflectivity: A pure white wall can work well for projection as it reflects light uniformly. However, dedicated projector screens often have specific coatings or materials that enhance color accuracy, brightness, and contrast. A plain white wall might not offer the same level of performance.
- Ambient Light: Walls don’t typically have the same ambient light rejecting properties as some specialized projector screens. If your room has a lot of ambient light, the image on a white wall might appear washed out.
- Viewing Angle: Dedicated projector screens are designed to offer wide viewing angles, ensuring that the image quality remains consistent even for viewers sitting off to the side. A regular white wall might not provide the same uniformity.
- Cost: Using a white wall is undoubtedly cost-effective. You won’t need to invest in a screen, and if you’re satisfied with the image quality, it can be a practical solution.
- Flexibility: One advantage of using a wall is the flexibility in size. You can adjust the projection size easily without being constrained by the dimensions of a physical screen.
- Maintenance: Walls can get dirty or scuffed over time. While it’s easy to clean or repaint a wall, it’s something to consider, especially if the wall is in a high-traffic area.
- Enhancements: If you decide to use a wall but want to improve the projection quality, there are projection-specific paints available. These paints are designed to enhance image quality and can be a good middle ground between a regular white wall and a dedicated screen.
In conclusion, while a white wall can serve as a projector screen, the results might vary based on the wall’s condition, the room’s lighting, and the projector’s quality. For casual viewing or temporary setups, a white wall can suffice.
However, for the best viewing experience, especially in dedicated home theaters or professional settings, investing in a dedicated projector screen might be worth considering.
Is your screen sagging or loose? Discover effective techniques for tightening your projector screen.
How do I clean and maintain my projector screen?
Maintaining the clarity and longevity of your projector screen is essential for an optimal viewing experience.
Regularly dusting the screen is a good starting point. Using a soft microfiber cloth or a gentle feather duster can help remove any accumulated dust or particles. It’s a good practice to turn off the projector during this process, as it allows you to see the dust and stains more clearly.
Over time, you might notice spots or stains on the screen. For such instances, spot cleaning becomes necessary. A soft, lint-free cloth dampened with distilled water can be used to gently wipe the affected area.
It’s crucial to ensure the cloth isn’t too wet, just slightly damp. Regular tap water isn’t recommended as it may contain minerals that can leave behind a residue.
Every few months, or when the screen appears noticeably dirty, a deeper cleaning might be in order. A solution of mild soap and distilled water can be used for this purpose.
Gently wiping the screen with a cloth dampened in this solution can help remove more stubborn dirt or stains. Following the cleaning with the soapy solution, it’s essential to rinse off any soap residue using another cloth dampened with just distilled water.
The screen should then be left to air dry. Direct heat sources, like hairdryers, should be avoided as they can damage the screen.
For those with retractable screens, it’s vital to ensure the screen is entirely dry before rolling it up. This prevents potential issues like mold or mildew. It’s also beneficial to avoid touching the screen with bare hands frequently, as the natural oils and dirt from skin can leave marks.
Environmental factors play a role too. Keeping the screen away from direct sunlight can prevent fading, and areas with high humidity should be avoided to reduce the risk of mold growth.
Lastly, always refer to the manufacturer’s cleaning instructions. Some screens may have special coatings or materials that require specific care. Periodic inspections for wear, tear, or damage can help in addressing minor issues before they escalate.
And if the screen is portable or adjustable, handling it with care during transport or adjustments can prevent potential damage.
In essence, with regular cleaning and mindful maintenance, your projector screen can remain in pristine condition, ensuring clear and vibrant projections for years to come.
What is screen gain and why is it important?
Screen gain is a measure of a projector screen’s reflectivity, indicating how much light the screen reflects compared to a standard reference, typically a block of magnesium carbonate.
The gain value represents the ratio of brightness from the screen in comparison to the reference.
For instance, a screen with a gain of 1.0 reflects the same amount of light as the reference, while a screen with a gain of 1.5 reflects 50% more light than the reference.
Understanding screen gain is crucial for several reasons:
- Brightness: A screen’s gain directly impacts the brightness of the projected image. A higher gain means the screen reflects more light, resulting in a brighter image. This can be especially beneficial in environments with some ambient light or when using a projector with lower lumens.
- Viewing Angle: Gain also affects the viewing angle. Typically, screens with higher gain values have narrower optimal viewing angles. This means that the image might appear brightest when viewed head-on, but as you move to the side, the brightness can diminish. Conversely, screens with a gain value close to 1.0 usually offer wider viewing angles, ensuring consistent image quality for viewers spread out in a room.
- Hotspotting: High gain screens can sometimes lead to “hotspotting,” where the center of the screen appears much brighter than the edges. This can be distracting and can detract from the overall viewing experience.
- Contrast Enhancement: Some high gain screens can enhance perceived contrast, making blacks appear deeper and colors more vibrant, especially in rooms with ambient light.
- Environment Suitability: The importance of screen gain becomes evident when considering the environment. For a dark home theater, a screen with a gain close to 1.0 might be ideal, ensuring wide viewing angles and consistent brightness. However, for a brightly lit conference room, a higher gain screen might be necessary to combat ambient light and ensure the projected image is clearly visible.
In conclusion, screen gain is a pivotal factor in determining the quality of the projected image. It’s essential to understand its implications and choose a screen with a gain value that aligns with the specific requirements of the projection environment and the intended viewing experience.
Are there any DIY materials suitable for projector screens?
Yes, there are several DIY materials that enthusiasts and hobbyists have successfully used as alternatives to commercial projector screens.
While these materials may not always match the performance of dedicated screens, they can offer a cost-effective solution for those on a budget or looking for a customized setup.
Here’s a look at some popular DIY materials suitable for projector screens:
- Blackout Cloth: This is a fabric commonly used for curtains to block out light. It’s a favorite among DIY enthusiasts because of its smooth texture and ability to reflect light evenly. When stretched and mounted on a frame, it provides a decent projection surface.
- Painted Wall: A plain, smooth wall painted with flat white paint can serve as a basic projector screen. For better performance, there are specialized projection screen paints available that are designed to enhance image quality. These paints often incorporate reflective materials to boost brightness and contrast.
- Spandex or Stretch Fabric: White or light gray spandex can be an excellent material for a projector screen. It’s stretchable, allowing for a tight and wrinkle-free surface when mounted. Moreover, it’s acoustically transparent, making it suitable for setups where speakers are placed behind the screen.
- Tyvek or House Wrap: Tyvek is a synthetic material often used as a house wrap in construction. It’s durable and has a smooth surface suitable for projection. It can be mounted on a frame or hung like a curtain.
- Foam Board or Insulation Sheeting: Large foam boards, especially those with a white or reflective surface, can be used as makeshift projector screens. They’re lightweight and can be easily mounted or propped up.
- Shower Curtains: A white or frosted shower curtain can be repurposed as a projector screen. While it might not offer the best image quality, it’s a quick and affordable solution for temporary setups.
- Plexiglass or Acrylic Sheets: For rear projection setups, translucent plexiglass or acrylic sheets can be used. They allow the projected light to pass through, creating a unique viewing experience.
- Bed Sheets: While not the most optimal, in a pinch, a white bed sheet stretched tightly can serve as a temporary projection surface. The key is to ensure it’s as wrinkle-free as possible.
While these DIY materials can be effective, it’s essential to manage expectations. The image quality might not be on par with commercial screens, especially in terms of color accuracy, brightness, and viewing angles.
However, with some creativity and experimentation, it’s possible to achieve satisfactory results for casual viewing or unique setups.
Final Thoughts
In the realm of projection systems, the screen material is more than just a backdrop—it’s a crucial component that shapes the viewing experience.
From the deep blacks of a cinematic masterpiece to the vibrant graphics of a gaming session, the right material can elevate the visuals to new heights.
As technology evolves and our viewing habits diversify, the importance of choosing the optimal projector screen material becomes even more pronounced.
Whether you’re an enthusiast setting up a home theater, a professional curating presentation or someone simply looking to enjoy movies under the stars, understanding and selecting the best material is key.
Remember, it’s not just about seeing an image; it’s about experiencing it in its full glory.
Author of this Post:

Kristy Roger
Home Cinema Consultant & Tech Enthusiast
Holding a background in Industrial and Electrical Technology from the University of Alberta, Kristy has spent 5+ years consulting on home theater products at a top electronics firm. As a certified Technical Professional with Lean Six Sigma credentials, Kristy expertise ranges from projector nuances to hands-on experience with leading models. Kristy have been sharing her knowledge online for two years, blending professional insights with personal experiences from her own home cinema setup. Off the screen, She is a dedicated mom to Jerry, Ryan, and our two pups, Cuddle and Paw.


