
How To Tighten Projector Screens [6 Tips and Methods]
-
 Written by:
Kristy Roger
Written by:
Kristy Roger
- Last Updated:
When I set up my first home cinema, I quickly realized that the projector screen is more than just a backdrop—it’s where every cinematic moment comes to life.
But as the months went by, I noticed my once taut and pristine screen began to sag, diminishing the magic of movie nights. But how to tighten projector screens?
Thankfully, I discovered that tightening a projector screen isn’t just doable; it’s actually quite straightforward without ripping with following 6 methods:
1. Adjustment Tensioning Mechanism
2. Re-Tightening the Screen Material
3. Using Tensioning Devices
4. Applying Heat
5. Utilizing Elastic Cords or Bungee Cords
6. Professional Adjustment
Join me as I share the steps and techniques I’ve learned to keep my screen as crisp and taut as it was on day one, ensuring every movie night is as mesmerizing as the last.
I recommend using the Table of Contents to quickly access the information you need.
My article is designed to cater to home cinema users of all levels, from Beginners to Advanced enthusiasts.
Table of Contents
Why Tightening is Important?
You might be wondering why fuss over tightening a projector screen? Well, let me share from personal experience why it’s an essential step.
1. Clear Image Quality
Imagine settling in for a movie night, eager to dive into the cinematic experience, only to find the image slightly distorted or wavy. It’s like trying to appreciate a masterpiece through a foggy window. That’s exactly what happens when a screen isn’t taut. By ensuring your screen is properly tightened, you’re guaranteeing a crystal-clear, sharp image that lets you fully immerse yourself in the visuals.
2. Reduced Distortion
A loosely hanging screen resembles a sail catching the wind – it ripples and distorts the image. The last thing you want during a suspenseful scene or a gripping sports match is to be distracted by waves on the screen. Proper tensioning eliminates these distortions, offering an uninterrupted, true-to-life viewing experience.
3. Longevity of the Screen
Investing in a quality projector screen is a commitment to your entertainment experience. However, without proper care and maintenance, screens can start showing signs of wear and tear, especially in high-use environments. Regular tightening ensures that your screen stays in top-notch condition, extending its lifespan and saving you from premature replacements.
4. Professional Appearance
A well-tightened screen isn’t just about functionality; it’s also about aesthetics. Think about it as the finishing touch to your home cinema setup. When guests walk in and see a flawlessly stretched screen, it sets a tone of professionalism and attention to detail. It’s a small touch that makes a big difference in the overall ambiance of your viewing space.
If you’ve ever dealt with a blurry projector screen, you know how frustrating it can be. Fortunately, there are solutions available. Check out our guide on How to Fix Blurry Projector Screen.
6 Methods to Tighten a Projector Screen
When it comes to tightening a projector screen, there are several approaches you can take. Here, I’ll walk you through each method, providing step-by-step instructions for optimal results:
1. Adjustment Tensioning Mechanism
Many modern projector screens are equipped with an adjustment tensioning mechanism. This mechanism allows you to fine-tune the tension of the screen to achieve the desired level of tautness.
How to Use It:
- Locate the adjustment points on your screen’s housing, usually found on the sides or back.
- Use the provided tools or mechanisms (often a knob or lever) to adjust the tension. Turn clockwise to increase tension and counter-clockwise to decrease it.
- Gradually make adjustments while checking the screen’s tautness. Be sure not to over-tighten, as this can lead to damage.
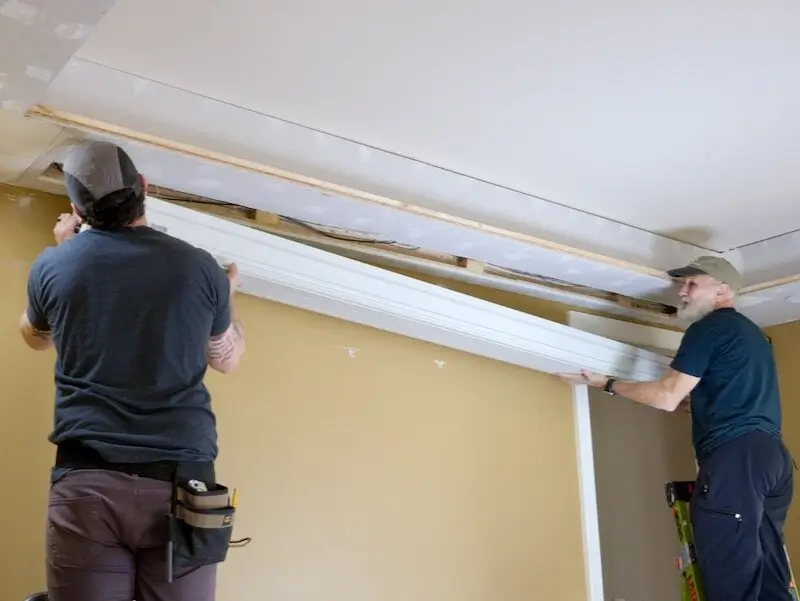
2. Re-Tightening the Screen Material
Over time, the screen material may become loose due to usage or environmental factors. This method involves removing the material and reattaching it for even stretching.
How to Do It:
- Carefully remove the screen material from the frame. Pay attention to any clips or fasteners that may be holding it in place.
- Stretch the material evenly across the frame, ensuring there are no wrinkles or creases.
- Reattach the material securely to the frame using the original fasteners or clips.
3. Using Tensioning Devices
Tensioning devices, such as screen tensioning kits, are specialized tools designed to aid in tightening projector screens. These kits often include clips or springs that apply additional tension to the screen.
How to Use Them:
- Follow the manufacturer’s instructions for the specific tensioning kit you have.
- Typically, you’ll attach the clips or springs to the screen’s edges and then secure them to the frame.
- Adjust the tension as needed to achieve the desired level of tautness.
4. Applying Heat
This method is particularly useful for screens with flexible materials like vinyl. Applying gentle heat helps the material become more pliable for even stretching.
How to Do It:
- Use a heat gun or a hairdryer on a low setting.
- Gently warm the screen material, moving the heat source evenly across the surface.
- While the material is warm, smooth out any wrinkles or waves. Be cautious not to overheat or damage the material.
5. Utilizing Elastic Cords or Bungee Cords
Elastic cords or bungee cords provide an additional means of applying tension to the screen material, ensuring it remains taut.
How to Use Them:
- Attach one end of the cord to a corner or edge of the screen.
- Secure the other end to the frame, creating tension. Repeat this process for each corner or edge.
6. Professional Adjustment:
If you’re unsure about how to tighten your screen, or if it’s a complex motorized screen, seeking the expertise of a professional technician is a wise choice. They have the knowledge and tools to handle specialized screens effectively.
For those who enjoy outdoor screenings, dealing with bugs can be a hassle. Check out our tips on How to Keep Bugs Off from Projector Screen for a bug-free experience
FAQs (Frequently Asked Questions) on how to tighten Projector Screen?
How often should I tighten my projector screen?
The frequency with which you should tighten your projector screen largely depends on several key factors. Here’s a breakdown of what you should consider:
- Frequency of Use: If you use your projector screen frequently, especially in high-traffic areas or for extended periods, it’s advisable to check the tension regularly. Frequent rolling and unrolling can gradually lead to loosening.
- Environmental Conditions: Environmental factors play a significant role. Screens in spaces with fluctuating humidity levels or exposure to extreme temperatures may experience more frequent tension loss. Additionally, if your screen is situated near a heating or cooling source, this can affect its tautness over time.
- Screen Material: Different screen materials have varying degrees of elasticity and susceptibility to sagging. For example, vinyl-based screens may require more frequent attention compared to tensioned fabric screens.
- Quality of Installation: A well-installed screen with proper tensioning initially may require less frequent adjustments compared to a screen that was not installed optimally.
- Type of Screen: Motorized or retractable screens with integrated tensioning mechanisms may require less frequent manual adjustments, as they often have self-tightening features. However, it’s still important to periodically inspect them.
- Manufacturer’s Recommendations: Always refer to the manufacturer’s guidelines for specific maintenance intervals. They often provide tailored recommendations based on the screen’s design and materials.
Accidents happen, and projector screens can get ripped. Learn how to fix them with our guide on How to Fix Ripped Projector Screen.
Can I use any type of heat source to tighten the screen material?
Using heat to tighten projector screen material is a useful technique, particularly for screens made of flexible materials like vinyl. However, it’s crucial to exercise caution and choose the right heat source. Not all heat sources are suitable, and using the wrong one can potentially damage the screen material. Here are some recommendations for safe and effective heat sources:
Safe and Effective Heat Sources:
Hairdryer (Low Heat Setting)
- Effectiveness: Hairdryers emit a gentle, controlled flow of warm air, making them a safe choice for tightening screen material.
- Safety: Ensure the hairdryer is set to a low heat setting to avoid overheating or damaging the material.
- Technique: Hold the hairdryer at a distance from the screen and move it evenly across the surface.
Heat Gun (Low Heat Setting)
- Effectiveness: Heat guns provide a more concentrated and adjustable heat source, making them suitable for screen tightening.
- Safety: Use the heat gun on a low setting to prevent excessive heat, which can lead to damage.
- Technique: Keep the heat gun moving at a consistent pace, maintaining a safe distance from the screen.
Heat Lamp or Infrared Heater
- Effectiveness: These devices emit infrared radiation, which can gently warm the screen material.
- Safety: Ensure the lamp or heater is positioned at a safe distance from the screen, and monitor the temperature to prevent overheating.
- Technique: Position the heat source at an angle and adjust the distance to achieve even heating.
Heat Pad or Heating Blanket
- Effectiveness: These can provide controlled and even heating, which can be useful for larger screens.
- Safety: Select a low or medium heat setting, and monitor the temperature to prevent overheating.
- Technique: Place the pad or blanket on a flat surface, then lay the screen material on top, ensuring it covers the entire surface area.
Are Tensioning Devices Compatible with All Projector Screens?
Tensioning devices, such as screen tensioning kits, are versatile tools designed to assist in tightening projector screens. However, their compatibility can vary depending on the type and design of the screen. Here’s some guidance to help you determine if a tensioning device is suitable for your specific projector screen:
Factors Influencing Compatibility
Screen Type
- Manual Screens: Most manual screens, especially those with flexible materials, are compatible with tensioning devices. These screens benefit from the additional tension provided by clips or springs.
- Motorized Screens: Some motorized screens have built-in tensioning mechanisms and may not require additional tensioning devices. However, it’s essential to consult the manufacturer’s guidelines.
Frame Design
- Frameless Screens: Screens without a rigid frame may not be compatible with tensioning devices, as there may not be a suitable attachment point for the clips or springs.
- Fixed Frame Screens: These screens typically have a sturdy frame, making them suitable for tensioning devices.
Material Elasticity
Screens made of materials with more elasticity, like vinyl, tend to benefit more from tensioning devices. They can help maintain the material’s tautness over time.
Manufacturer Recommendations
Always refer to the manufacturer’s guidelines for specific information on tensioning devices. They may provide recommendations based on the screen’s design and materials.
What do I do if my projector screen doesn’t have an adjustment tensioning mechanism?
When a projector screen lacks an adjustment tensioning mechanism, it may require alternative methods to ensure it remains taut and flat for optimal viewing. Here are some alternative techniques you can employ:
Alternative Methods for Screens Without Built-In Mechanisms:
1. Re-Tightening the Screen Material
This method involves manually re-tightening the screen material by removing it from the frame and then reattaching it while ensuring it’s stretched evenly.
Steps:
- Carefully Remove the Screen Material: Begin by gently and systematically detaching the screen material from the frame. Take care not to damage the material in the process.
- Stretch Evenly: Lay the screen material flat and stretch it evenly across the frame. Ensure there are no wrinkles or creases.
- Reattach Securely: Once stretched, reattach the material securely to the frame. Use the original fasteners or clips, ensuring they hold the material firmly in place.
2. Using Elastic Cords or Bungee Cords
Elastic cords or bungee cords provide an additional means of applying tension to the screen material, helping to maintain its tautness.
Steps:
- Attach to Corners or Edges: Secure one end of the cord to a corner or edge of the screen.
- Secure to Frame: Stretch the cord and secure the other end to the frame. Repeat this process for each corner or edge of the screen.
3. Applying Heat
For screens with flexible materials like vinyl, applying heat can help the material become more pliable for even stretching.
Steps:
- Use a Heat Source: Utilize a heat gun or a hairdryer on a low setting. Ensure it is set to a safe and controlled temperature.
- Warm the Material: Gently warm the screen material, moving the heat source evenly across the surface. Take care not to overheat or damage the material.
- Smooth Out Wrinkles: While the material is warm, use a flat, smooth surface (like a clean cloth) to gently smooth out any wrinkles or waves.
Maintaining a clean projector screen is crucial for optimal viewing quality. Find detailed instructions in our guide on How to Clean Projector Screen? [Step-by-Step Guide].
4. Professional Assistance:
If you’re uncertain about how to tighten your screen or if it’s a complex motorized screen, consulting a professional technician is advisable.
Steps:
- Seek a Professional Technician: Contact a qualified technician or reach out to the manufacturer for guidance on tightening your specific screen type.
Follow Expert Recommendations: Abide by the recommendations and instructions provided by the technician or manufacturer for tightening the screen.
Conclusion
In closing, the significance of a tightly stretched projector screen cannot be overstated. It forms the foundation of an exceptional viewing experience, ensuring every image is presented with utmost clarity and precision.
By employing the methods outlined above, you’re not only preserving the integrity of your screen but also elevating your entire cinematic venture. From adjustment tensioning mechanisms to alternative techniques, each method plays a crucial role in maintaining the screen’s tautness.
So, I encourage you to take these steps to heart. Your dedication to a well-tightened projector screen will be richly rewarded with an immersive visual journey, where every frame comes to life with unparalleled brilliance. Embrace these methods and let your viewing experiences truly shine.
Here’s to countless captivating moments in your home cinema!
Author of this Post:

Kristy Roger
Home Cinema Consultant & Tech Enthusiast
Holding a background in Industrial and Electrical Technology from the University of Alberta, Kristy has spent 5+ years consulting on home theater products at a top electronics firm. As a certified Technical Professional with Lean Six Sigma credentials, Kristy expertise ranges from projector nuances to hands-on experience with leading models. Kristy have been sharing her knowledge online for two years, blending professional insights with personal experiences from her own home cinema setup. Off the screen, She is a dedicated mom to Jerry, Ryan, and our two pups, Cuddle and Paw.


