
Projector Screen FAQ Guide [10 Things to Consider]
-
 Written by:
Kristy Roger
Written by:
Kristy Roger
- Last Updated:
Maybe you’re dealing with wrinkles, blurry images, or just can’t figure out how to get that screen to roll up. Whatever your questions, you’ve come to the right place!
In this guide, we’ll tackle the most frequently asked questions about projector screens. From choosing the right type and size to troubleshooting common issues, we’ve got you covered.
We’ll break down the jargon, offer step-by-step solutions, and give you the lowdown on how to get the best viewing experience possible.
So grab some popcorn, settle in, and let’s get those questions answered. Your ultimate home theater experience is just a few scrolls away!
Table of Contents
How to Fix Blurry Projector Screen?
Clearing Up a Blurry Projector Screen: My Easy Steps
Hey everyone, let’s dive into a common issue: a blurry projector screen from bottom, top, or around the edges. It’s super annoying, right? But don’t sweat it. I’ve got some simple tips to help you get that crystal-clear picture back.
First, I grab the remote and find the focus adjustment. Usually, it’s a dial or a button on the projector itself. I turn it slowly until the picture starts to clear up. Sometimes, it’s just that easy.
Next, I check the projector’s distance from the screen. If it’s too close or too far, the image won’t be sharp. I move the projector and adjust the zoom until everything looks just right.
Now, let’s talk resolution. I go into the settings menu on my projector to make sure it matches the source. For example, if I’m streaming from a laptop, both should be set to the same resolution, like 1080p.
Still blurry? Time to clean the lens. Dust and smudges can really mess up your picture. I use a soft, lint-free cloth to gently wipe the lens. No pushing or scrubbing, we don’t want to scratch it.
If all else fails, I check the cables. A damaged HDMI or VGA cable can cause a blurry image. I swap it out for a new one to see if that fixes the problem.
Finally, I give it another test. I turn on a movie or show to see if the picture is as clear as it should be. If it looks good, I know I’ve nailed it.
So there you go, clearing up a blurry projector screen isn’t rocket science. Just follow these steps and you’ll be back to enjoying your movies or presentations in no time. Happy viewing!
How to Fix a Ripped Projector Screen?
Fixing a Torn Projector Screen: Here’s My Quick Guide
Let’s talk about a problem many of us have faced: a ripped projector screen. Yeah, it’s a bummer, but don’t worry. I’ve got some easy steps to help you fix it.
First, I gather all the supplies. Trust me, you don’t want to be running around looking for stuff halfway through. I grab some clear fishing line, a needle, and a pair of scissors. Some people use white thread, but I find fishing line is less visible.
Next, I clean the area around the tear. A damp cloth usually does the trick. I make sure it’s dry before moving on. Dirt or dust can mess up the repair job.
Now, I thread the needle with the fishing line. I start sewing from one end of the tear, pulling the fabric close together as I go. The key here is to keep the stitches small and close to each other. This makes the repair less noticeable.
Once I reach the end of the tear, I tie a knot to secure the fishing line. Then, I cut off any extra line sticking out. I take a step back to check my work, making sure the screen looks smooth.
Finally, I test it out. I turn on the projector to see if the repair is visible when I’m watching something. If it looks good, I pat myself on the back for a job well done.
So there you have it. Fixing a ripped projector screen isn’t as hard as it seems. With a little time and the right supplies, you can get it back to looking almost like new. Happy watching!
How to Fix a Wrinkled Projector Screen?
Smoothing Out a Wrinkled Projector Screen: My Quick Guide
Let’s chat about another common problem: a wrinkled projector screen. It’s a real eyesore, but don’t worry. I’ve got some simple tricks to help you smooth things out.
First, I take down the screen if it’s hanging. Trust me, it’s easier to work with that way. I lay it flat on a clean, dry surface. A table or even the floor will do, as long as it’s clean.
Next, I grab a damp cloth. Gently, I wipe down the wrinkled areas. No scrubbing, just a light touch. The goal is to make the fabric a bit damp, not soaking wet.
Now, time for some heat. I use a hairdryer on the lowest heat setting. Holding it about six inches away, I move it slowly over the damp areas. The heat helps the fabric relax and the wrinkles start to disappear.
If the hairdryer trick doesn’t work, I try a handheld steamer. Again, I keep it a few inches away from the screen. Steam can be more effective than dry heat, but be careful. Too much steam can damage the screen.
Once the wrinkles are gone, I hang the screen back up. But this time, I make sure it’s taut. Sometimes, wrinkles happen because the screen isn’t stretched out properly. Most screens have tension adjustments, so I use those to get it just right.
Finally, I turn on the projector to test it out. If the picture looks smooth, I know I’ve done a good job.
So there you have it. A wrinkled projector screen isn’t the end of the world. With a little effort and the right tools, you can get it looking good as new. Happy watching!
How to Tighten Projector Screen?
Tightening a Loose Projector Screen: My Quick Fix
Let’s chat about a common issue: a saggy projector screen. It can really mess up your viewing experience but don’t worry. I’ve got some simple steps to help you tighten that screen right up.
First, I take a look at the screen’s edges. Many screens have tension adjustments on the sides or corners. I find these knobs or screws and give them a little turn. Not too much, just enough to pull the screen taut.
Next, I examine the top and bottom bars of the screen. Sometimes, these can get a bit loose. If that’s the case, I find the adjustment screws and tighten them up. A few turns usually do the trick.
No adjustments on your screen? No worries. I’ve got another trick up my sleeve. I grab some clear fishing line and small hooks. I attach a hook to each corner of the screen and tie the fishing line to it. Then, I pull the line tight and attach it to a wall or ceiling hook. This helps pull the screen taut and gets rid of any sag.
Now, if you’ve got a motorized screen that’s sagging, the fix might be in the settings. I grab the remote and look for a “tension” or “tighten” setting. A few clicks and the screen usually tightens up automatically.
Finally, I test it out. I lower and raise the screen a few times to make sure it stays tight. Then, I turn on the projector to make sure the picture looks good. If everything’s smooth and taut, I know I’ve done it right.
So there you go, tightening a projector screen isn’t hard at all. With a few adjustments or a little DIY ingenuity, you can get that screen looking perfect again. Happy viewing!
How to Fix Upside Down Projector Screen?
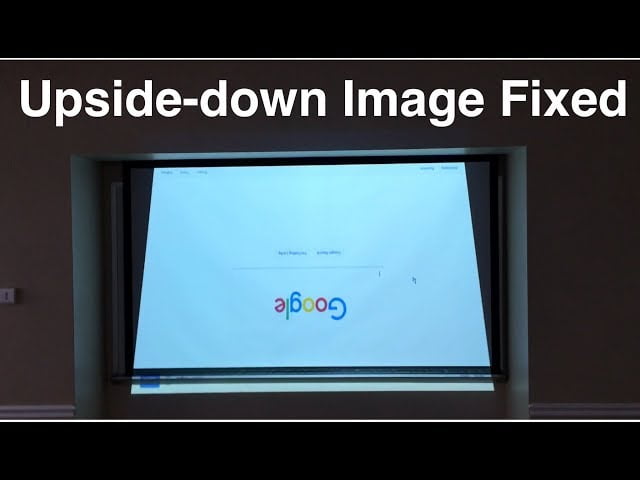
Flipping an Upside-Down Projector Screen: Here’s My Fix
Let’s dive into a quirky issue: an upside-down projector screen. It’s confusing and a bit funny, but don’t stress. I’ve got a quick fix to turn things right-side up.
First, I grab the remote control. Most projectors have a settings menu you can access with it. I navigate to the “Display” or “Projection” options. Usually, that’s where you’ll find the setting to rotate the screen.
Next, I look for terms like “rotation,” “flip,” or “orientation.” Once I find it, I select the option that will flip the screen. Sometimes it’s as simple as choosing “180 degrees” or “invert image.”
Now, if the remote is missing or the batteries are dead, I head over to the projector itself. Many models have buttons on them that let you access the settings menu. I follow the same steps as before to flip the screen.
Still upside down? Time to check the source device. If I’m using a laptop or a tablet, the issue might be there. I go into the display settings on my device and make sure it’s set to project the image correctly.
Once everything looks good, I test it out. I play a video or slideshow to make sure the screen is displaying as it should. If it’s right-side up, I give myself a high-five for a job well done.
So there you have it, folks. An upside-down projector screen is an easy fix. Just a few clicks in the settings menu, and you’re back in business. Enjoy your viewing!
How to Get Projector Screen Roll-Up?
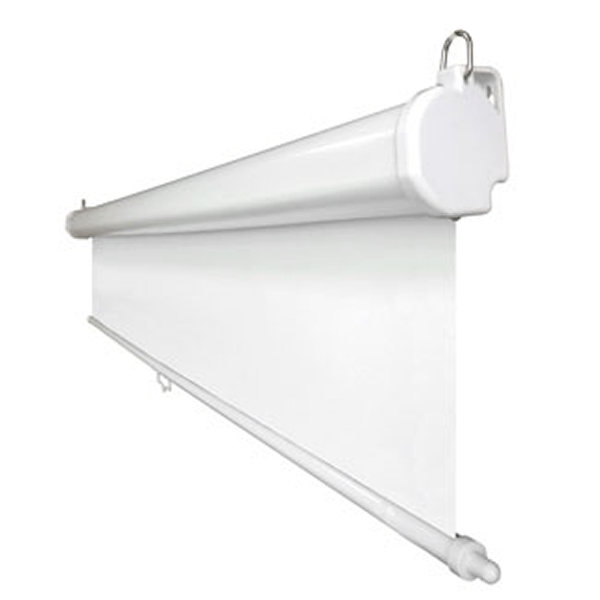
Rolling Up a Projector Screen: My Easy Guide
Hey folks, today let’s tackle a simple but important task: rolling up a projector screen. Whether you’re done watching or need to free up some space, I’ve got you covered. Here’s how I do it.
First, I locate the screen’s pull-down handle. It’s usually at the bottom, hanging down a bit. I grab it firmly and pull down slightly. This action unlocks the screen’s rolling mechanism.
Next, I guide the screen upwards. I do this gently, letting the screen roll up on its own. Some screens have a slow-retract feature, so I make sure to let it do its thing.
Got a motorized screen? Even easier. I find the remote and press the “up” button. The screen starts rolling up automatically. If I can’t find the remote, I check the projector itself. Many have an “up” button right on them.
Now, if the screen gets stuck, I don’t force it. I pull it down a bit and then try rolling it up again. Sometimes screens just need a little nudge to get going.
Finally, once the screen is fully rolled up, I make sure it’s secure. Some screens have a latch or a hook to keep them in place. I use that to ensure the screen stays rolled up until I need it again.
So there you go, rolling up a projector screen is a breeze. Whether it’s manual or motorized, a few simple steps will get the job done. Now you’ve got all the space you need for whatever comes next. Enjoy!
How to Extend or Enlarge Projector Screen?
Making a Projector Screen Bigger: My Simple Steps
Let’s talk about something we all want sometimes: a bigger projector screen. Whether it’s for a movie night or a big game, a larger screen makes everything better. Good news, I’ve got some easy tips to help you enlarge that display.
First, I grab the remote and look for the zoom function. It’s usually in the settings menu under “Display” or “Projection.” I adjust the zoom level until the screen size meets my liking. But remember, zooming in too much can lower the picture quality.
Next, I check the projector’s position. Moving it farther from the screen can make the image bigger. So, I slide it back a bit and adjust the focus. Now, the picture fills more of the screen, and it still looks sharp.
If I want an even bigger display, I consider getting a larger screen. Sometimes, the screen itself is the limiting factor. I measure the room to see if a bigger screen will fit. If it will, that’s an option worth exploring.
Now, let’s talk about aspect ratio. This setting can also affect the screen size. I go back into the settings menu and look for “Aspect Ratio.” Changing it can sometimes give me a wider or taller image, depending on what I’m watching.
Finally, I test out the new setup. I play a movie or a game to make sure everything looks good. If the picture is clear and fills the screen, I know I’ve nailed it.
So there you go, making your projector screen bigger isn’t hard. With a few adjustments here and there, you’ll get that larger-than-life viewing experience you’re craving. Enjoy!
How to Zoom Projector Screen?
Zooming In on a Projector Screen: My Easy Guide
Let’s get into a handy feature many people overlook: zooming in on a projector screen. Whether you want a closer look at movie details or need to focus on a specific slide in a presentation, zooming can be super useful. Here’s how I do it.
First, I find the remote control. Most projectors have a zoom button right on it. I press the button, and a zoom menu usually pops up on the screen.
Next, I use the arrow keys on the remote to adjust the zoom level. Some projectors have a “+” and “-” buttons instead. Either way, I keep pressing until the screen size looks just right to me.
No remote? No problem. I walk over to the projector. Many models have manual zoom dials or levers. I turn the dial or move the lever until I get the zoom level I want.
Now, a quick note on focus. After zooming, things might look a bit blurry. Most projectors have a focus dial near the zoom control. I adjust that until the picture sharpens up.
Finally, I sit back and enjoy. I always test the new zoom level by playing a video or showing a slide. If everything looks good, I know I’ve done it right.
So there you have it. Zooming in on a projector screen is a piece of cake. Just a few button presses or dial turns, and you’re all set for a closer view. Happy watching!
How to Tilt Projector Screen?
Tilting a Projector Screen: My Simple Steps
Let’s talk about a little tweak that can make a big difference: tilting your projector screen. Sometimes the angle just isn’t right, but don’t worry. I’ve got some easy tips to help you get the perfect view.
First, I check the screen’s mounting brackets. Many models have adjustable brackets that let you tilt the screen. I loosen the screws a bit, adjust the angle, and then tighten them back up.
Next, if the screen is on a stand, I look for tilt adjustments there. Some stands have knobs or levers that let you change the screen’s angle. I turn or move them until the screen sits at the angle I want.
No adjustable brackets or stand? No problem. I grab some small rubber doorstops or wooden wedges. I place them under the bottom edge of the screen to tilt it slightly. This is a quick fix, but it works in a pinch.
Now, if the screen is hanging from the ceiling, the fix is a bit different. I find the ceiling hooks and adjust their length. By making one side shorter than the other, I can tilt the screen to the angle I need.
Finally, I test out the new angle. I turn on the projector and make sure the image looks good on the tilted screen. If everything appears clear and straight, I know I’ve got it right.
So there you have it. Tilting a projector screen is pretty straightforward. With a few adjustments or a little creativity, you can get the perfect viewing angle. Enjoy your movie or presentation!
How to Rotate Projector Screen?
Rotating a Projector Screen: My Simple Steps
Let’s talk about something we all might need to do at some point: rotating a projector screen. Whether you’re switching from landscape to portrait mode or just need a different angle, I’ve got you covered. Here’s how I do it.
First, I turn off the projector. Safety first, right? I don’t want a bright light shining in my eyes while I’m working.
Next, I check the screen’s mounting. Some screens have a rotating feature built right into the mount. If that’s the case, I loosen the screws or knobs that hold the screen in place.
Now, I carefully rotate the screen to the desired orientation. I make sure to move slowly so I don’t accidentally tear or damage the screen. If I have someone to help, even better. One person can hold the screen while the other handles the mount.
Once the screen is in the new position, I tighten those screws or knobs back up. I make sure it’s secure so it won’t move or fall while I’m using it.
If my screen doesn’t have a built-in rotating feature, I get a little creative. I take down the screen and reposition the mounting brackets myself. Then, I hang the screen back up in its new orientation.
Finally, I turn the projector back on and adjust its settings. Most projectors have an option to rotate the image. I find this setting and make sure it matches the screen’s new position.
So there you have it, folks. Rotating a projector screen isn’t too complicated. Whether your screen rotates easily or you have to reposition it yourself, a few simple steps will get the job done. Now you’re ready for any viewing experience that comes your way!
Author of this Post:

Kristy Roger
Home Cinema Consultant & Tech Enthusiast
Holding a background in Industrial and Electrical Technology from the University of Alberta, Kristy has spent 5+ years consulting on home theater products at a top electronics firm. As a certified Technical Professional with Lean Six Sigma credentials, Kristy expertise ranges from projector nuances to hands-on experience with leading models. Kristy have been sharing her knowledge online for two years, blending professional insights with personal experiences from her own home cinema setup. Off the screen, She is a dedicated mom to Jerry, Ryan, and our two pups, Cuddle and Paw.


