How To Hang a Projector Screen From Ceiling [5 Unique Methods]
-
 Written by:
Kristy Roger
- Last Updated:
Setting up a projector screen can be a game-changer for your home cinema or presentation space. However, if you’ve ever wondered about the best way to hang a projector screen from the ceiling, you’re in the right place.
I’ve been there myself, and I know the importance of getting it just right for the ultimate viewing experience.
In this step-by-step guide, I’ll walk you through the process, offering practical tips and honest advice along the way. Whether you’re a seasoned DIY enthusiast or a first-timer, rest assured that this guide is designed with simplicity in mind.
So, let’s roll up our sleeves and get ready to transform your space into a cinema-worthy haven!

I recommend using the Table of Contents to quickly access the information you need.
My article is designed to cater to home cinema users of all levels, from Beginners to Advanced enthusiasts.
Table of Contents
What is the Purpose of Installing a Ceiling-Mounted Projector Screen?
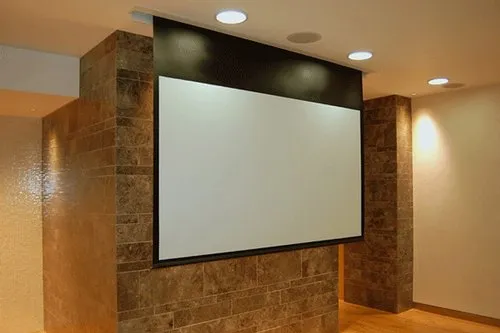
Hanging a projector screen from the ceiling isn’t just about aesthetics, it serves several crucial purposes that genuinely elevate your viewing experience. Let me break it down for you:
Space Efficiency
- Floor Space Saving: Let’s face it, we all want more room to move around. By hanging your screen from the ceiling, you’re freeing up precious floor space, which is especially valuable in cozier rooms.
- Unobstructed Walking Areas: No trip hazards here. With a ceiling-mounted screen, there’s no need for a clunky stand or tripod, ensuring a clear path for everyone in the room.
Clean Aesthetics
- Sleek and Professional Look: Who doesn’t love that clean, professional look? A ceiling-mounted screen adds a touch of purpose to your space, creating an organized and inviting atmosphere.
- Reduced Clutter: Less is more, right? Without a bulky freestanding screen, your space looks cleaner and more focused, allowing everyone to fully immerse themselves in the content.
Optimal Viewing for All Seats
- Elevated Viewing Angle: When you hang the screen from the ceiling, you’re giving viewers at the back a clear view without any obstructions.
- Tilt Adjustments: Many ceiling-mounted screens allow for adjustments in tilt. This means you can fine-tune the viewing angle for every seat in the house.
Enhanced Viewing Experience
- Optimal Screen Size: Trust me, a projector screen is purpose-built to deliver the best visual experience. Unlike a plain wall, it reflects light evenly, giving you sharper, more vibrant images.
- Correct Aspect Ratio: Screens come in various aspect ratios. This means that movies and presentations are displayed exactly as intended by their creators, with no distortion.
- Improved Image Quality: Ever heard of hotspots or color distortions? A quality screen minimizes these issues, ensuring a consistent, top-notch viewing experience from any angle.
Customization and Flexibility
- Custom Screen Sizes: Your room, your rules. Ceiling-mounted screens come in various sizes, so you can choose one that perfectly fits your space and viewing preferences.
- Motorized Options: For that extra touch of convenience, consider a motorized screen. With a simple remote control, you can effortlessly raise or lower it to suit your viewing needs.
What factors should be considered when deciding the placement of the screen?
Selecting the optimal placement for your projector screen is key to creating an immersive viewing experience. It involves considering several important factors:
Viewing Distance
- Comfort is Key: I always consider how far the screen is from where I’ll be sitting. It’s got to be just right – not too close, not too far. Nobody wants to strain their eyes or miss out on details.
- Projector Specs Matter: I make sure to check out the projector’s manual for recommended viewing distances. This helps me get the most out of my projector’s capabilities.
Ceiling Height
- Measure from the Ground: I pay attention to how high the ceiling is from the floor. It’s got to be at a height that lets everyone see comfortably.
- No Neck Craning: I avoid hanging the screen too high. Nobody wants to crane their neck to catch the action, especially those in the front rows.
Obstructions
- Inspect Every Nook: I give the ceiling a thorough look-over. I’m on the lookout for anything that might get in the way – like lights, vents, or any structural bits that could be a hassle.
- Plan Around It: If I spot any obstacles, I adjust the screen placement to work around them. Flexibility is the name of the game.
Screen Size
- Consider Room Size: I take into account the dimensions of the room. A bigger room can handle a larger screen for that immersive feel. In smaller spaces, I go for a more modest size of projector screen to keep things comfortable.
- Match the Ratios: I always ensure the screen’s aspect ratio matches my projector’s native ratio. This way, I know I’m getting the visuals just the way they were meant to be.
Finding the perfect spot for your projector screen is all about balance. It’s about creating an environment where everyone can kick back and enjoy without straining. So, grab a measuring tape, take your time, and don’t hesitate to tweak things if needed. Trust me, it’s worth it for that top-notch viewing experience.
What are the Different Methods of Hanging a Projector Screen from ceiling?
Choosing the right method to hang your projector screen largely depends on factors like screen type, room layout, and personal preference. Here are the most common 5 methods:
Method 1: Ceiling Mount Brackets
I personally love this method. It involves using specialized brackets that you attach to the ceiling. The screen then hangs securely from these brackets.
Why I Like It:
- It’s super sturdy and reliable.
- You can make precise height adjustments.
- It gives the room a clean and professional look.
What to Keep in Mind:
- Make sure your ceiling can handle the screen’s weight.
- Double-check the stability of those brackets and their alignment.
Method 2: Ceiling Hooks or Rings
If you have a lighter screen, this method is a budget-friendly choice. You attach hooks or rings to the ceiling and then hang your screen from them.
Why It Works:
- It’s straightforward and doesn’t break the bank.
- Installation is a breeze.
Things to Remember:
- Ensure those hooks are securely anchored to the ceiling.
- Check if they can handle the screen’s weight.
Method 3: Motorized Ceiling Mounts
If you’ve got a big, motorized screen, this one’s for you. These mounts come with an electric motor that lets you raise or lower the screen with a remote control.
Why I Recommend It:
- It’s so darn convenient and user-friendly.
- Plus, it adds a sleek, modern touch to your setup.
Points to Consider:
- You’ll need proper electrical connections, and installation might be best left to a professional.
Method 4: Wall Mounts with Extension Arms
Sometimes, a wall mount with adjustable extension arms can do the trick. It offers flexibility in positioning.
Why It’s Handy:
- It’s an alternative to ceiling mounting.
- Provides room for screen placement tweaks.
Keep in Mind:
- Make sure your wall can support the screen’s weight.
- Check if the extension arms match your screen.
Method 5: Portable Screen Stands
While not a ceiling mount, these freestanding frames hold the screen and can be placed anywhere in the room.
Why I Like It:
- No need for permanent installation, which can be a big plus.
- Perfect for spaces where ceiling mounting isn’t an option.
What to Watch Out For:
- Make sure the stand is stable and level to prevent wobbling.
The method you choose depends on your screen type, room layout, and personal preferences. Always follow manufacturer guidelines and don’t hesitate to consult a pro if you’re uncertain about the best method for your specific setup.
Step-by-Step Installation Process for Hanging a Projector Screen from the Ceiling
Step 1: Gather Required Tools and Materials
- Tools: Measuring tape, level, stud finder, drill, screwdriver, and appropriate drill bits.
- Materials: Projector screen, ceiling mount brackets or hooks, screws, anchors, bolts, and any additional accessories provided by the manufacturer.
Step 2: Locate Ceiling Joists
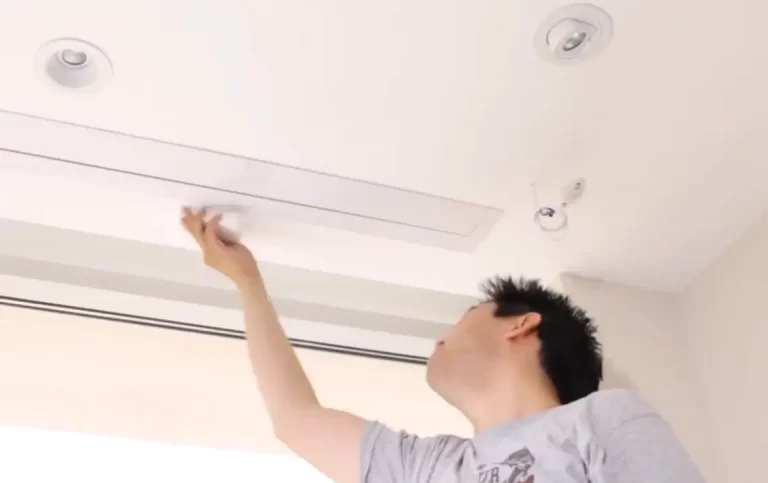
- Use a stud finder to locate the ceiling joists. These are the sturdy beams that provide the best support for mounting heavy objects like a projector screen.
Step 3: Measure and Mark
- Determine the optimal height for the screen from the floor. This will depend on factors like seating arrangement and screen size. Use a measuring tape and mark the spot on the ceiling.
Step 4: Attach Brackets or Hooks
- If using ceiling mount brackets, position them over the marks made in step 3. Use a level to ensure they are aligned properly. Drill pilot holes and secure the brackets using appropriate screws and anchors.
- If using hooks or rings, position them according to the marks and secure them to the ceiling.
Step 5: Hang the Screen:
- For ceiling mount brackets, follow the manufacturer’s instructions to securely attach the screen. Ensure it’s level and snugly fit onto the brackets.
- If using hooks or rings, carefully hang the screen ensuring it’s properly supported.
Step 6: Test Operation (if applicable)
- If you have a motorized screen, connect it to the power source and test the operation to ensure it raises and lowers smoothly. Follow the manufacturer’s instructions for any specific setup.
Step 7: Adjust Viewing Angle
- Tilt the screen slightly downward. This ensures that viewers have an optimal viewing angle from various seating positions.
Step 8: Conceal Cables (optional)
- If desired, use cable management solutions to conceal any cables running from the projector to the screen. This can create a cleaner and more organized look.
Step 9: Calibrate Projector
- Turn on your projector and adjust the settings to ensure the image is properly aligned and focused on the screen. Follow the projector’s manual for calibration instructions.
Step 10: Final Checks
- Double-check all connections and make sure the screen is securely in place. Test the viewing experience from different seating positions to ensure everyone has a clear view.
Remember to prioritize safety throughout the installation process. If you’re uncertain about any step or don’t have the necessary tools, consider consulting a professional installer for assistance. Enjoy your new home theater experience!
FAQs (Frequently Asked Questions)
How can I ensure the screen is level and securely attached?
To make sure the screen is level and securely attached, you begin by using a level tool. This helps you check if the screen is perfectly horizontal. Then, you carefully examine the attachment points to ensure they are snug and in the right position.
Next, give the screen a gentle nudge to confirm that it doesn’t wobble or sway. If there’s any movement, you’ll need to recheck the attachment points and make any necessary adjustments.
Additionally, double-check that the brackets or hooks are securely fastened to the ceiling joists. This provides a strong foundation for the screen.
You also take a step back and visually inspect the screen from different angles to ensure it appears level to the eye. This is an essential check for overall aesthetics and viewing experience.
Lastly, you may use a measuring tape to verify that the distance from the floor to the bottom of the screen is consistent on all sides. This helps guarantee that the screen is not only level but also at the desired height for optimal viewing.
Can I hang a projector screen from any type of ceiling?
I have to be honest, not every type of ceiling is suitable for hanging a projector screen. Drop ceilings, for instance, might not provide the necessary structural support. It’s crucial to check if the ceiling material can hold the weight of the screen before proceeding. A solid, reinforced ceiling is typically the best choice. If I’m uncertain about the ceiling’s suitability, consulting a professional is a wise step to take. Safety always comes first in these situations.
Accidents happen, and if you find yourself with a ripped projector screen, don’t worry. There are solutions available. Refer to How to Fix Ripped Projector Screen for tested methods.
How do I choose the right size projector screen for my room?
Selecting the proper projector screen size for your room involves a few straightforward steps. First, you need to measure the distance from where you’ll be sitting to where the screen will be placed. This distance, along with the projector’s throw ratio, helps determine the screen’s optimal width.
Next, consider the aspect ratio of the content you’ll be displaying most frequently. For movies, a 16:9 aspect ratio is standard, while presentations might benefit from a 4:3 ratio.
Additionally, assess the available wall space. It’s important to ensure that the screen fits comfortably within the room’s dimensions without overwhelming the space.
Lastly, you might use a screen size calculator or consult the manufacturer’s recommendations based on your projector’s specifications to fine-tune your selection.
By taking these steps, you can confidently choose a projector screen size that maximizes the viewing experience in your room.
What should I do if I want to move my projector screen to another location?
If you’re planning to relocate your projector screen, here are the steps you should follow for a smooth transition:
First, carefully detach the screen from its current position. If it’s ceiling-mounted, remove any brackets or hooks securing it. If it’s wall-mounted, unscrew it from the wall.
Next, take precautions to protect the screen during the move. This might involve using a soft cloth or screen cover to prevent any scratches or damage.
Once the screen is safely packaged, transport it to the new location. If it’s a large screen, make sure to have assistance to avoid any mishaps.
Upon arriving at the new location, carefully install the screen in its new position. This involves securely attaching it to the ceiling or wall, ensuring it’s level and properly aligned.
Finally, recalibrate the projector to ensure the image is properly aligned with the relocated screen.
What should I do if my projector screen starts to drop over time?
If your projector screen starts to gradually lower on its own, it’s likely a sign that the tension in the screen’s mechanism needs adjustment. To address this, you should first locate the tension adjustment knob or mechanism on the screen housing.
Next, turn the knob or adjust the mechanism according to the manufacturer’s instructions. This is typically done by turning it in small increments in the direction indicated to increase tension.
Test the screen by raising and lowering it a few times to ensure it stays in position without any unintended movement. If needed, make further adjustments until the screen operates smoothly and stays in place as intended.
If, despite your efforts, the issue persists or if you’re unsure about making adjustments, consider contacting the manufacturer’s customer support or consulting a professional for assistance. It’s important to address any issues promptly to maintain the functionality and longevity of the projector screen.
Final Thoughts on “How to Hang a Projector Screen From Ceiling”
Successfully hanging a projector screen from the ceiling involves several key steps and considerations. Firstly, gathering the right tools and materials is crucial. Locating and marking the ceiling joists ensures a sturdy anchor point. Accurate measurements and level installation are essential for a seamless setup.
Choosing the appropriate screen size based on viewing distance, aspect ratio, and room dimensions guarantees an optimal viewing experience. Lastly, if adjustments are needed, they should be made with precision to maintain the screen’s stability.
By following these steps and considering these factors, readers can embark on a successful installation journey. Remember, safety and accuracy are paramount.
So, take your time, consult manufacturer guidelines, and seek professional help if needed. With this guide, you’ll be well on your way to enjoying a top-notch home cinema experience. Happy viewing!
Author of this Post:

Kristy Roger
Home Cinema Consultant & Tech Enthusiast
Holding a background in Industrial and Electrical Technology from the University of Alberta, Kristy has spent 5+ years consulting on home theater products at a top electronics firm. As a certified Technical Professional with Lean Six Sigma credentials, Kristy expertise ranges from projector nuances to hands-on experience with leading models. Kristy have been sharing her knowledge online for two years, blending professional insights with personal experiences from her own home cinema setup. Off the screen, She is a dedicated mom to Jerry, Ryan, and our two pups, Cuddle and Paw.


