
How to Make Cheap Projector Better? [11 Easy to Follow Methods]
-
Written by: Kristy Roger
- Last Updated:
I’ve always loved watching movies on a big screen, but fancy projectors can be really pricey.
So, I got myself a cheaper one when I started my home cinema Journey. At first, it wasn’t perfect. But guess what?
By following 11 simple tricks, I made cheap projector better:
- Calibration: Fine-tuning for the best visuals.
- Upgrade Projector Screen: A better canvas for clearer images.
- Control Ambient Lighting: Setting the mood and enhancing clarity.
- External Sound System: For that immersive audio experience.
- Optimal Projection Placement: Positioning matters!
- Regular Maintenance: Keeping it in top shape.
- Lens Hood: Enhancing focus and reducing external light interference.
- Upgrade the Bulb: Brighter and clearer projections.
- Advanced Settings Tweak: Diving deep for the best results.
- Soundproofing: Keeping the outside noise out and the movie magic in.
- Firmware Updates: Keeping the projector’s software up-to-date.
I’ve learned a lot from playing around with my own projector, and I want to share those tips with you.
If you have a budget projector and want to make it shine, you’re in the right place.
Let’s make movie nights awesome together!

I recommend using the Table of Contents to quickly access the information you need.
My article is designed to cater to home cinema users of all levels, from Beginners to Advanced enthusiasts.
Table of Contents
Method 1: Calibration

Calibration is one of my favorite topics, and I’ve spent countless hours tweaking settings to get the best out of my projectors.
Calibration is the process of adjusting a projector’s settings to ensure the displayed image accurately represents the content source in terms of color, brightness, contrast, and sharpness.
Here’s how calibration can improve a cheap projector and some tips on how to go about it:
Why Calibration Matters for a Cheap Projector
Color Accuracy: Cheap projectors often come with factory settings that aren’t optimized for all viewing environments. Calibration ensures that the colors on the screen are as close as possible to what the content creator intended.
Improved Contrast: Proper calibration can help you achieve deeper blacks and brighter whites, making the image pop and appear more dynamic.
Brightness Optimization: Too bright can wash out the image, and too dim can make it hard to see. Calibration helps find the right balance.
Sharpness: Ensuring that the image is as sharp as possible can make a significant difference, especially on larger screens.
How to Calibrate
Environment Setup: Before you start, ensure your viewing room resembles the conditions you’ll typically watch in. If you usually watch movies in the dark, calibrate in the dark.
Use Calibration Tools: There are DVDs and Blu-rays like “Digital Video Essentials” or “Spears & Munsil HD Benchmark” that offer calibration patterns and guides. I’ve used these myself, and they’re incredibly helpful.
Start with Basic Settings: Begin by adjusting the basic settings like brightness, contrast, color, and sharpness. Most projectors have test patterns built-in to help with this.
Tweak Advanced Settings: If you’re comfortable, dive into more advanced settings like color temperature, gamma correction, and individual color channels.
Use Online Guides: There are many online forums and guides where enthusiasts share calibration settings for specific projector models. While every projector and environment is unique, these can be a good starting point.
Tips on Calibration
Take Breaks: Your eyes can get fatigued. After making adjustments, take a break and come back with fresh eyes to see if you’re happy with the changes.
Trust Your Eyes: While tools and guides are helpful, trust what looks best to you. After all, you’re the one watching!
Document Changes: Write down the original settings and any changes you make. This way, if you’re not happy with the results, you can always revert.
Regularly Re-calibrate: Over time, as bulbs age and other factors change, you might need to recalibrate. I usually check my settings every few months or if something looks off.
Consider Professional Help: If you’re not confident in calibrating yourself, consider hiring a professional.
I’ve done it myself for a friend’s setup, and the results can be worth it, especially if you’re passionate about getting the best picture quality.
In my experience, taking the time to calibrate a cheap projector can make it rival more expensive models in terms of picture quality. It’s a bit of an art and science combined, but the results are truly rewarding.
Method 2: Upgrade Projector Screen
Screen is often an overlooked component, but it plays a pivotal role in the overall viewing experience. I’ve had my share of experiences with different screens, and I can’t emphasize enough how crucial a good screen is, especially when working with a budget projector. Let’s delve into the details:
Why Upgrading the Screen Matters for a Cheap Projector
Enhanced Brightness: A good screen can reflect light more efficiently, making the image appear brighter and more vibrant.
Improved Color Accuracy: Certain screens are designed to enhance color reproduction, ensuring that the colors you see are true to the source.
Better Contrast: A quality screen can provide deeper blacks and more defined whites, adding depth to the image.
Texture and Smoothness: A smooth screen surface ensures that the image is sharp and free from distortions or “hot spots.”
How to Upgrade
Commercial Screens: There are many commercial projector screens available in various sizes and formats. Depending on your budget, you can opt for manual pull-down screens, motorized screens, or fixed-frame screens.
DIY Screens: If you’re on a tight budget, consider making your own screen. Materials like blackout cloth stretched and framed, can serve as an excellent projection surface.
I’ve tried this myself, and with a bit of effort, the results were surprisingly good.
Painted Walls: Specialized projector screen paint is available that allows you to convert a wall into a screen. This paint is designed to be reflective and can provide a smooth surface for projection.
Tips on upgrading Screen
Choose the Right Gain: Screen gain refers to the reflectivity of the screen. A gain of 1.0 means the screen reflects light equally in all directions.
Higher gain screens can make the image brighter but might narrow the viewing angle. Depending on your room and seating arrangement, choose a screen with the appropriate gain.
Consider Ambient Light: If you can’t control ambient light, consider an ambient light rejecting (ALR) screen. These screens are designed to reflect the projector’s light while absorbing or deflecting ambient light.
Aspect Ratio: Choose a screen that matches the primary aspect ratio you’ll be viewing in, whether it’s 16:9 for most modern content or 4:3 for older films and presentations.
Screen Tension: If you’re going for a manual or motorized screen, ensure it has a good tensioning system to keep the screen flat and wrinkle-free.
Test Before Finalizing: Before permanently setting up or painting, project onto the surface to ensure you’re happy with the size and position.
Regular Maintenance: Keep the screen clean. Dust and smudges can affect image quality. For most screens, a gentle wipe with a microfiber cloth will do the trick.
In my home cinema journey, I’ve realized that the screen is as vital as the projector itself. Investing time and, if possible, a bit of money into getting the right screen can elevate your viewing experience to a whole new level. It’s like the canvas for a painter; the better the canvas, the more the artwork shines!
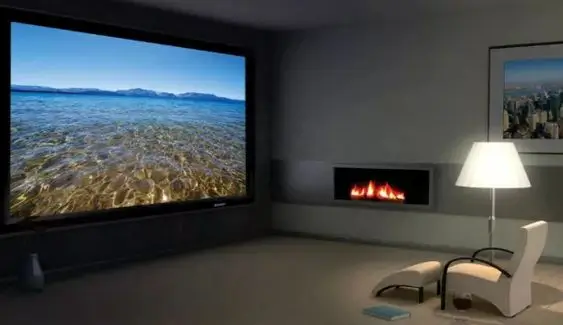
Method 3: Control Ambient Light
Ambient light is the nemesis of any projector setup, especially when dealing with budget projectors. I remember the first time I set up my projector in a room with large windows; the difference between daytime and nighttime viewing was like night and day, quite literally. Let’s explore this further:
Why Controlling Ambient Light Matters for a Cheap Projector
Improved Contrast: Ambient light can wash out the image, making blacks appear gray and reducing the overall contrast ratio. By controlling it, you can achieve deeper blacks and more vibrant colors.
Enhanced Color Accuracy: Colors can get distorted or faded in the presence of ambient light. Controlling it ensures that colors remain true to the source.
Better Image Clarity: Ambient light can introduce glare or reflections, especially if you’re not using a high-quality screen. By minimizing it, you get a clearer, more defined image.
How to Control Ambient Light
Blackout Curtains: One of the most effective solutions. I installed thick blackout curtains in my home cinema, and they did wonders in blocking out external light.
Window Shades or Blinds: If curtains aren’t your style, consider installing shades or blinds that can block out light when needed.
Room Positioning: If possible, set up your home cinema in a room with fewer windows or in a basement where light control is naturally better.
Strategic Lighting: If you need some light (for example, if you’re watching with friends and need some ambient lighting for snacks or drinks), use dimmable lights and position them strategically so they don’t shine directly on the screen.
Wall and Ceiling Colors: Darker colors absorb more light. Consider painting the walls and ceiling of your viewing room in darker shades to reduce light reflections.
Tips to Control Ambient Light
Test Different Times: Before finalizing your setup, test the projector at different times of the day to understand how ambient light affects the image.
Layered Window Treatments: Combine sheer curtains with blackout ones. This way, you can have the sheer ones during regular days and pull the blackout curtains during movie time.
Lighting Position: If you’re using ambient lighting, position the lights behind the viewing area, pointing away from the screen. This reduces direct light interference with the projected image.
Use Rugs and Carpets: Reflective floors can bounce light back onto the screen. Using rugs or carpets can help absorb some of this light.
Consider ALR Screens: If you can’t control ambient light entirely, as mentioned earlier, an Ambient Light Rejecting (ALR) screen can be a game-changer. It’s designed to give a better image in lighted conditions.
Controlling ambient light was one of the most transformative changes I made in my home cinema. It’s amazing how even a cheap projector can shine (pun intended) in the right lighting conditions.
Remember, projectors work by emitting light, and the less competing light there is, the better the image will be.
Method 4: External Sound System
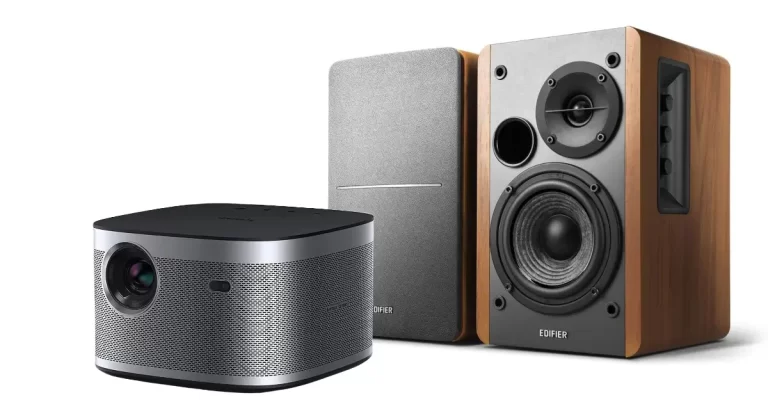
While visuals are half the cinematic experience, sound completes the other half. I’ve always believed that audio plays a crucial role in immersing oneself in a movie or presentation. I recall the first time I connected an external sound system to my projector setup; it felt like I was in a real cinema. Let’s dive into this:
Why an External Sound System Matters for a Cheap Projector
Better Audio Quality: Most budget projectors come with built-in speakers that are, frankly, underwhelming. They lack depth, clarity, and can’t reproduce the nuances of a film’s soundtrack.
Immersive Experience: A good sound system can envelop you in the movie, making action scenes more thrilling and dialogues clearer.
Volume Levels: External systems can produce louder sound without distortion, perfect for larger rooms or group viewings.
Audio Positioning: Sound directionality is essential for a cinematic experience. With an external system, especially a surround setup, sound can come from specific directions, enhancing realism.
How to Set Up an External Sound System
Determine Your Needs: Decide if you want a simple stereo setup, a soundbar, or a full-fledged 5.1 or 7.1 surround sound system. Your room size and budget will play a role in this decision.
Connection: Most projectors have an audio out port (either 3.5mm or optical). Connect this to your sound system. If you’re using a streaming device or Blu-ray player, you might connect the audio directly from that device to the sound system.
Positioning: For stereo speakers, place them on either side of the screen. For surround sound, follow standard positioning: front left and right, center, rear left and right, and additional speakers depending on your setup. Don’t forget the subwoofer for those deep bass tones!
Calibration: Just as you calibrate your projector, calibrate your sound system. Adjust volume levels for each speaker, ensuring balanced sound throughout the room.
Tips for External Sound System
Wire Management: With more devices come more cables. Invest in cable management solutions to keep things tidy. I’ve used cable sleeves and clips, and they make a world of difference.
Acoustic Treatment: Consider adding some acoustic panels or foam to improve room acoustics. Even simple measures, like placing bookshelves or using thick curtains, can enhance sound quality.
Test Different Audio Sources: Play different types of content (movies, music, video games) to ensure the sound system performs well across the board.
Consider a Soundbar: If you’re tight on space or budget, a good soundbar can offer a significant upgrade over built-in projector speakers. Some even come with wireless subwoofers for added depth.
Regular Maintenance: Dust and clean your sound equipment regularly. Ensure vents on amplifiers or AV receivers are not obstructed to prevent overheating.
Invest in a Good AV Receiver: If you’re going for a surround setup, a quality AV receiver can make a significant difference. It acts as the heart of your sound system, processing audio signals and driving your speakers.
Incorporating an external sound system with a projector truly elevates the home cinema experience. I’ve had moments where I was genuinely startled by a sound effect coming from behind, all thanks to a well-set-up audio system. It’s not just about loudness; it’s about clarity, depth, and immersion. And once you experience it, there’s no going back!
Method 5: Optimal Projector Placement
Projector placement is a topic that brings back memories of me, a laser level in hand, trying to get that perfect alignment. Proper placement is crucial, not just for image quality but also for the overall longevity and efficiency of the projector. Let’s delve into this:
Why Optimal Projector Placement Matters
Image Quality: Proper placement ensures a sharp, undistorted image. Misalignment can lead to skewed or blurry projections.
Maximized Brightness: When a projector is at the optimal distance from the screen, it can provide the best brightness and clarity.
Reduced Strain on the Projector: Using features like keystone correction to adjust for poor placement can degrade image quality and might strain the projector’s internals over time.
Efficient Cooling: Ensuring the projector has enough space around it allows for better airflow, reducing the risk of overheating.
How to Achieve Optimal Placement
Determine Throw Distance: This is the distance between the projector and the screen. Most projectors have a specific range where they can project a clear image of a certain size. Check the projector’s manual or use online calculators to determine this.
Height and Angle: Ideally, the projector lens should be level with the top or bottom of the screen (depending on whether it’s ceiling-mounted or table-placed). If it’s too high or low, you’ll need to tilt it, which can distort the image.
Center Alignment: The projector lens should be centered with the middle of the screen. This ensures an even projection without horizontal skew.
Avoid Obstructions: Ensure there’s nothing between the projector and the screen that can obstruct the light path.
Mounting Options: Depending on your room and furniture, you can either ceiling-mount the projector, place it on a shelf behind the seating area, or use a table. Ceiling mounts are often preferred as they keep the projector out of the way and reduce the risk of misalignment from accidental bumps.
Tips for Projector Placement
Invest in a Quality Mount: If you’re going for a ceiling mount, don’t skimp on it. A sturdy mount reduces vibrations and ensures the projector stays aligned.
Use a Laser Level: This tool was a lifesaver for me. It helps ensure that the projector is perfectly level and aligned with the screen.
Regularly Check Alignment: Over time, mounts can shift, or tables can be bumped. Periodically check to ensure the projector is still correctly aligned.
Consider Lens Shift: Some projectors come with a feature called lens shift, which allows you to move the lens vertically or horizontally without moving the projector. This can be handy for fine-tuning placement.
Limit Use of Keystone Correction: While it’s tempting to use keystone correction to adjust for placement issues, it can degrade image quality. It’s better to physically align the projector correctly.
Ensure Adequate Ventilation: Whether it’s on a table or mounted, ensure the projector’s vents are not obstructed. This is crucial for cooling and the longevity of the projector.
Getting the placement right might require some time and patience, but it’s worth every minute spent. I remember the satisfaction I felt when I finally got that perfectly aligned, sharp, and clear image on my screen. It’s like setting the foundation for your home cinema; once it’s right, everything else falls into place.
Method 6: Regular Maintenance
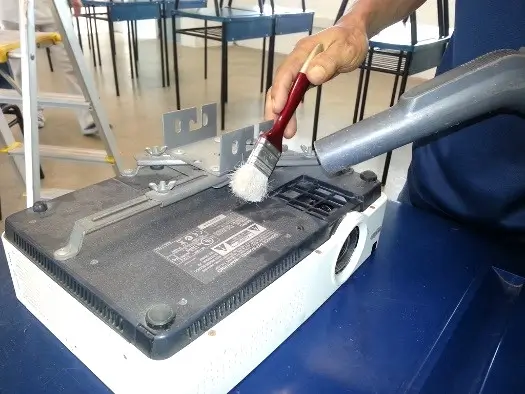
Regular maintenance is akin to taking your car for periodic servicing. Just like how a well-maintained car runs better and lasts longer, a well-maintained projector performs optimally and has an extended lifespan. Let’s dive into the importance of regular maintenance for a cheap projector:
Why Regular Maintenance Matters for a Budget Projector
Prolonged Lifespan: Dust and dirt can cause the projector to overheat, reducing its lifespan. Regular cleaning ensures efficient cooling and operation.
Optimal Image Quality: A clean lens and mirror will project a clearer and sharper image. Dust or smudges can cause blurriness or dark spots.
Preventative Care: Addressing small issues early, like a clogged filter, can prevent bigger problems down the line.
How to Apply Regular Maintenance
Clean the Lens: Use a soft, lint-free cloth or lens cleaning solution to gently wipe the lens. Avoid touching the lens with bare fingers, as oils can smudge it.
Check and Clean the Air Filter: Most projectors have a removable air filter that traps dust. Depending on usage, remove and clean this filter every couple of months. Some filters can be washed, while others might need to be replaced.
Ensure Proper Ventilation: Make sure the projector’s vents are not obstructed. This ensures efficient cooling and reduces the risk of overheating.
Inspect the Lamp: Over time, projector lamps can degrade or get dirty. While they have a long lifespan, it’s good to inspect them periodically and replace them when they near the end of their rated life.
Update Firmware: Manufacturers sometimes release firmware updates that can improve performance or fix bugs. Periodically check the manufacturer’s website for any updates.
Tips on Regular Maintenance
Avoid Harsh Chemicals: When cleaning the projector, especially the lens, avoid using harsh chemicals. Specialized lens cleaning solutions or just a damp cloth usually does the trick.
Handle with Care: When cleaning or replacing parts, handle the projector gently. Avoid jarring movements or excessive force.
Power Down Properly: Always turn off the projector using its power button and wait for the fan to stop running before unplugging. This ensures the lamp cools down properly.
Use in a Clean Environment: Try to use the projector in a relatively dust-free environment. This reduces the frequency of cleaning required.
Store Properly: If you’re not using the projector for an extended period, store it in a cool, dry place, preferably in its original packaging or a protective case.
Schedule Regular Checks: Set a reminder every few months to inspect and clean your projector. Regular, preventative maintenance is always better than reactive repairs.
In my experience, taking care of a projector, even a budget one, can significantly enhance its performance and longevity. It’s a bit like caring for a beloved gadget; a little love and attention go a long way in ensuring it serves you well for years to come.
Method 7: Lens Hood
The lens hood is one of those underrated accessories that can make a noticeable difference, especially in certain environments. I remember crafting a makeshift lens hood for one of my older projectors, and the results were pleasantly surprising. Let’s delve into the details:
Why a Lens Hood Matters for a Cheap Projector
Reduced Light Spill: A lens hood can help focus the projected light more directly onto the screen, reducing stray light that might spill around the edges. This can enhance perceived contrast and make the image pop more.
Protection: It acts as a barrier, protecting the lens from accidental touches, smudges, or even potential damage.
Reduced Glare and Reflections: In rooms with ambient light, a lens hood can reduce potential glare or reflections that might interfere with the projected image.
How to Apply a Lens Hood
Commercial Lens Hoods: Some high-end projectors come with their own lens hoods or have them available as optional accessories. If one is available for your projector model, it’s a straightforward attachment.
DIY Lens Hood: If a commercial option isn’t available, you can craft one:
- Material: Use a material that’s sturdy yet lightweight, like black cardboard or foam board.
- Shape: Cut the material into a rectangular shape, ensuring it’s wide and tall enough to extend a bit beyond the projector’s lens without obstructing the light path.
- Attachment: Attach the hood to the projector using non-residue tape or, if you’re feeling crafty, design a clip-on mechanism.
Tips for Lens Hood
Ensure No Obstruction: When crafting or attaching a lens hood, ensure it doesn’t obstruct the projected light. Test the projector with the hood on to ensure the entire image is visible and clear.
Black is Best: Use a black material for the lens hood. Black absorbs light and reduces potential reflections.
Regularly Check Alignment: If you’ve crafted a DIY lens hood, ensure it stays in place and doesn’t shift over time, potentially obstructing the projected image.
Consider Portability: If you move your projector often, design the lens hood to be easily removable or foldable.
Combine with Other Enhancements: A lens hood works best in conjunction with other enhancements, like controlling ambient light and using a quality screen. The combined effect can be quite transformative.
In my personal experience, while a lens hood might seem like a small addition, it can make a noticeable difference, especially in rooms with challenging lighting conditions. It’s one of those simple tweaks that can elevate the performance of even the most budget-friendly projectors.
Method 8: Upgrade the Bulb
The bulb, often referred to as the lamp in the context of projectors, is the heart of the device. It’s the primary light source, and its performance directly impacts the quality of the projected image. Upgrading or optimizing it can bring about significant improvements. Let’s explore this:
Why Upgrading the Bulb Matters for a Old Projector
Increased Brightness: A higher-quality or newer bulb can produce more lumens, making the projected image brighter. This is especially beneficial in rooms with some ambient light.
Improved Color Accuracy: Higher-quality bulbs can offer better color reproduction, leading to more vibrant and true-to-source colors.
Extended Lifespan: Some upgraded bulbs might have a longer lifespan than the original, meaning fewer replacements over time.
How to Upgrade the Bulb
Check Compatibility: Before purchasing a new bulb, ensure it’s compatible with your projector model. Not all bulbs fit or work with all projectors.
Purchase from Reputable Sources: There are many third-party bulbs available, but not all are of good quality. It’s essential to buy from a trusted source or directly from the projector’s manufacturer.
Installation:
- Safety First: Always unplug the projector before starting and allow it to cool down if it was recently in use.
- Access the Lamp Compartment: Most projectors have a designated hatch or compartment for the lamp, secured with screws.
- Remove the Old Lamp: Carefully remove the old lamp unit. It’s usually held in place with screws and connected to the projector via a plug or connector.
- Install the New Lamp: Place the new lamp in the same position, secure it, and reconnect any connectors.
- Reassemble: Close the lamp compartment and secure any screws.
Reset the Lamp Timer: Most projectors have a lamp timer that tracks the bulb’s usage. After replacing the bulb, reset this timer through the projector’s menu.
Tips to upgrade Projector Lamp
Handle with Care: Projector bulbs are fragile. Avoid touching the bulb’s glass with bare hands, as oils from your skin can reduce its lifespan.
Regularly Clean the Lamp Compartment: When replacing the bulb, take the opportunity to clean the lamp compartment, removing any dust or debris. This ensures optimal cooling.
Consider Bulb Lifespan vs. Cost: While some bulbs might be brighter, they might also have a shorter lifespan. Consider the trade-off between brightness, color accuracy, and longevity when choosing a bulb.
Keep a Spare: It’s a good practice to have a spare bulb on hand. Projector bulbs can sometimes fail unexpectedly, and having a backup ensures you’re not left in the dark.
Proper Disposal: Used projector bulbs contain materials that might be harmful to the environment. Ensure you dispose of them as per local regulations, often at designated electronic waste collection points.
In my own home cinema journey, I’ve found that while the projector itself is vital, the bulb plays an equally crucial role in delivering a high-quality image.
A well-chosen bulb can breathe new life into an older or budget projector, making the viewing experience significantly better.
Method 9: Advanced Settings Tweak
Tweaking the advanced settings of a projector is akin to fine-tuning a musical instrument. It’s about getting the most out of the hardware and ensuring that the image projected is as close to perfection as possible. I’ve spent countless hours diving deep into these settings, and the results can be truly transformative. Let’s delve into this:
How to Tweak Advanced Settings
Color Temperature: This setting adjusts the warmth or coolness of the image. While movies are often best in a “warm” setting, presentations or documents might benefit from a “cool” setting.
Gamma Correction: This adjusts the brightness curve of the image, affecting how mid-tones are displayed. Different content types (movies, games, presentations) might benefit from different gamma settings.
RGB Adjustments: Dive into individual Red, Green, and Blue channels. Adjusting these can help achieve more accurate color reproduction.
Sharpness and Noise Reduction: While it’s tempting to crank up sharpness, it can introduce artifacts. Find a balance. Noise reduction can help with lower-quality sources but might soften the image too much if overused.
Dynamic Contrast and Iris: Some projectors offer dynamic contrast adjustments or a dynamic iris feature. These can enhance the contrast ratio by adjusting on-the-fly based on the content.
Aspect Ratio: Ensure you’re using the correct aspect ratio for your content. While 16:9 is common, some content might be in 4:3 or other ratios.
Overscan and Zoom: Some projectors allow for digital zoom or overscan adjustments. This can be useful if the image doesn’t fit the screen perfectly, but use sparingly to avoid loss of quality.
Tips on Advanced Settings
Start with a Neutral Baseline: Before diving into tweaks, reset the projector to its default or “natural” setting. This gives a neutral starting point.
Use Calibration Tools and Content: Tools like “Digital Video Essentials” or patterns available online can help in calibration. Scenes with skin tones, deep blacks, and vibrant colors can be particularly useful.
Take Notes: Document your changes as you go along. This way, if you’re not happy with the tweaks, you can revert to previous settings.
Trust Your Eyes: While tools and patterns help, trust your perception. If it looks right to you, it’s probably right.
Consider Room Lighting: Your tweaks might look different under various lighting conditions. If possible, calibrate under the lighting conditions you’ll most often watch in.
Regularly Revisit Settings: As bulbs age or as you change content types, you might need to revisit and adjust settings.
Avoid Extreme Adjustments: Small, incremental changes are often best. Extreme adjustments can introduce artifacts or degrade image quality.
Tweaking advanced settings is both an art and a science. It’s about understanding the technology and also about personal preference.
In my own setup, I’ve found that taking the time to dive deep into these settings made a world of difference, turning a good image into a great one. It’s a journey of experimentation and discovery, and the results can be incredibly rewarding.
Method 10: Soundproofing
Soundproofing is a fascinating topic, and while it might not directly improve the performance of a cheap projector, it significantly enhances the overall home cinema experience. I remember when I first soundproofed my home theater room; the difference was night and day.
The audio was clearer, external noises were minimized, and the immersion was unparalleled. Let’s dive into this:
Why Soundproofing Matters for a Home Cinema
Enhanced Audio Clarity: By minimizing external noises and reducing sound reflections within the room, every detail in the audio track becomes clearer and more distinct.
Immersive Experience: External sounds, like traffic, neighbors, or household noises, can be distracting. Soundproofing helps you get lost in the movie without disturbances.
Protects Your Privacy: Just as soundproofing keeps external noises out, it also keeps the sound from your movies or games from disturbing others outside the room.
How to Apply Soundproofing
Acoustic Panels: These are designed to absorb sound, reducing echoes and reverberations. They can be mounted on walls and ceilings.
Bass Traps: Low-frequency sounds can be particularly tricky to manage. Bass traps, usually placed in room corners, help absorb these frequencies.
Acoustic Foam: Similar to acoustic panels but made of foam. They come in various patterns and can be used on walls and ceilings.
Weatherstripping and Door Seals: Sound can leak through gaps around doors. Weatherstripping and door seals help close these gaps.
Soundproof Curtains: These are heavy, dense curtains designed to block sound. They’re especially useful for windows.
Floating Floors: If you’re going all out, consider floating floors. These are essentially a layer of flooring separated from the structure by sound-absorbing material.
Drywall and Green Glue: For serious soundproofing, adding an additional layer of drywall with a product like Green Glue (a noise-proofing compound) in between can significantly reduce sound transmission.
Tips for Soundproofing
Identify Weak Points: Before starting, identify where most of the sound leakage occurs. It could be a window, a door, or a particular wall. Focus on these areas first.
Combine Methods: Using a combination of soundproofing methods often yields the best results. For instance, acoustic panels combined with soundproof curtains can be very effective.
Room Decor: Soft furnishings like rugs, sofas, and bookshelves can also help absorb sound. They might not be as effective as specialized soundproofing, but every bit helps.
Regular Maintenance: Over time, some soundproofing measures, like weatherstripping, might degrade. Regularly inspect and replace as needed.
Consultation: If you’re serious about soundproofing, consider consulting with an expert. They can provide insights specific to your room and needs.
Respect Neighbors: If living in an apartment or close to others, inform them about your soundproofing efforts. It’s a gesture that shows you’re considerate of potential noise disturbances.
In my personal journey, soundproofing was one of the best investments I made for my home cinema.
While the visuals draw you into the story, the sound is what truly envelops you, making you feel like you’re in the midst of the action.
Soundproofing ensures that this auditory experience is as pure and uninterrupted as possible.
Method 11: Firmware Updates
Firmware updates are akin to giving your projector a “software upgrade”. Manufacturers release these updates to fix bugs, improve performance, or even add new features. Let’s delve into the intricacies of firmware updates:
Why Firmware Updates Matter
Performance Enhancements: Manufacturers might optimize the software to make the projector run smoother or improve image processing.
Bug Fixes: If users report issues or bugs with the projector, manufacturers often address these in firmware updates.
New Features: Occasionally, firmware updates might introduce new features or functionalities that weren’t available in earlier versions.
Compatibility: Updates might ensure the projector remains compatible with newer devices or technologies.
How to Apply Firmware Updates
Check Manufacturer’s Website: Most manufacturers have a support section on their website where they list available firmware updates for their products. Locate your projector model and see if any updates are available.
Download the Update: If an update is available, download it to your computer. It’s usually a compressed file that you’ll need to extract.
Transfer to USB Drive: Most projectors allow firmware updates via USB. Transfer the extracted firmware file to a USB flash drive.
Connect to Projector: Plug the USB drive into the projector. Ensure the projector is connected to a reliable power source and won’t be interrupted during the update.
Initiate the Update: Navigate to the projector’s menu. There’s often an “Update” or “Firmware Update” option. Select it and follow the on-screen instructions.
Wait for Completion: The projector will update its firmware. This process can take anywhere from a few minutes to over an hour. The projector might restart during this process.
Verify the Update: Once done, you can check the projector’s firmware version in its settings or menu to ensure the update was applied.
Tips for Firm Updates
Backup Settings: Before updating, note down or take photos of your current settings (brightness, contrast, color settings, etc.). Some updates might reset settings to default.
Stable Power Source: Ensure the projector is connected to a reliable power source. An interruption during a firmware update can brick the device.
Read Release Notes: Before updating, read the release notes or changelog for the firmware. It’ll give you an idea of what changes to expect.
Check Regularly: Manufacturers don’t always notify users of new updates. It’s a good practice to check their website every few months.
Seek Community Feedback: Before applying an update, check online forums or communities to see if other users have had any issues with the new firmware. Sometimes, it’s worth waiting for a subsequent update if there are reported problems.
Avoid Unofficial Firmware: Stick to firmware updates released by the projector’s manufacturer. Unofficial or third-party firmware can cause issues or void your warranty.
In my experience, keeping the firmware updated has often led to noticeable improvements in projector performance.
It’s a bit like getting a free upgrade, ensuring your device stays up-to-date with the latest optimizations and features. However, always approach with caution and ensure you follow the update process meticulously to avoid potential issues.
Final Thoughts to Make Cheap Projector Better
So, there you have it! Even if you buy a cheap projector, with a few tweaks, it can work like a charm. I tried these tricks on my own projector, and it made a big difference.
Remember, you don’t need to spend a lot to have a great movie night. With some effort and the right tips, your projector can shine bright. Happy watching!
Author of this Post:

Kristy Roger
Home Cinema Consultant & Tech Enthusiast
Holding a background in Industrial and Electrical Technology from the University of Alberta, Kristy has spent 5+ years consulting on home theater products at a top electronics firm. As a certified Technical Professional with Lean Six Sigma credentials, Kristy expertise ranges from projector nuances to hands-on experience with leading models. Kristy have been sharing her knowledge online for two years, blending professional insights with personal experiences from her own home cinema setup. Off the screen, She is a dedicated mom to Jerry, Ryan, and our two pups, Cuddle and Paw.


